
Making of MKX Scorpion cosplay – PART 1

Mortal Kombat came into my life about 20 years ago. I was really into it as a teen, then had less and less time to play, but had always kept an eye on it. When I started cosplaying, it didn’t take long before I considered creating a Scorpion cosplay. I had even started sculpting the previous version’s skull belt buckle, but the project never came to completion. And then, MKX arrived. And they got me. I was literally astonished by the costume designs. Highly detailed with realistic fabric textures, almost every piece was believable and captured the essence of the characters. The costumer in me was pleased. Looking at all the concept art was making me happy like a kid in a candy store. And that was it, I HAD to create a Scorpion cosplay.
But, hey, we’re professionals, aren’t we? I also had serious reasons to choose this costume (of course.) It was a cool opportunity to test 3D printed pieces and to integrate other artists’ work into my projects, like jewelry, as an example. Plus, I was studying specialized leather clothing techniques and needed a final project to get my degree. I graduated partly because of my Scorpion costume. 3D printed mask, molding, fiberglass casting, painting techniques, tons of leather straps, handmade silver buckles and accessories, distressing techniques – my Scorpion costume was a journey in itself.
A word about leather
Before moving on, let’s first say a few words about leather. Working with leather is totally different from working with any other type of fabric, including faux-leather. Leather requires specific techniques for everything: pattern drawing; cutting the pieces in the hide or skin; preparing each piece before sewing; and of course, sewing. I could blog about various leather techniques and I will, eventually. But right now, I want to focus on Scorpion’s costume, so let’s simply mention a few basic facts.
There are 2 types of leather, chrome-tanned and vegetable leather. Chrome-tanned leather is what we use for garments. This type of leather can NOT be hand carved and is sold already dyed. Hides’ color can vary from one lot to another. Thicknesses vary depending on the animal, the part of the hide or skin, etc. Vegetable leather CAN be hand carved. Some hides are sold either black or nude beige in order to be dyed. Some vegetable leather is sold already dyed with embossed patterns, like snake or crocodile imitation fantasy patterns. Vegetable leathers are used to make all kind of accessories, boots and shoes, hand bags, LARP armor, etc. Thicknesses of the hides vary. Cow hide, pig skin leather, lambskin, kid skin leather, rabbit skin leather, snakeskin leather, skate fish leather and so many more can be purchased on the market. Each type of leather will be used in specific ways. Delicate, supple and thinner leathers like lambskin or kid skin leathers can be used, for example, to make fancy women gloves. Motorcycle jackets are generally made of cow hide. Smaller skins like snakeskin will most likely be used to make smaller accessories. The smaller the skin, the more yokes and seam lines you’ll need to have in your design to integrate pieces of a small skin in a garment.
Cutting the pattern pieces in a hide or skin isn’t like cutting in fabric. Each pattern piece has to be placed on the hide, one by one, avoiding any hole or defect. There’s a lot of loss when you work with real leather because some parts of the hides and skins have wrinkles, are thicker and won’t be used for the garment or accessory. The most beautiful part of any hide or skin is the center of it, which is the back of the animal.
For my costumes, I like to use cow hides of 4oz (about 1/16 of an inch of thickness). One of the biggest difficulties of working with leather is the thickness. The more leather pieces you sew together, the more thickness you have. Where many seam lines meet, it can turn into a thickness nightmare. That’s why working with leather requires a lot of preparation. Before starting sewing, all the pieces of the pattern that have been cut in the hide or skin have to be skived. Skiving is the process of ‘shaving’ the edges of a leather piece on the fleshy side with a width that is twice as large as the sewing allowance. Wherever there’s a sewing allowance, it has to be skived. This step can either be done by hand using various knifes or with a machine called a skiver. Skiving the edges of every leather piece is essential and necessary for every thick leather. However, it doesn’t have to be done in thinner leathers like lambskin.
In a leather garment, all the sewing allowances are glued with a special glue following various techniques, regardless if the seam lines will be top stitched or not. Every seam line will be flattened down with a special hammer.
And yes, to sew leather, you will need a special sewing machine called a ‘walking foot’ and a stronger and thicker type of thread and needle.
First step: Analyzing
All my cosplay projects start by the analysis of many reference pics. As many as possible. I need to see the costume from every angle, see every detail. I always work with printed pics that I can easily refer to during the process. I carry these prints everywhere from the workshop to the fabric store. My work as a designer is to understand what the artist tried to capture in his drawing, his intentions, his ideas. What fabric does this texture imitate? What type of seam and stitch does that drawing look like? And how am I gonna translate it in real life, using real fabrics and real sewing techniques? There’s an entire interpretation and adaptation done before I even start working on the pattern of a new costume.
Cleavage, or no cleavage? That is the question.

Making a female version of a male costume obligated me to make a very big (pardon the pun) choice. Original design or sexy version? I could have worn the yellow garment alone, with nothing underneath, like I did for my version of Frost many years ago. But even though many men and women are attracted by canyon cleavage, I choose to respect the original design. Go for the cleavage and some will accuse you of going for the easy, popular option. Go for the original version and others will say they are disappointed not to see your boobs. Folks, I love boobs too, but I think I can wear a more covering costume from time to time, especially when it’s as awesome as Scorpion’s costume. Get over it or, as Scorpion would say… Get over here!
The beginning of my journey: The black sleeveless top
Analyzing Scorpion’s costume, I first had to decide how many garments this costume would be made of. The pants are obviously one piece. Then, the character wears over his pants what I would interpret as a short waist corset, which could be another garment. What about the signature yellow garment? Are the black details on the chest and the hood part of it? Or should they be separate pieces? I decided to make the waist corset and black front part of only one single piece of clothing. A short, sleeveless top with a collar that would cover my breasts on the side, where Scorpion wears nothing, and that would imitate the original look. In the middle front of that black top, there are 4 rings and 6 straps garnished with custom silver pieces hand made by a local jeweler.
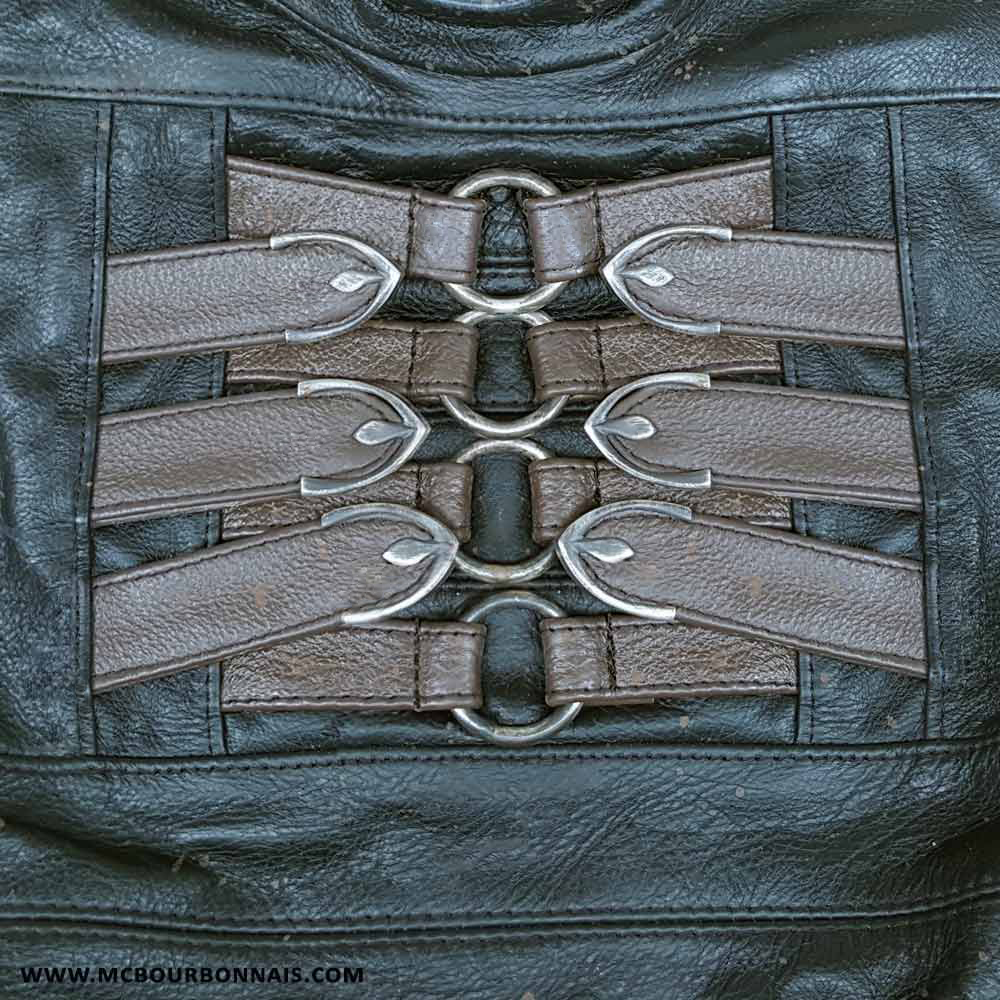
Silver pieces handmade by Vincent Zimmermann – www.zimms.ca
The way these 6 straps are drawn made me think that the artist imagined them being sewed in the front opening of the yellow garment, which I already knew wouldn’t be possible since I intended to use genuine leather. First technical problem related to a finishing technique – too much thickness to possibly sew the straps to the yellow garment and make a proper finish in the front. The only logical way to go was to make the 6 straps part of the black sleeveless top that is already decorated with 8 straps holding 4 metallic rings. Leather straps overlapping other leather straps forced me to think of a specific design for the sleeveless top that would make it possible to sew of all these straps. I added in the pattern vertical seams in which the various straps are sewn.

We can’t see that design detail when I wear the complete costume since it’s hidden by the yellow garment. It was all about handling a technical finishing issue. Of course, I had to sew a leather mockup to test this design before sewing the real one. In case you’re wondering, the top opens with a zipper in the middle back, which is hidden by the yellow garment.

Stay tuned for the Making of MKX Scorpion costume – Part 2!
C’est vraiment cool ton blog! :) Continue Marie…