
Making of Fallout 4 Vault suit – Part 3
A story of piping and quilting
The Fallout 4 Vault suit is a perfect example of a garment made of many complicated separate pieces that individually require a lot of work before being assembled together. Just like these first rectangular yokes with 5 welt pockets I made. They needed all these steps before these little pieces were ready to be sewn to other pieces of the Vault suit. After this, I decided to work on the knees, another small part.
Sewing a rectangular piece of fabric in a rectangular opening can be a little challenging and I explained the technique in Part 2. Sewing a circular or oval piece in an opening of the same shape can also be a challenge. If you’re a beginner, don’t be surprised if you don’t succeed at first try.
I’m not sure if I mentioned it before, but you’ll notice on the next picture that each blue piece of fabric has a black lining. Since I’m working with light knits, I wanted to avoid my Vault suits to look like a typical Walmart stretch one piece Halloween costume or like these very popular printed stretch cosplay suits (that are, sorry to say it, the laziest thing a cosplayer can possibly wear. How many printed spandex Overwatch D.Va suits have I seen online? Too many. Way too many.) To avoid that plain, slick, boring look, I like to do a real patterning job for my costumes instead of having the design details printed on the fabric, I like to choose thicker fabrics with an interesting texture and I like to add even more texture with padding materials, topstitches, pipings, etc. The black lining is a stretch fabric that I used to give each piece of blue fabric more stability. I also used the same padding they use for padded bras and added it to the oval yoke, between the blue fabric and black lining. It adds just a little more thickness, it’s very suddle, but it’s all these suddle details that make a costume stand out at the end.

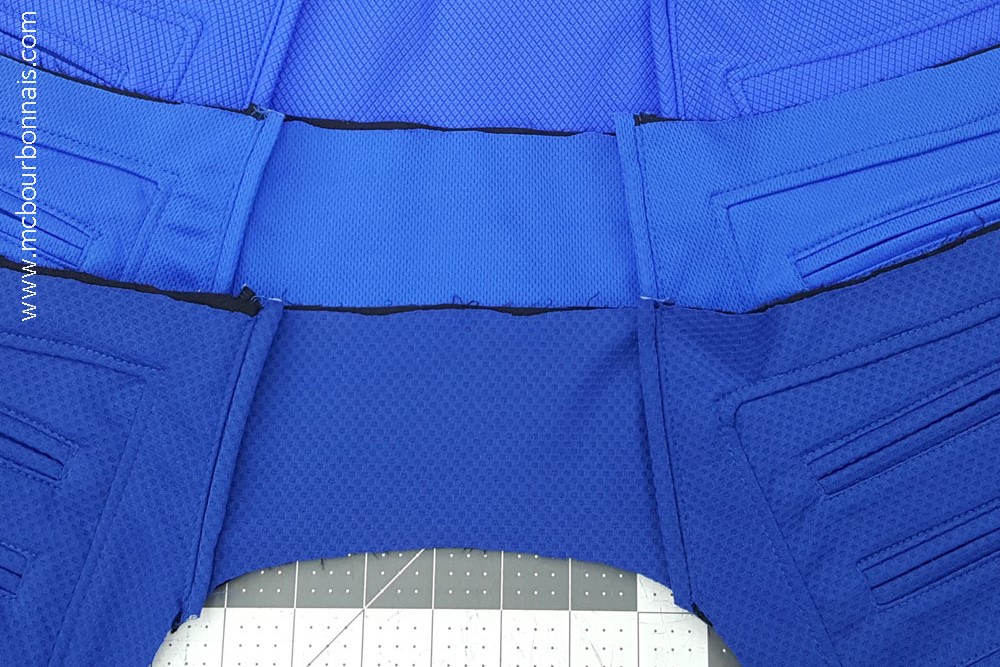
The trick to sew a round or oval piece of fabric in an opening of the same shape is to make a notch at every quarter of both the yoke and the opening. Notice the 4 notches on the oval itself and in the opening. You’ll need to use pins to make sure that these 8 notches will match when you’ll sew everything together. If 2 of these notches don’t match, believe me, it will look bad when you’ll turn your garment and look at it on the good side. I completed the piece with a topstitch around the oval yoke.
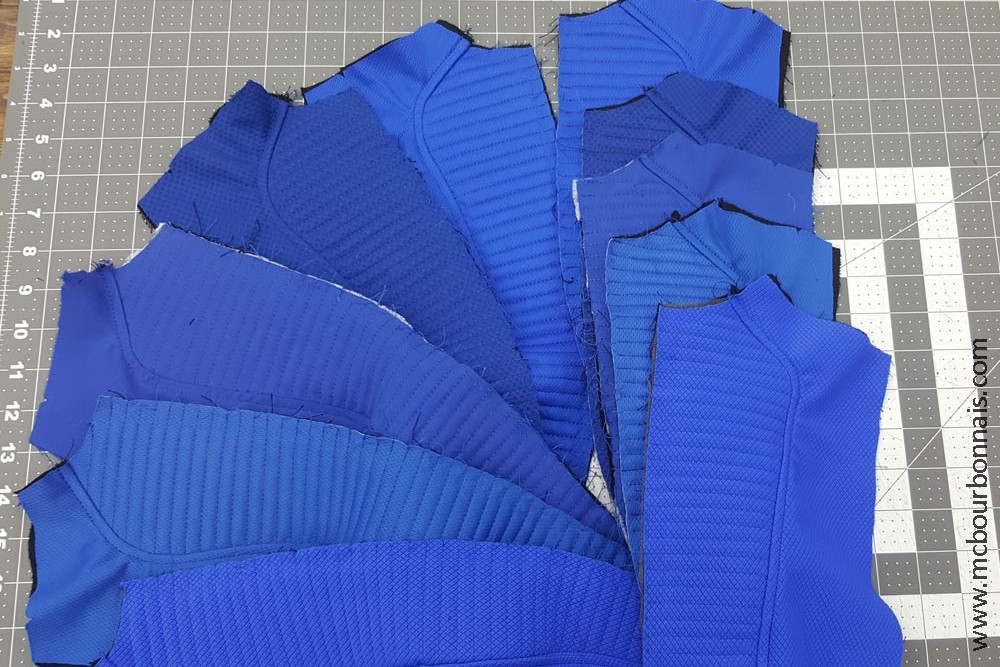
Here are some of the finished padded knees.

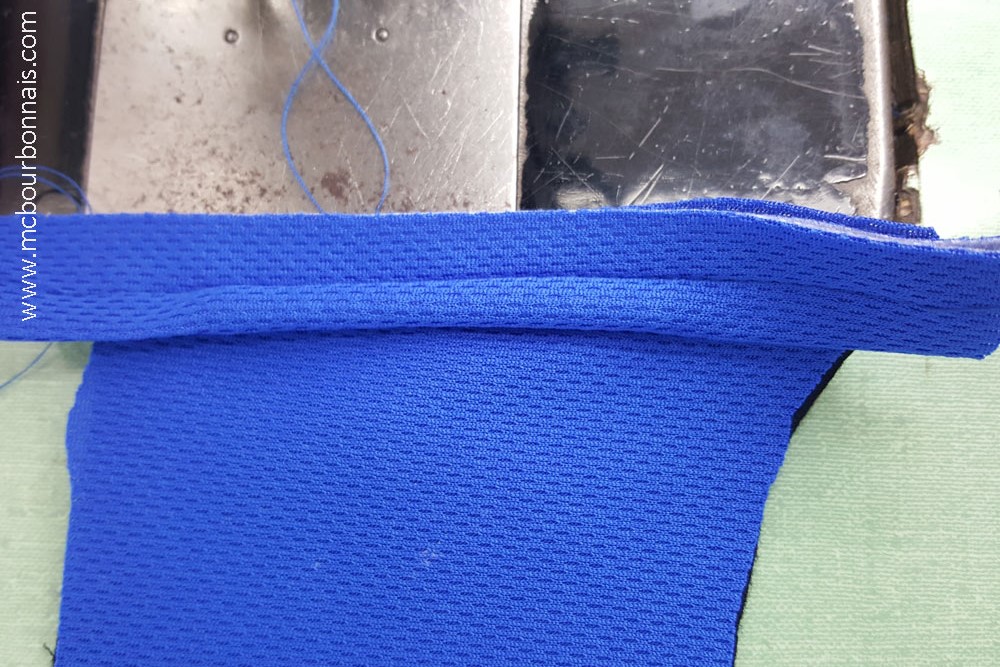
This is the middle back piece that holds together the very first pieces that I sewed, the rectangular yokes with the 5 welt pockets. (See Part 2) My plan was to sew a piping in that stitch and that piping would continue in the stitches in the back of the Vault suits, on each side of the golden numbers. Actually, I had initially planned to add pipings in almost all the Vault suit’s stitches.
A piping is a cord wrapped in a folded strip of fabric or leather that is sewed with a special foot. It’s commonly used in sportswear and furnitures.
Following the reference pics from the game, I really wanted to imitate how each stitch is highlighted in the game by using in real life a large piping… everywhere. I was very motivated. However, I realized that many of the yokes in the Vault suit’s design were so curvy that my huge piping would make the fabric bend and curve, giving the garment a weird shape. It was a nice idea, but it just didn’t work. You’ll see later how my piping plan made me unsew a lot of steps that I had to start all over again. That’s one of the reasons why sewing the Vault suits took me so long. I spent a lot of time unsewing. I should have tested pipings in my mockup. I didn’t. It was a lazy mistake.
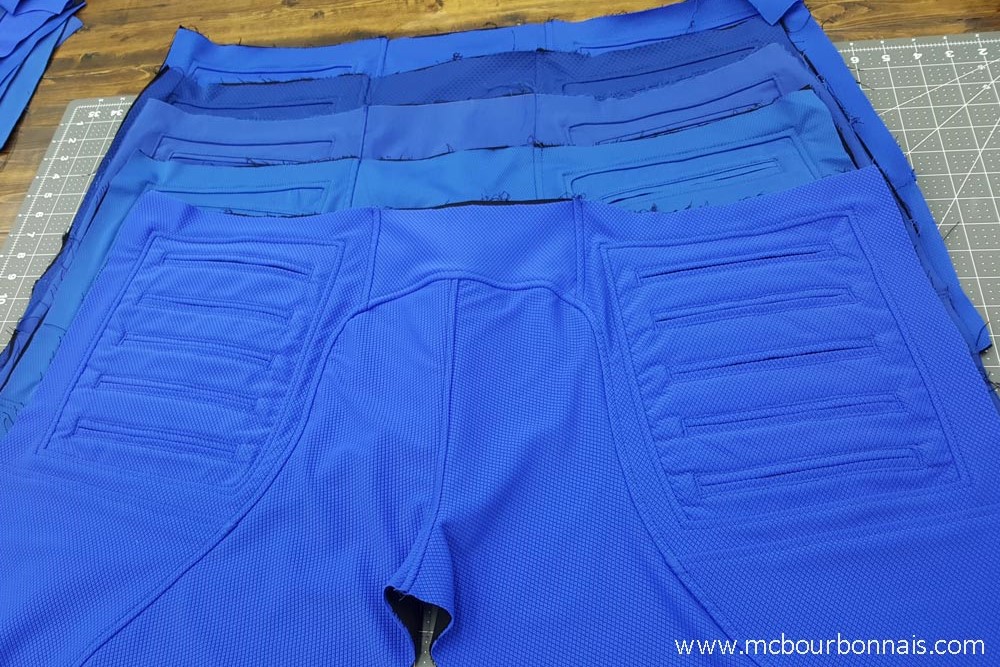
On the next picture, you see what is actually the back of the Vault suit’s pants. And there’s no piping anymore. I unsewed the little pieces of piping I had sewed and only made topstitches everywhere. Notice the curvy yoke on the booty. This is only part of the female Vault suit version. Male characters wearing a Vault suit don’t have that design on their suit in the game.
Then I decided to attack what is probably the most distinctive feature of the Fallout 4 Vault suit along with its golden yokes: the quilted pieces on the front and sleeves. I started with the front pieces. These are the ones that go right next to the front golden yokes.
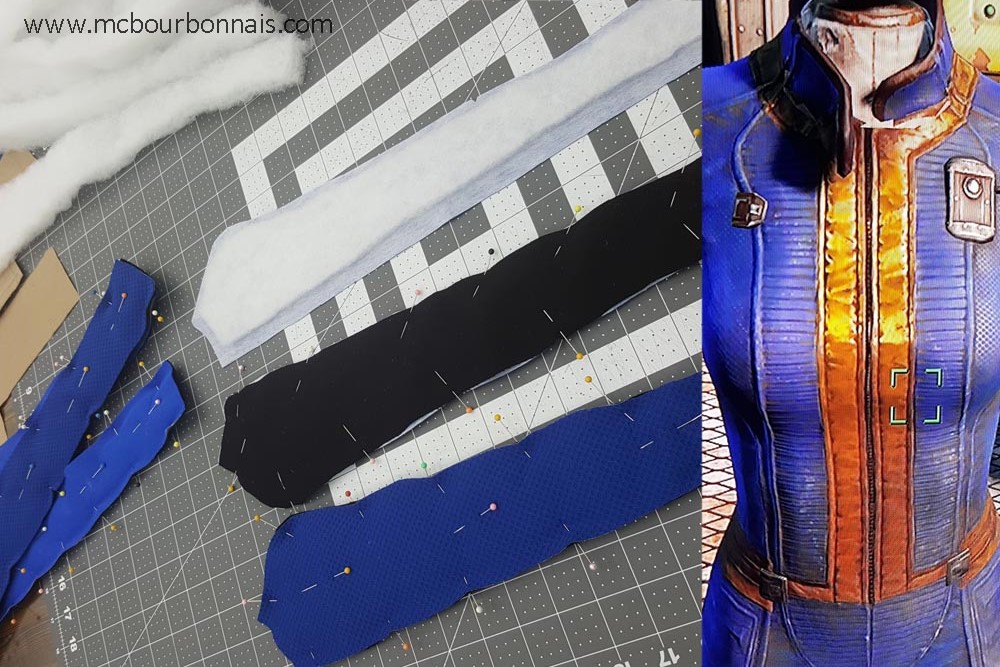
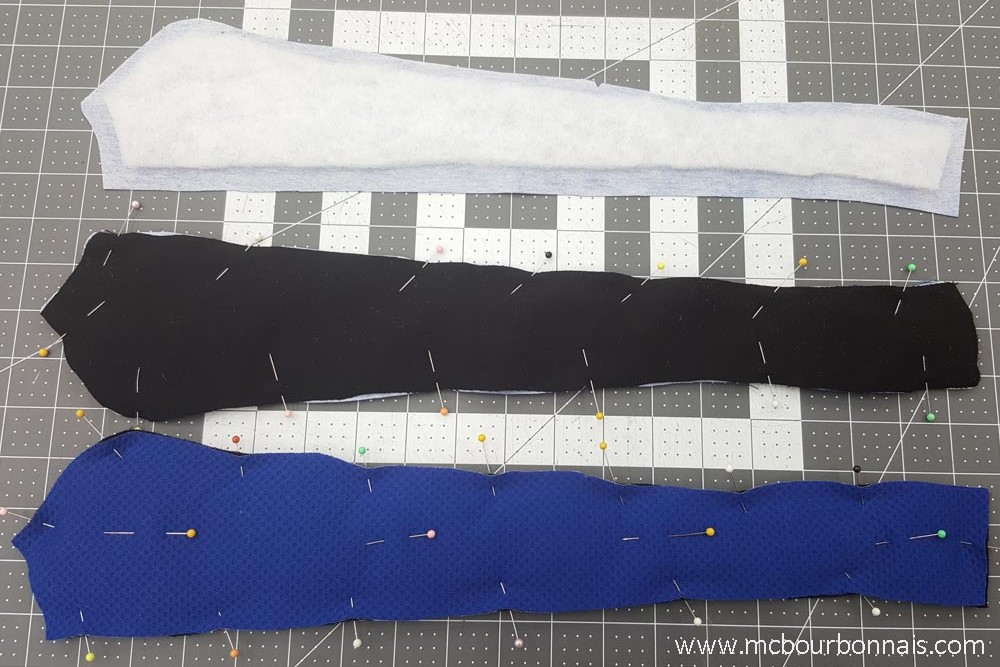
I first applied a thermo bonding interfacing on all the pieces that would be quilted to keep them from stretching while I’d be sewing the topstitches. Notice in the background of the picture the polyester stuffing I used. It’s sold in sheets by the meter or yard to be used for quilted bed covers, for example. I cut the same pattern shape, but without the sewing allowances to avoid adding any thickness in the stitches. I placed that polyester stuffing piece between the blue fabric and black lining. I used a lot of pins to hold all the layers together.
The next step was to do all the topstitches. A lot of top stitches. And once all the quilted pieces were done, I could finally sew them with the other part of the suit’s front. I wanted to sew a big piping in that stitch too, next to the quilted pieces. But the yoke was too curvy. It didn’t look good. So I did only topstitches.
I repeated all these steps for the little quilted yokes in the middle front of the Vault suit pants, under the golden belt.
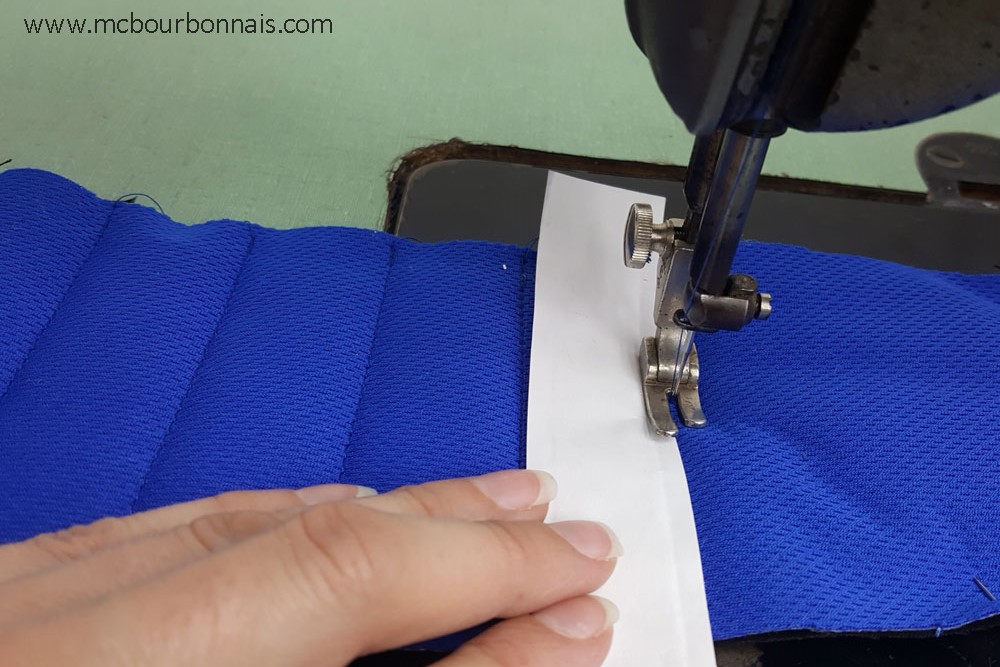
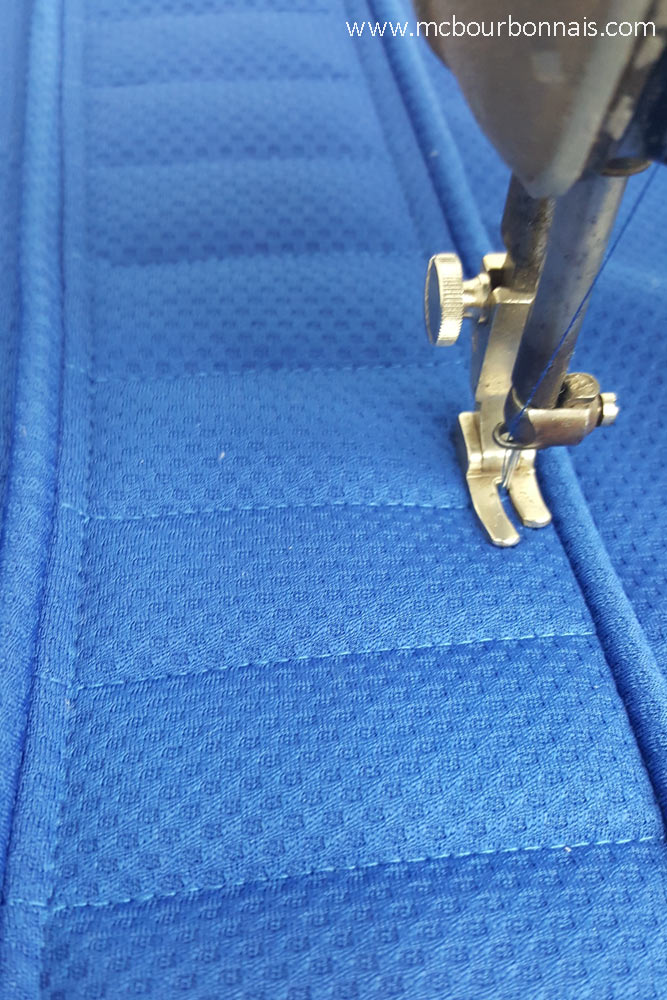
Then I moved on to the quilted pieces of the sleeves. Here’s a trick to make even topstitches: I used a piece of paper of the proper width as a guide, sewing every time next to the paper.
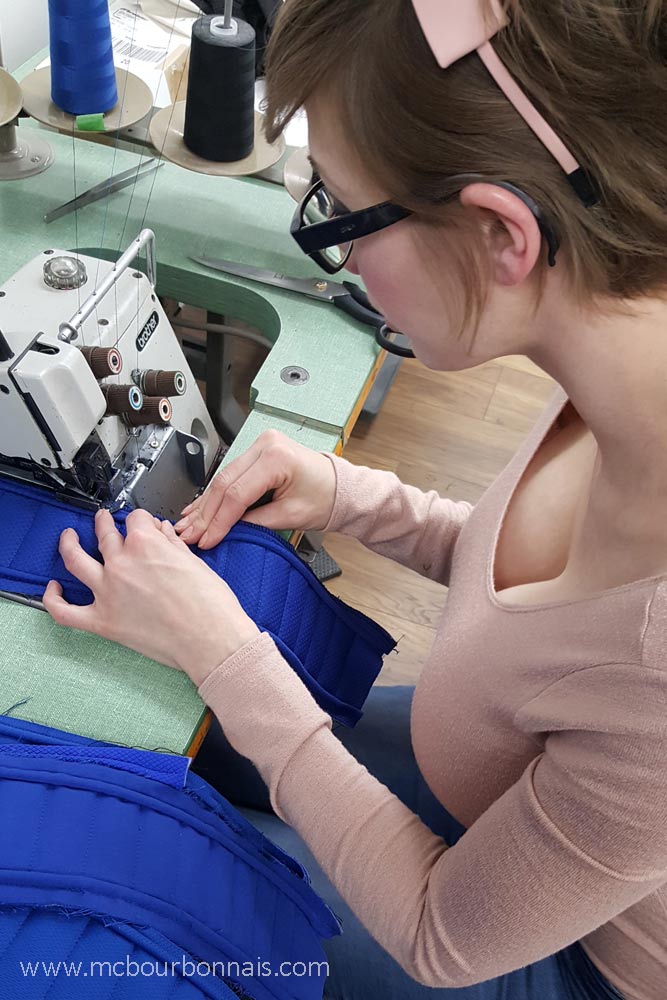
Sewing the quilted yokes with the other parts of the sleeves. These are the only pipings that I finally sewed in the whole Vault suit. One piping on each side of the sleeves’ middle yoke. That’s all. Pretty disappointing considering that I wanted to add piping everywhere! lol But at least, I was satisfied. There would be some piping in my Vault suits.
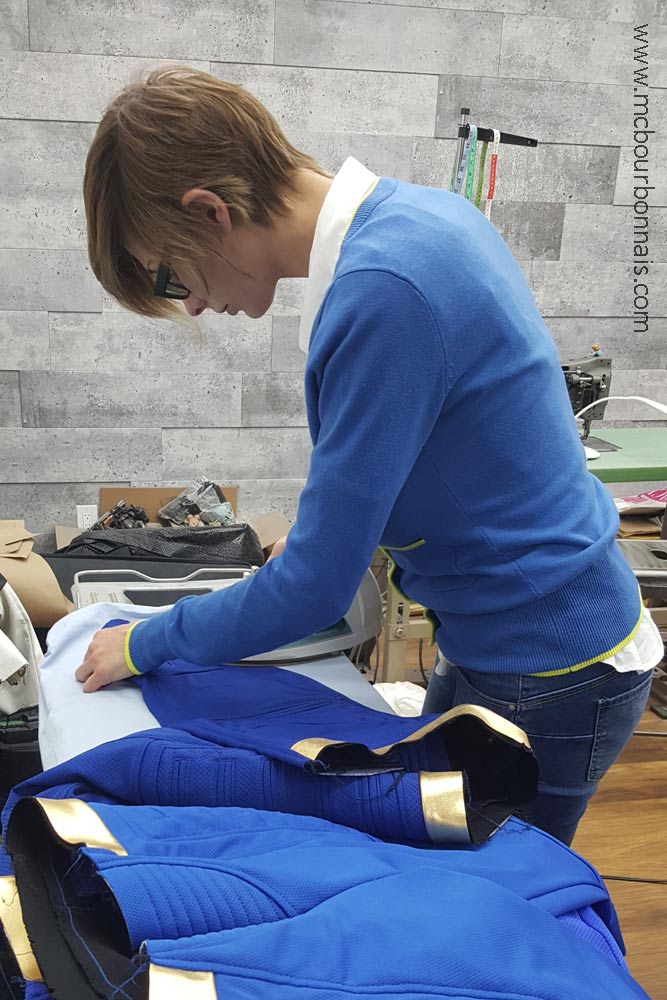
Then I could complete part of the Vault suit’s pants, sewing the yokes with the fake welt pockets described in Part 2, the small quilted pieces in the front, the padded knees and a first row of golden belt. After all these sew/unsew steps, I finally had something that started to look like a Vault suit! That was encouraging! Don’t you think? :D And it will look even better in Part 4!
Hey! I love your blog and it’s actually perfect. I am starting to make a vault suit and it will be my first cosplay that I’ll be making by hand. I want it to look as authentic as possible so I’m really excited to see that you put so much detail and time into this! I’m giving myself a whole year to get it done because I’m so new to all of this. Your blog is helpful so thank you so much!
First I wanted to say I love your blog. This is the only place I could find with a detailed ACCURATE vault suit tutorial from scratch. I love my cosplays to be as accurate as possible and this is very helpful. The pictures are amazing. I do have a question, as I’ve also been working on patterning my own vault suit (I’m a bit chunky so I need to make bigger curves in the pattern pieces. It’s quite the chore). Why did you choose quilting for the bits by the trim? I had come to the conclusion that it was reverse pleating. Or just scraps sewn together to save fabric or something. It seemed like a seam (😂) to me.
Hi Charlie,
Thanks for your comment about my blog! I’m so happy to know it could help you in your sewing process. :D One of the most important part of cosplay that many people seem to forget is all the work that needs to be done before we even start the patterning and sewing: analysing. When I choose a cosplay, I print tons of reference pics from every angle to see all the costume’s details. Unless you’re reproducing a costume from a movie, you’re usually working with illustrations or 3D models. All these costumes have in common the fact that they were designed by people who don’t know how to sew. Comic book artists, manga artists, video games’ concept artists, they all reproduce clothes as they see them in real life with their eyes of people who don’t know how a garment is actually made. When I first looked at the Vault suit, I asked myself what the concept artist could have seen on a garment that he decided to include as a design element in the Vault suit. I tried to guess what the concept artist could have been thinking of, what his inspiration could have been. Analsing the Vault suit in the game, I thought it was likely that this design was reproducing a quilting effect and that quilting in real life would be a realistic, credible adaptation of the suit in the game. Plus, I thought that quilted parts would match the retro futuristic overall look of what is supposed to be kind of a high tech suit in the game. Pleating was a good idea too, it’s a question of personal interpretation. We would have the real answer only if we could talk to the concept artist who designed this. But we’ll never know… That’s what makes each of our cosplay costume unique. We all make our own version of a costume. :) Good luck with your project!
HI!!
Is this the final post?
Am curious about the rest of the making of and the final result
Very interesting to read
Hi Dan,
No, there are so many other steps after this! lol I just didn’t have the time to write more blogs, but I will. :)
Hello!
First off, all of your posts on the Vault Suit have been incredibly informative! I sew a lot, often from scratch, but you’re on such a professional level and I’m super grateful that you’ve written about your process. So, thank you! I also have a question about your process:
I’ve never made a full body suit before, and I have a question about interfacing with stretch fabrics. I understand that interfacing is important for supporting fabric, especially when you’re doing something like quilting. However, doesn’t the support of the interfacing take away from the stretch of the fabric? Do you have to account for less stretching in interfaced areas by making the other yokes wider?
Thanks again! This is all very helpful.
-Amy R.
Hi Amy,
Thanks for your kind words about my blog. :) If it can help someone learning, I’m very happy!
There’s actually stretch and non stretch interfacing. We’ll use non stretch, woven interfacing in a shirt or jacket’s collar, wrists or in the front where the buttons and buttonholes are, to reinforce the fabric. If it’s a stretch fabric, we might want in some situation to use a non stretch interfacing for this exact reason, to keep these specific pieces of the garment from stretching. However, sometimes, we need a stretch fabric to keep its extensibility and we’ll use stretch, knitted interfacing that will support the fabric without keeping it from stretching. It’s good only for little pieces though, you couldn’t use fusible stretch interfacing on a large piece that will stretch a lot and expect that the interfacing won’t come off, unless it would be an industrial fusible interfacing applied with a lot of heat and pressure, which our little iron won’t do. For my Vault suits, I litterally lined each piece with another stretch fabric, so the whole suit has a lot of structure, but is still stretch. Some pieces, like the piece where the welted pockets are, have non stretch interfacing so make the sewing of such a detail possible. It means that this specific rectangle on the sides doesn’t stretch anymore, but the rest around it still does.
Hope it helps! :D Thanks for taking the time to read my blogs!
Thank you so much for the help! Thanks to your blog and response, my test vault suit is going well and I have lovely quilted pieces that fit correctly! They feel so sturdy and retro future!
If I could bother you with one more question, I found black textured fabric for making my test suit, but for the life of me, there’s no textured BLUE stretch fabrics that look quite like what I need/want. So many of the different textured fabrics you found are good options, and I was wondering if you would be okay with telling me what stores you visited to get the fabrics. My hope is that I could find your stores online and try to buy from them. (The online vendors I’ve found don’t have quite what I want, and I only have one fabric shop in my area! It kills me! lol.) If you can’t provide store names, that’s okay, but I figured it doesn’t hurt to ask!
Thanks again! You’re a real inspiration, and I can’t wait to see the whole suit reveal!!
Hi Amy,
Happy to know that your Vault suit project is going well! :D All the fabrics I used for my Vault suits were bought in local stores through the province of Québec, I didn’t order anything online. I remember I had found 1 or 2 fabrics at Tonytex in Montréal, but that was a really long time ago. I counldn’t tell if this specific fabric is still available. I had probably found another of these fabrics at my local Club Tissu in Québec City, not sure anymore… Even though it’s very hard to find fabrics around and we’re having less and less choice, I rarely order online because we never know what the real color of the fabric will be.
Good luck with everything! :)
I’ve been flipping through your posts on this suit, but I didn’t see this mentioned – where did the base blue fabric come from? It’s a fantastic match for the texture required, but I haven’t been able to find anything like it online!
Hi Adam,
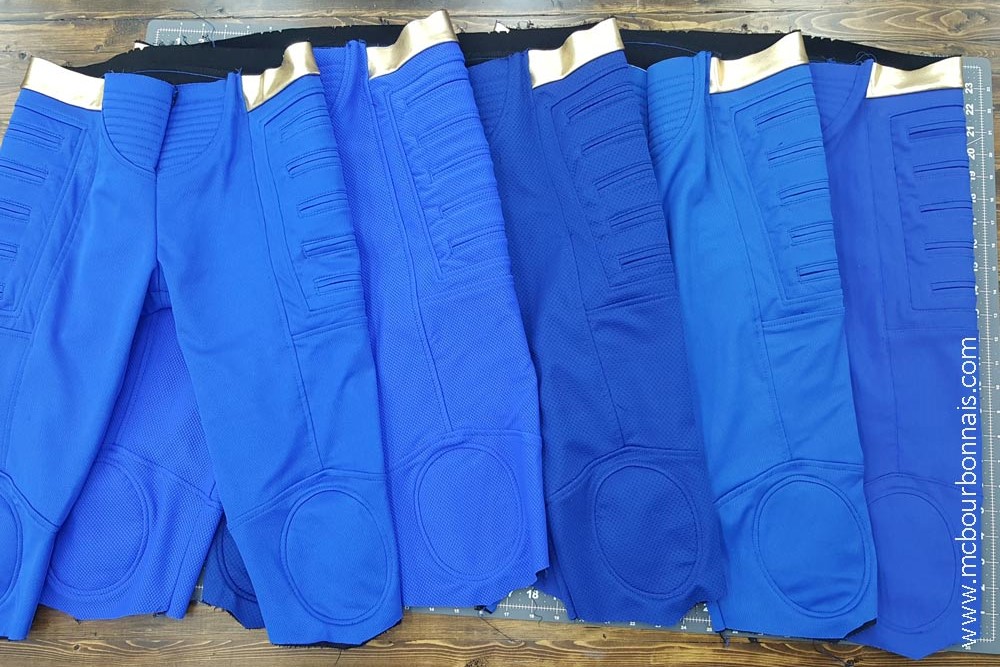
I found 5 different stretch blue fabrics in various fabric stores in my area. Actually, each time I would find a blue stretch fabric that could work for a Vault suit, I bought it. I had finally found 5 different fabrics and it’s a friend of mine who said: ‘Why don’t you do 5 Vault suits, one in each of your fabrics, one for each Vault in the game.’ And that’s what I decided to do. :) One of the fabrics is a woven polyester with some elastane in it. Plain blue, no texture. It’s finally the one that I like the least. The 4 others are knits, mixes of polyester and elastane too, some are more stretch than others and they have different textures. The most stretch looks like a fabric that could be used for a swimsuit or for leggings. To do a suit that is as fit as it is in the Fallout 4 game, I absolutely needed a stretch fabric.
Great skills really and I love the attention to detail in these costumes.
So looking forward to seeing the new non-cosplay (really?) costume…..
I love all the effort you put in to make your cosplay seem as real and authentic as possible. And to do it over at least more times! I can only imagine how much work you have to do, and I certainly appreciate it. :)
Marie-Claude,
I’m so sure when Vault suits was designed for game, there was some inspiration in old anti-g suits used by air force pilots. That padding and piping look same.
You did hell of a work so far, keep it going!
Arnie