Good news! My friends from the province of Québec already saw me in the documentary by UBIQUE Film ‘Culture Cosplay’ on Canal D, a French Canadian TV channel. However, there is a version with English subtitles! It’s available for sale now on Vimeo! You’ll see me many times and you’ll see my workshop before it was remodeled! lol Enjoy!
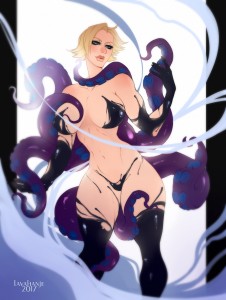
Lavahanje / Blaer
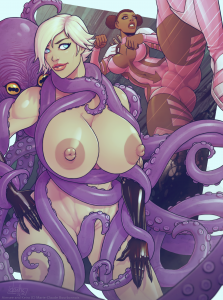
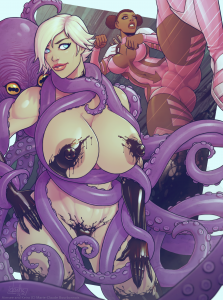
Lavahanje is a really interesting artist touching ladies, gentlemen and monsters. Aimsee is a combination of at least 2 of the previous, so it has to be a good match. I’m seriously impressed with the quality of the work that was delivered to me and by how good Lavahanje instantly grasped the concept and pushed it even further. I like the signature look of her characters and I think it suits mine really well. It gives Aimsee this empowered look and also some mystery.
Go get some more there. In the meantime, I’ll find some more commission ideas for Lavahanje. :)
Twitter: https://twitter.com/Lavahanje
Tumblr: http://lavahanje.tumblr.com/
Facebook: https://www.facebook.com/BlaerNaomi/
Instagram: @blaer_naomi_art
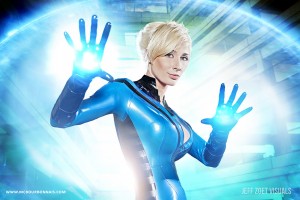
Pour mes amis du Québec: ne manquez pas Culture Cosplay, un documentaire de Ubique Film sur le cosplay qui sera diffusé à Canal D ce jeudi, le 19 octobre à 22h00. Oui, j’apparais dans le documentaire avec d’autres cosplayers du Québec! Vous me suivrez en voyage et verrez mon ancien atelier… avant que je le rénove entièrement au début de cette année. Pour plus d’info sur l’émission, consultez le site de Canal D:
http://www.canald.com/emissions/docud-1.1197927?tab=episodes&episode=1508464800
En rediffusion:
Vendredi le 20 octobre à 14h00
Dimanche le 22 octobre à 19h00
Mardi le 24 octobre à 10h00
For my friends in the province of Quebec: yes, I’ll be on TV this week! Don’t miss Culture Cosplay, a documentary by Ubique Film about cosplay, on Canal D next Thursday October 19th, 10pm. Yes, I’m featured in the documentary with other cosplayers from the province of Quebec. You’ll follow me while I’m traveling for conventions and you’ll also see my old workshop, before I remodeled it at the beginning of this year. For more info about the show, check out Canal D website:
http://www.canald.com/emissions/docud-1.1197927?tab=episodes&episode=1508464800
Thusrday October 19th 10pm
Friday October 20th 2pm
Sunday October 22nd 7pm
Tuesday October 24th 10am
And for my international and non French speaking friends, there might be a version with English subtitles available online eventually… I’ll keep you informed!
Sorry if I took a little while to get back to my blog! The chibi Severina costume is one of the costumes I’m the most proud of, I did a lot of new things for this costume, got to practice new techniques and learned a lot. It’s important to me to complete this Making Of Blog and to share what I have learned with you. :) Last time, I was talking about my 3D printed dragon staff. Let’s move on and complete this part!
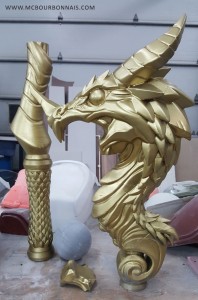
If you look at the picture, you’ll see that the dragon’s jaw is missing. The jaw piece is on the table. It was voluntarily 3D printed as a separated piece in order to be able to insert the red ball in the dragon’s mouth. Many of you asked if the ball would be glowing or would have transluscent LED lights inside. Unfortunately, for this project, I only 3D printed a sphere that I simply painted in red. (I’ve used clear resin for the sword that I made for Ninja Division’s miniature painting contest at Gen Con 2017. The sword was the trophy for the contest. Some very small parts of the sword were made with clear resin, but that’s the only experience I have with these products so far.) So the sphere would only be painted.
Then I realized that I would have some problems with the order of the assembling/painting steps. If I paint the red ball, place it in the dragon’s mouth, then add the jaw, how could I paint inside the dragon’s jaw, around the ball? But if I paint the dragon pieces first, then add the ball and jaw, I would have to use body filler to hide the junction of the jaw, so I’d have to retouch my gold paint. That second option wasn’t perfect either, but seemed to be the solution.
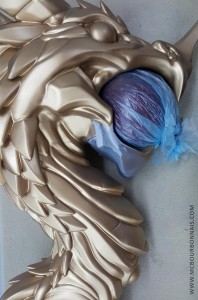
The ball was first glueded to a dowel so it could be painted all around. The spot where the dowel was gluded would be hidden inside the dragon’s mouth. I covered the painted ball with the same plastic sheets I used to paint Ninja Division’s robot, Lug, when I wanted to cover the yellow parts before painting the black parts. Then the dragon staff and jaw were painted separately using simple spray can paint (noting fancy this time.) I pierced a hole inside the dragon’s mouth, inserted the dowel with the red ball in it and glueded it there. I used that same technique, inseting dowels through the dragon’s jaw, to hold it in place. Last step was to retouch the jaw junction with body filler. Sanding, sanding, and I could add a final layer of gold paint. And finally I removed the plastic to reveal a pristine red ball. At that point, I was very close to my deadline, leaving for Gen Con the next day. I wish I would have had the time to do something fancier for the paint, like some dry brush/weathering techniques to make the staff look used and add some depth to it. But if I had applied those techniques to the staff, I would have had to do it on the other pieces of the costume too, the bra and little bones. I had no time left and no real experience with these painting techniques, so I let the dragon as it was. It will never be too late to upgrade the paint job.
Here’s a 360 view of the final dragon staff. The pics are not retouched, so you can see the remaining flaws, where I could have sanded more. If you look closely, you’ll see some remaining texture from the 3D printing. But deadlines are deadlines, so there’s a point where I needed to stop sanding and start painting.
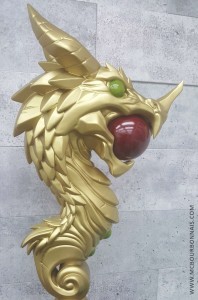
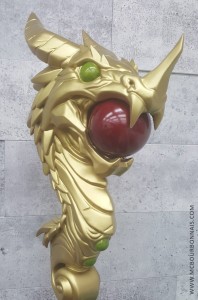
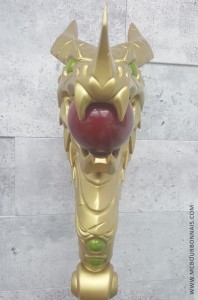
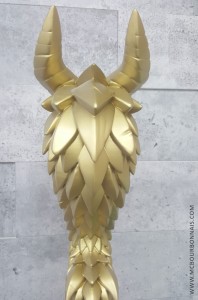
Even if it wasn’t perfect, my dragon staff was very popular at Gen Con! :D I’m very happy that people enjoyed it that much! And I’ll present it again this weekend at Quebec City Comiccon! In the next part, I’ll talk about the other 3D printed pieces of the costume, bra, bones and other small accessories. You’re curious about the bra, right? ;)
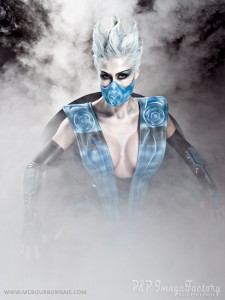
13 jours avant ma fête! Oui, oui, ma fête est le 15 octobre, le weekend du Comiccon de Québec! Et je serai de retour au comiccon cette année! J’apporte une correction à ma dernière publication, par contre. Il n’y aura qu’une seule mascarade le samedi soir (mon erreur, désolée) que je co-animerai avec plaisir. Venez me voir à ma table en avant-midi ou tôt en début d’après-midi samedi parce que je devrai rapidement quitter et aller backstage pour rencontrer les participants. J’ai hâte de voir vos costumes! Le dimanche, je serai là toute la journée!
13 days before my birthday! Yes, my birthday is on October 15th, the weekend of Quebec Comiccon! Yes, I’ll be back this year! I want to make a correction to my previous post, though. There will be only one masquerade on Saturday night, as usual (sorry, my mistake) and I’ll gladly co-host it! Make sure to come to my booth before noon or early in the afternoon on Saturday because I’ll have to leave and go backstage to meet the contestants. Looking forward to seeing your costumes! Sunday, I’ll be there all day!
http://www.comicconquebec.com/fr/accueil/
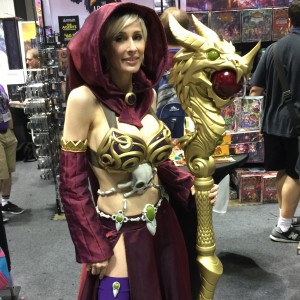
Eh oui, je serai de retour au Comiccon de Québec cette année! :D Les 14 et 15 octobre au Centre des Congrès de Québec, c’est un rendez-vous! Petite différence avec les années précédentes, par contre. Cette année, le Comiccon de Québec présentera 2 mascarades, une le samedi soir et une le dimanche soir et je serai co-animatrice des 2 événements! Alors assurez-vous de venir me voir à ma table en avant-midi ou tôt en début d’après-midi parce que je devrai rapidement quitter et aller backstage pour rencontrer les participants. J’ai hâte de voir vos costumes!
Pour plus d’info sur le Comiccon de Québec, visitez leur site officiel:
http://www.comicconquebec.com/fr/accueil/
Yes, I’ll be back to Quebec City Comiccon this year! October 14-15 at Quebec City Convention Center, I’ll be there! There’s something different this year, though. For the 1st year, there will be 2 masquerades at Quebec City Comiccon, one on Saturday night and one on Sunday night and I’ll co-host both events. :) So make sure to come to my booth before noon or early in the afternoon because I’ll have to leave early and go backstage to meet the contestants. Looking forward to seeing your costumes!
For more info about Quebec City Comiccon, check out their website.
http://www.comicconquebec.com/en/home/
I came accross Kometoze’s work while I was looking for manga artists and my girly side got caught by his cute girls with peachy skin. I searched for his contact info and sent him a quick request about my character Aimsee that would be hugging frenetically her pillow. (Yeah, I was probably worn out that night.)
Kometoze just started a Patreon and he’s working on a yuri manga that looks pretty good so far! I also like that the guy is drawing really neat backgrounds! If you want to support him and give him a chance to create more art, please check out these links:
Patreon: https://www.patreon.com/Kometoze/
Deviantart: https://kometoze.deviantart.com/
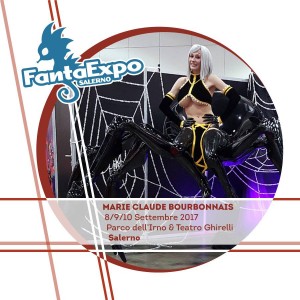 Looks like I’ll be visiting Europe again this fall! I’m so excited! :D I’m received as a cosplay guest for Fanta Expo in Salerno, Italy!!!
And I love the Italian description in the convention’s original posts! Let’s learn some Italian!
‘Vi presentiamo la prima ospite internazionale di quest’anno: Marie-Claude Bourbonnais (Cosplay/Glamour Model, Designer)
Potrete incontrare questa esperta cosplayer, attiva non solo nel campo dei costumi ma anche nel campo del prop making, il 9 e 10 Settembre al Parco dell’Irno e al Teatro Ghirelli a Salerno!’
Check out the convention’s website:
I’m happy to finally talk about one of Severina’s costume pieces I think you’ll be very excited about: the magical staff!
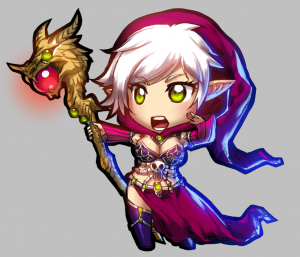
I hired Texelion, a 3D modeler from France, to do this 3D model. (Bonjour à mes amis Français!) As you can see, the original chibi art doesn’t show that much details, so I had to find other reference images of dragons, scales and textures that I sent to Texelion to give him an idea of the interpretation I wanted for my life size scepter. I’m very satisfied with how it turned out! Texelion pays great attention to details and understood exactly what I had in mind! You can see more of his work on his DA: www.texelion.deviantart.com
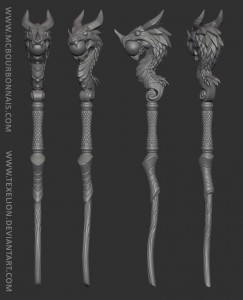
What an incredible design! I was excited just to look at that picture of the 3D model! Next step was to have the piece printed. A little while ago, I bought my own 3D printer. (Ultimaker 2 Extended +) 3D printing is new to me, I’m just starting to integrate that technology to my cosplays. I choose to do this costume especially to practice 3D printing, molding, casting, sanding and painting techniques. A lot of things I’m not specialized in. I’ll do my best to explain what I’ve learned. In any case, it couldn’t be worst than building a 10 feet tall fiberglass robot!
Before you put your file in the printer, you have to see how you’ll cut your 3D model to make it fit the printer. Because the staff is as tall as I am and my printer isn’t obviously that tall! lol The Ultimaker 2 Extended + has a build volume of 223 x 223 x 305 mm. To give you an idea, the dragon head needed to be cut in 6 pieces and the staff itself, in 3 pieces. The file was cut using a 3D slicing software called Cura. Choosing where and how to cut your 3D model and in which position each piece will be printed is important because it will have an impact on the support material needed to print and the 3D printing texture in the different curves of the object. (We call ‘support’ some material that the printer will print around the 3D model just to allow the piece to hold, but this support will be removed after. Some 3D printer will print the support in the same material than the rest of the 3D piece while other printers are designed to use a different material to print the support. Some types of support disolve in water. Other have to be removed with pliers.) A word about the 3D printed texture, the distinctive lines or ridges that are the undeniable proof that your piece was 3D printed and not made in any other way. For example, if you print half a sphere, the flat surface facing the floor, the final layers or ridges on top of the sphere won’t look as good as the ridges around the sphere. It’s hard to explain in words. If you’re curious about 3D printing, but not familiar with it, I’d recommend you to watch videos online. Videos are easier to understand. :)
Speaking of the 3D printing texture, the main challenge, when you 3D print a prop, is to get rid of it. The type of 3D printer, the resolution of the original 3D model, the size of the nozzle, etc. will all influence the quality of the final printed piece. With my 3D printer, I can use 4 nozzle sizes: 0.25mm, 0.4mm, 0.6mm or 0.8mm. The 0.25mm nozzle will obviously give a better results, but it will take way longer to print. Since the staff is a pretty big piece, I decided to use the 0.8mm nozzle. To give you an idea, even with the bigger nozzle, it took more than a week, day and night, to print all the pieces of the staff.
I’m using PLA to print and I saw online a popular technique where people expose their PLA 3D printed piece to an acetone vapor bath to give it a smoother texture. However, I think that this technique also smooths some of the more suddle details of the piece, so I realized that, just like it’s the case for fiberglass, the secret for a smooth 3D printed piece would be sanding and patience. I’ll talk more about the sanding process later. For now, I want to show you the dragon scepter at a stage where it was already sanded a lot and painted with a coat of automotive high coverage primer, the same Omni products I used to paint the fiberglass robot and spider for Ninja Division. (You can see my Rachnera Making Of blog for references.)
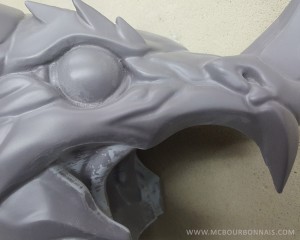
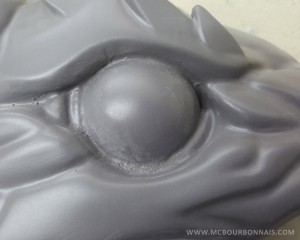
You can already see that most of the 3D printing texture doesn’t show anymore, but there’s still work to do on the details and smaller areas. Many hours of sanding were required to reach this level of smoothness. A vapor bath would have been faster, but I keep thinking it would have flatten down too much of the nice details Texelion had carefully 3D modeled. Here’s a closeup so you can see better what was done and what still has to be sanded.
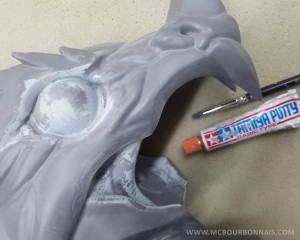
I found out that the Tamiya putty they use for miniatures works well on PLA. It’s fine enough to fill up the very small imperfections and 3D printing texture. To apply this putty, I’m using a rubber brush, I don’t know how else I could describe this tool. It’s literally a sharp piece of rubber on a paint brush tip. It’s sold as a sculpting tool, but it’s very efficient to apply putty.
I might not be the best at applying putty in these little corners. If you don’t evenly apply it, you just have more stuff to sand. But using very fine sanding paper grade and very fine files (and have I mentioned a lot of patience?) you can make miracles. Here’s a before/after pic so you can compare the details once they were corrected with the putty and sanded. Don’t hesitate to download the image in its full size to see better.
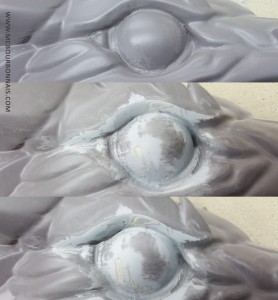
Yes, every little part of the huge magical dragon staff was sanded like this. Under each scale, eveywhere. I don’t calculate the hours I spent sending this prop. But I really wanted to get rid of all the typical 3D printed texture. When I was working on my Jesse Quick costume, which had a 3D printed helmet, I tried to sand 3D printed PLA with my small orbital sander. I realized that high speed sanding was heating the PLA, making it sticky and the sanding paper would then be useless. I had to find a way to sand PLA without heating it up. This is when I started water sanding the PLA pieces and it worked super well! They sell in my local hardware store this very fine sanding paper I had never used before. It’s made to be wet and to sand under the water. Yes, the sanding paper and the surface you’re sanding are wet… and it works! If water sanding is common for you, there’s nothing there that will surprise you, but I was personally surprised to learn that some wet sanding paper would still sand! lol And it turned out that it worked very well on PLA. With a lot of sanding, tiny files, Tamiya putty and lots of patience, I could make my dragon look the way I wanted it to look.
Here a larger view of the dragon staff so you can see how it looks from various angles.
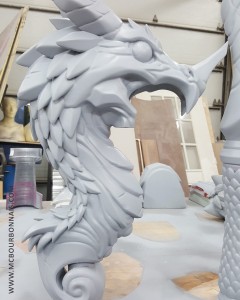
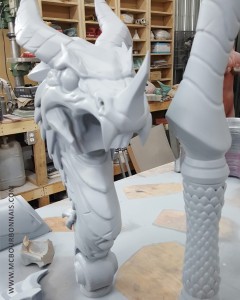
On this last picture, you can clearly see that some of the details, in the dragon’s scales and eyes, still needed some sanding. But there was already a lot of work done.
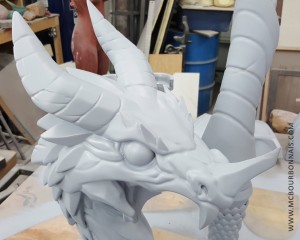
I’ll post pics of the finished magical staff later! More work in progress pics to come! Hope you enjoyed my 3D printing/sanding adventures! lol
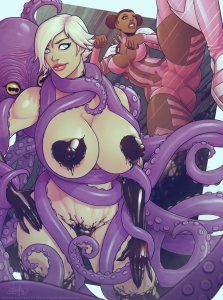
I’ve been pretty slow at working on my storyline for Aimsee and at creating other characters to develope her universe. (Costumes don’t build themselves alone, you know…) But I’m very excited to finally introduce a new character! The cutie in the background is called Keira and she’s the new girl in town! Keira’s the oposite of Aimsee. She’s tidy, serious and always focuses on what she has to do.
This awesome artwork is by Devilhs. What more could I say? The guy drew the piece and variations so fast I still can’t believe it! Make sure to check out all the variant versions he suggested me! He’s literally producing quality sketches one after the other on tumblr and DA. It’s a really enjoyable experience to have somebody translating your vision into a finished piece and I’m always so appreciative that talented artists lend me their hard earned skills!
To find Devilhs:
Deviantart: http://devilhs.deviantart.com
