
Monster Musume Rachnera Cosplay making of – Part 6
I know it took me a while to complete that bolg. With the first months of 2017 that I spent remodeling my workshop, I had very little time for anything else. You’re more than welcome to read the previous parts of my Monster Musume Rachnera Cosplay making of blog to remember the first steps before reading that very last part.
Enjoy your reading!
Part 6
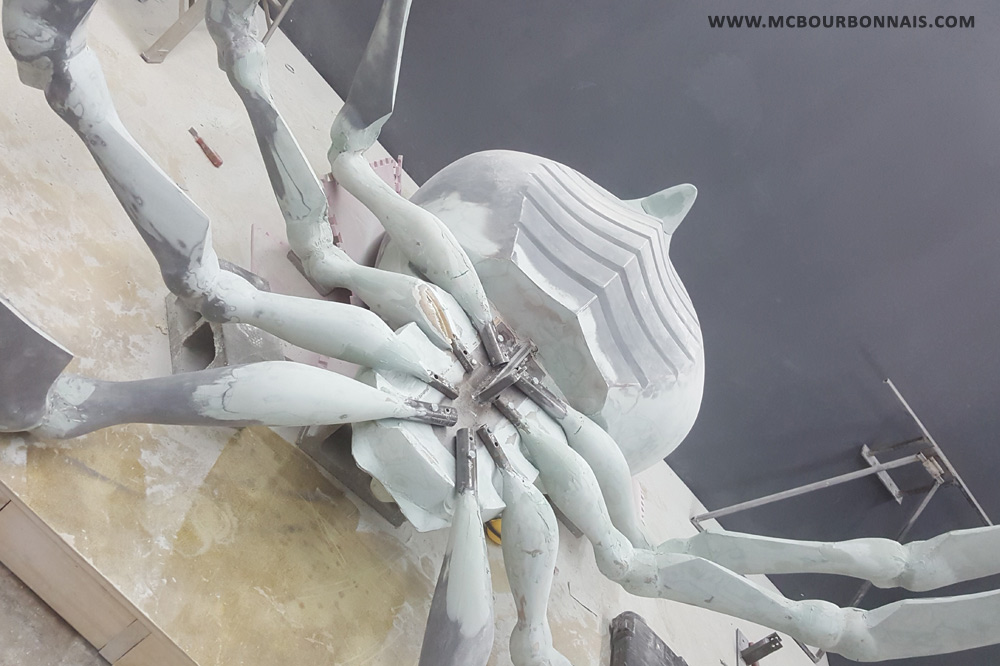
Next step was to build the front part of the spider’s belly, the second half sphere of its abdomen, the ‘lid’ that would cover and hide the part where the legs would be boalted. On the next picture, you can see very clearly how the legs were boalted to the metalic plate. Notice the square tubing vertically welded on the metallic plate. It will be used to attach the lid and keep it in place.
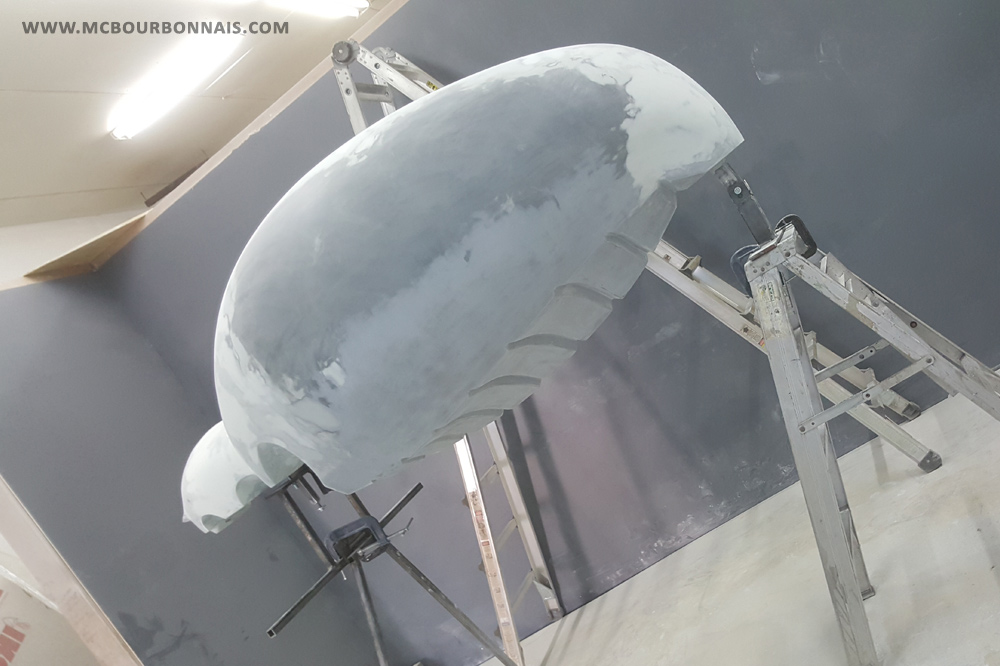
I think the lid was the most complicated part of the spider to fit. If the metallic structure and concept to assemble/disassemble the legs were big engineering challenges, building the lid was certainly a fine-tuning challenge. We had to make a custom lid with holes that would match perfectly the shape of each leg in its final position. We used styrene again to sculpt the general shape of our spider’s abdomen, as you can see on the next picture.

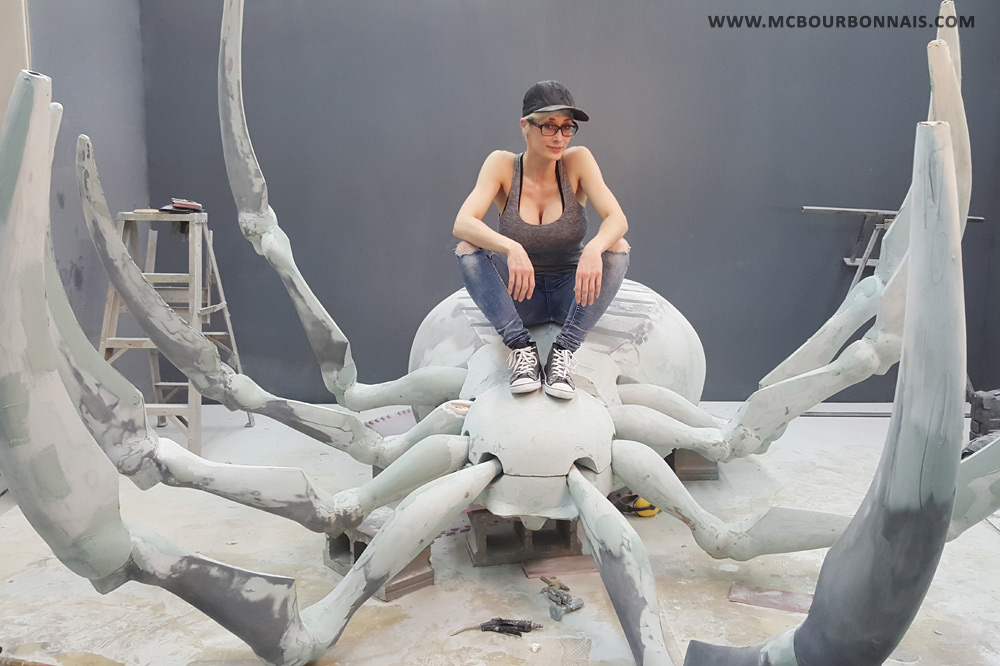
At this point, the holes to allow to insert the 4 big legs, front and back, were there, but the holes for the 4 smaller middle legs were not done yet. We had to cut holes in the abdomen and do our best to adjust each of them to the shape/position of each leg. Remember that we wanted some of the smaller legs to stay in the air, to give Rachnera a more dynamic pose? We realized that the first holes we pierced didn’t allow the legs to be lifted in the air. It was a trial by error sort of process, buffing each hole in both halves of the spider’s abdomen, boalting the legs to see if the lid would fit, taking off the lid and legs again to adjust the holes… It was improvisation, again, creating that custom piece for which we had no plan. The whole spider itself was a big prototype, like anything you build for the first time, and we just had to figure out how to solve each problem as it would happen. We finally suceeded in making a lid that would fit over the legs, abandoning in the process the idea of having 8 perfectly round holes and aiming to have 8 holes that would ‘look like’ circles. We had no time left for perfection. It just had to work and to look good. Here I am, sitting proudly on the lid that was finally matching the rest of the spider’s abdomen and legs.
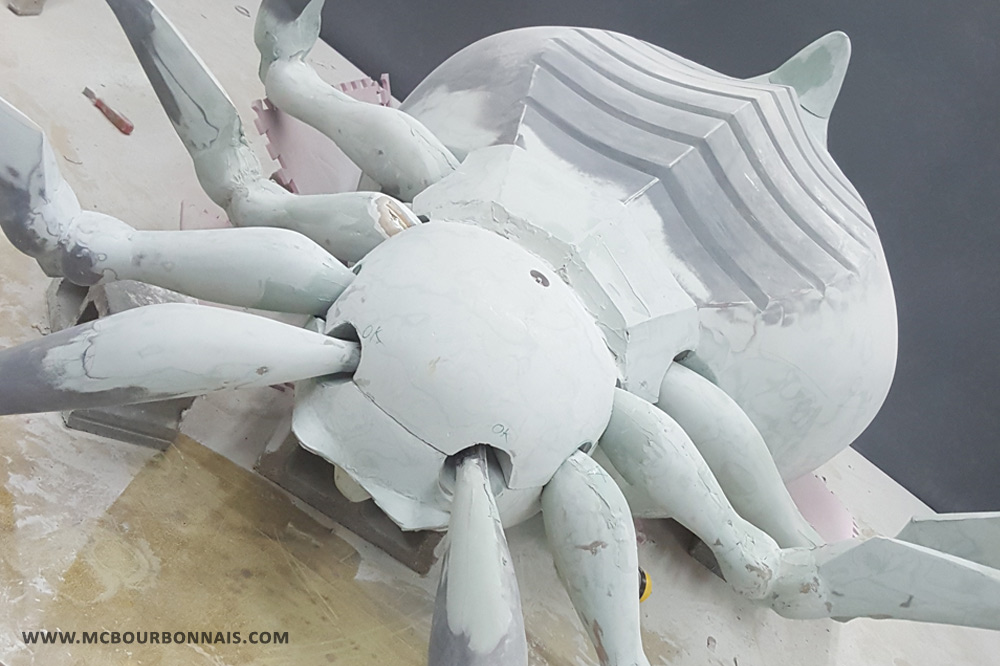
I don’t know how much body filler we used to finish all the corners, inside of the holes, all these details that had to match… But we made it. Notice on the next picture the final hole that we pierced in the middle of the lid to be able to boalt it to the square tubing vertically welded on the metallic plate. You can look again at the first picture of that part of the blog and compare. You’ll understand how the lid was holding.
And after many more hours of fine sanding and not much time left before the exportation of the spider, we finally decided that the spider was ready to be painted. We used automotive primer and paint. After the making of the robot, we knew that the smaller imperfections and latest smaller holes in the fiberglass surface would be filled up by the high coverage Omni primer. Here are the products we used (primer).
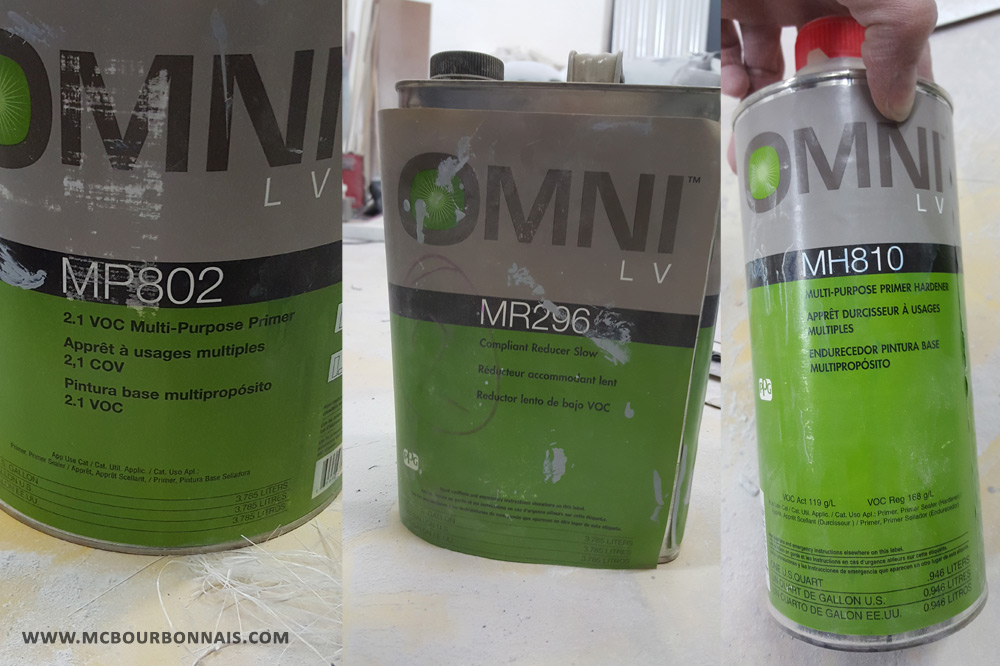
I have to say that automotive primer and paint aren’t funny to work with. You don’t only need the primer or paint, but also the reducer (to make the mix liquid enough to be used with the spray gun) and the hardener or activator, to activate all the chemicals and allow the paint to set. Make a mistake in your mix and the primer or paint will never dry or will be too thick to be used with the spray gun. All these required products are expensive, highly toxic, you absolutely need a respirator mask, gloves and something to cover your clothes. Plus, big paint jobs like this are usually made in an empty paint room where the paint fumes can only leave stains on the walls and where there’s an appropriated ventilation system. My workshop was never designed to build big fiberglass pieces like this. I don’t have a paint room. I never thought I would build anything like that one day. I do have a garage door that I can open to ventilate the place. But if there’s wind, there could also be dirt in the paint… And if it was winter, you can forget about opening the door. So here’s what I did. I covered everything around in my workshop with plastic sheets and we started by painting the legs. We used an urethane paint that doesn’t required a last layer of clear. That type of paint is already very glossy when it dries. However, it’s harder to maker a correction if there’s an imperfection in your layer of paint, while other types of automotive paints can easily be sanded, then covered with many layers of clear to make the surface perfectly shinny.
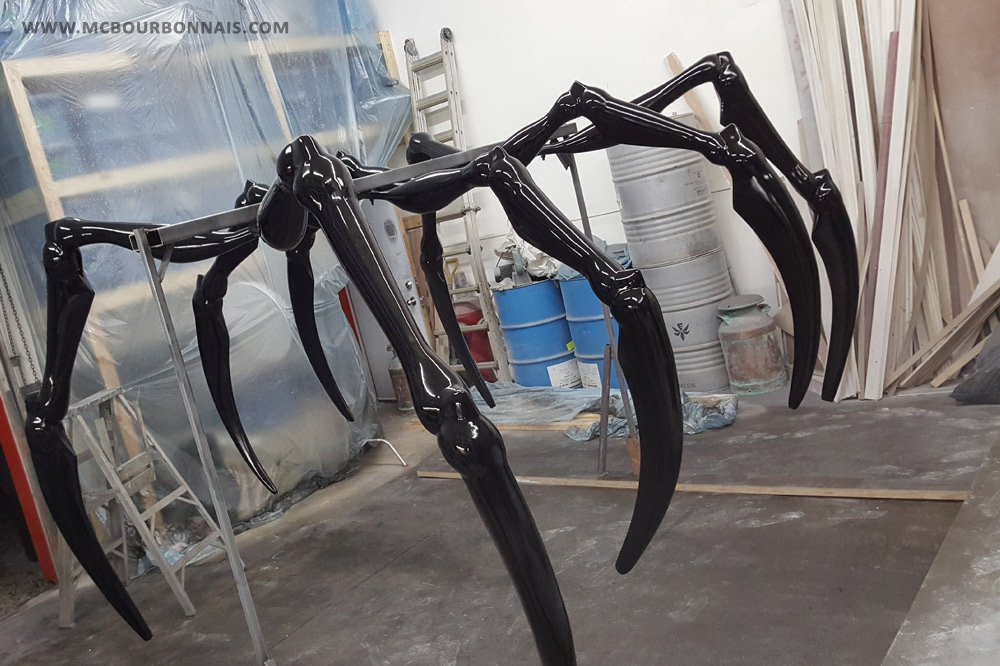
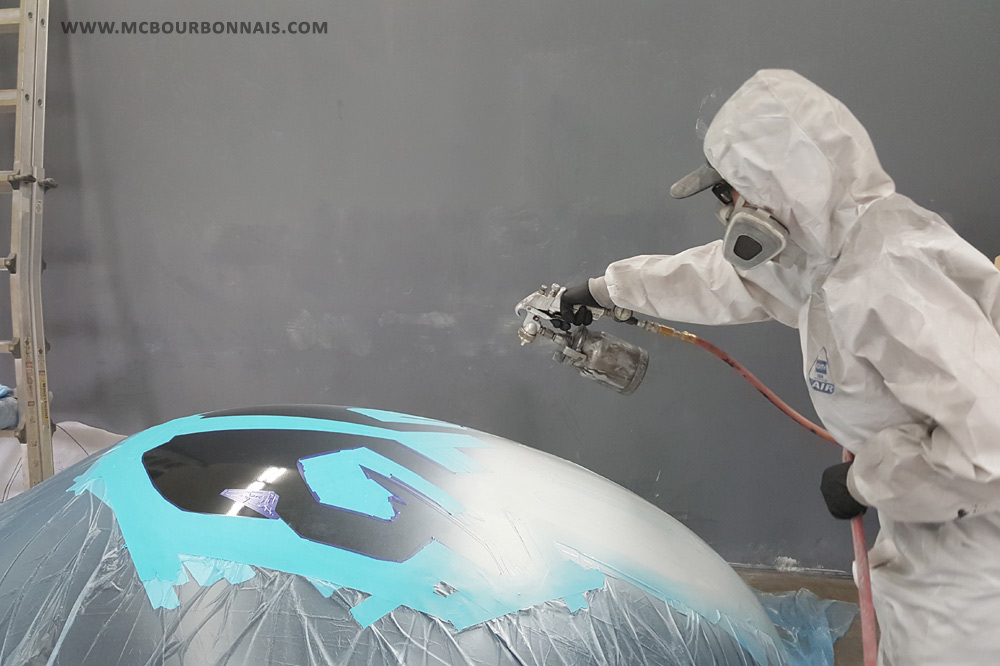
We had to figure out a way to suspend the legs in order to paint them. My friend had the idea of using metallic tubing, again, to make an improvised rack where we boalted the legs. It worked surprisingly well considering that the heavier, bigger legs weighed around 60 pounds each. Here I am with my super sexy painting suit and mask. Notice in the background how I covered and protected everything in my workshop with plastic sheets. The picture almost looks blurry, but it’s actually paint fumes.

I really felt like we could make it on time when I finally saw the legs painted in black. All of a sudden, the black paint gave to the legs a look… of real spider’s legs! They were huge, full of sharp angles and they almost scared me as much as real spiders do. Yeah, I spent 2 months of my life working on building a huge spider and I’m afraid of spiders. What a crazy project… But still, it felt very encouraging to see these huge black legs! Impressive, isn’t it?
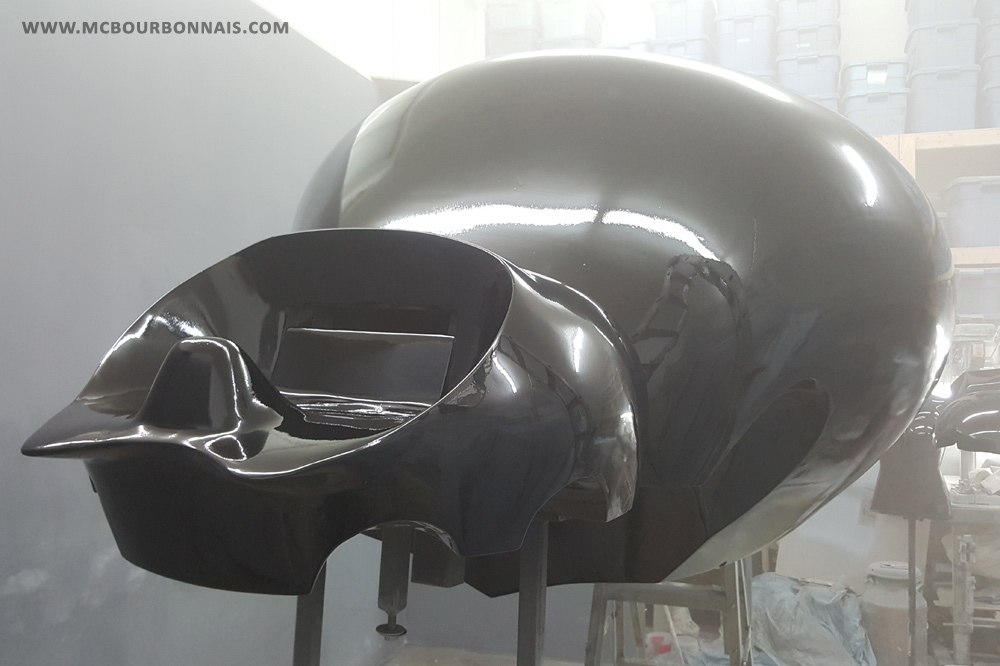
Then it was time to paint the body. Same challenge: how would we lift up the body to allow us to paint it all over? On one end of the body, we simply used the mechanism we had developed for the assembling/disassembling process. At the other end, we used the mechanism made to fix the body to the bottom of the transportation box by temporary fixing it… to the top of a ladder. A questionable, probably not very safe way to make everything stay in place. But we had no time to think of a better way. We had a few days left before the departure of our creature.
And finally, here’s the body painted in black. What a relief! Those of you who are professional painters will immediately notice the irregular texture of the paint in the light reflection. I only had an old spray gun, almost as old as I am (which is very old) and my friend and I had no real experience in painting other than the robot we had previously made for Ninja Division. Honestly, painting with a spray gun is harder than it seems. There are techniques and you have to know how to adjust your spray gun. The spray has to have a specific shape when it comes out of the spray gun, you have to hold the gun at a certain distance from the object you paint, you have to do a certain movement to apply the paint evenly… Way harder than it seems, at least that’s what I thought. And again, the fact that I don’t have a paint room didn’t help. See how that picture also looks blurry? Paint fumes. Everywhere. But at that moment, I didn’t really care anymore.
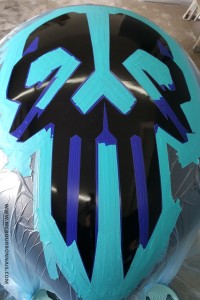
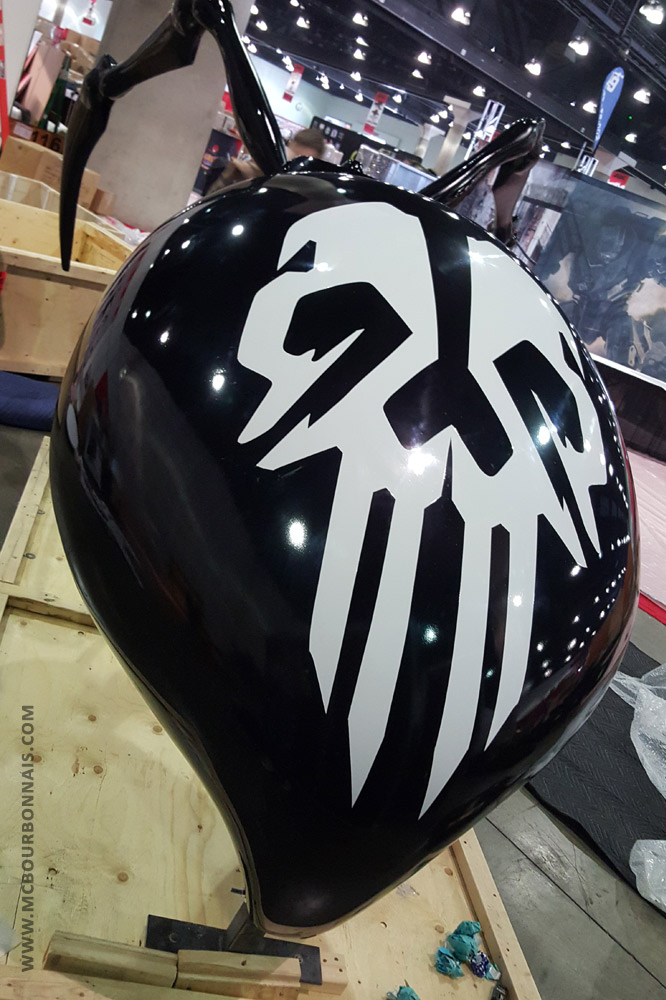
Last step was to paint the white skull on the back of Rachnera’s body. Truth is that the assembled spider was so tall that we couldn’t see its back. Which means that nobody could see the white skull, and probably that nobody at Anime Expo noticed that it was there. But we wanted to make things right, so we used the last hours we had to prepare and paint the skull pattern.
And that’s me with my sexy suit, using my archaic spray gun.
While the white paint was drying, the truck coming for the spider arrived in front of the workshop. We were not able to take off the masking tape, the paint didn’t have the time to dry. The spider’s body was already fixed to the bottom of the transportation box and we quickly built the box around the body while the trucker was waiting. It was June 20th 2016. Anime Expo would start on July 1st. They needed 10 days for the exportation process. Remember that this spider had to cross the border between Canada and the USA… We could only hope that the paint would dry in the box and that 10 days later, before the beginning of Anime Expo, we would be able to remove the masking tape without any trouble. I said goodbye to my spider… and realized that I still had a costume to make. :S But let’s focus on the spider. The body in one box, the legs in another box. Goodbye, Rachnera. See you in LA!

We landed in LA on June 29th, had a good night of sleep and woke up early to start assembling Rachnera at Ninja Division’s booth. I was relieved to see that we were able to remove all the masking tape and that the skull looked good, even if nobody would ever really see it. Here’s a picture taken during the assembling process. Notice how the back of the spider is still screwed to the bottom of the transportation box. It was useful to keep the body from moving in the box during the transportation and to make the assembling process doable by only 3 persons. Everything had to hold as much as possible by itself. That mechanism was a brilliant idea.
Just for fun, I climbed on the transportation boxes and took that picture to have at least one picture where I could see the assembled spider with the white skull on its back.

And finally!

Rachnera existed for the time of a convention. Yes, I suffered on my fiberglass spider shaped chair, but it was totally worth it. Will I ever build another 10 feet tall fiberglass robot? No. Will I ever build another thing like the spider? Maybe. I said maybe, don’t get excited too fast! But one thing is for sure, I’m happy we finished everything on time! And I’m happy that people enjoyed it. :) Plus, I had the honor to meet Okayado, the writer and illustrator of the manga Monster Musume, who knew I was building Rachnera and who had been sharing my work in progress pics on his Twitter account all along the project. What more could I ask for? I hope you enjoyed reading this blog, that the professionals won’t think I did too many mistakes explaining what I had just learn in the process of working with fiberglass and automotive paint and that the fans will remember Rachnera as an incredible piece that once existed for real. :)

Prints of my Rachnera cosplay are available on my store. Thanks for your support! :)
I’ve loved reading this whole blog, its been very helpful!!! Im planning on making my own Rachnera cosplay (not quite as large, I still want to be able to walk around) and will definitely be using some of your tips about forming the body. I had never even thought about fiberglass! It turned out spectacular and I look forward to reading more!
Thanks for your comment and good luck with your project! :D Don’t hesitate to send me pics when your cosplay will be ready!
Hola! I’ve been following your blog for a long time now and finally got the bravery to go ahead and give you a shout out from Atascocita Tx! Just wanted to tell you keep up the great work!
Yay, another ‘making of’ blog! I’ve been looking forward to the continuation. Thanks for taking the time to write these!
It’s kinda crazy how much work you and your friend had to do without any formal training, and cutting so close to the deadline! I’m so happy for you that everything came out great. :)
Now that you remodeled your workshop, are you able to safely do big paint jobs now?
Amazing work as always, I’m glad you found the time to continue the making of blogs, I really enjoy reading how you create your projects.