
Making of Ninja Division’s Lug for Gen Con 2015 – Part 2
Here it is! Part 2 of Lug’s Making of blog! I’m so excited about this blog that I’ve been wanting to write for so long! And things are about to get exciting too because we reached a point where the robot started to look like… a robot! lol
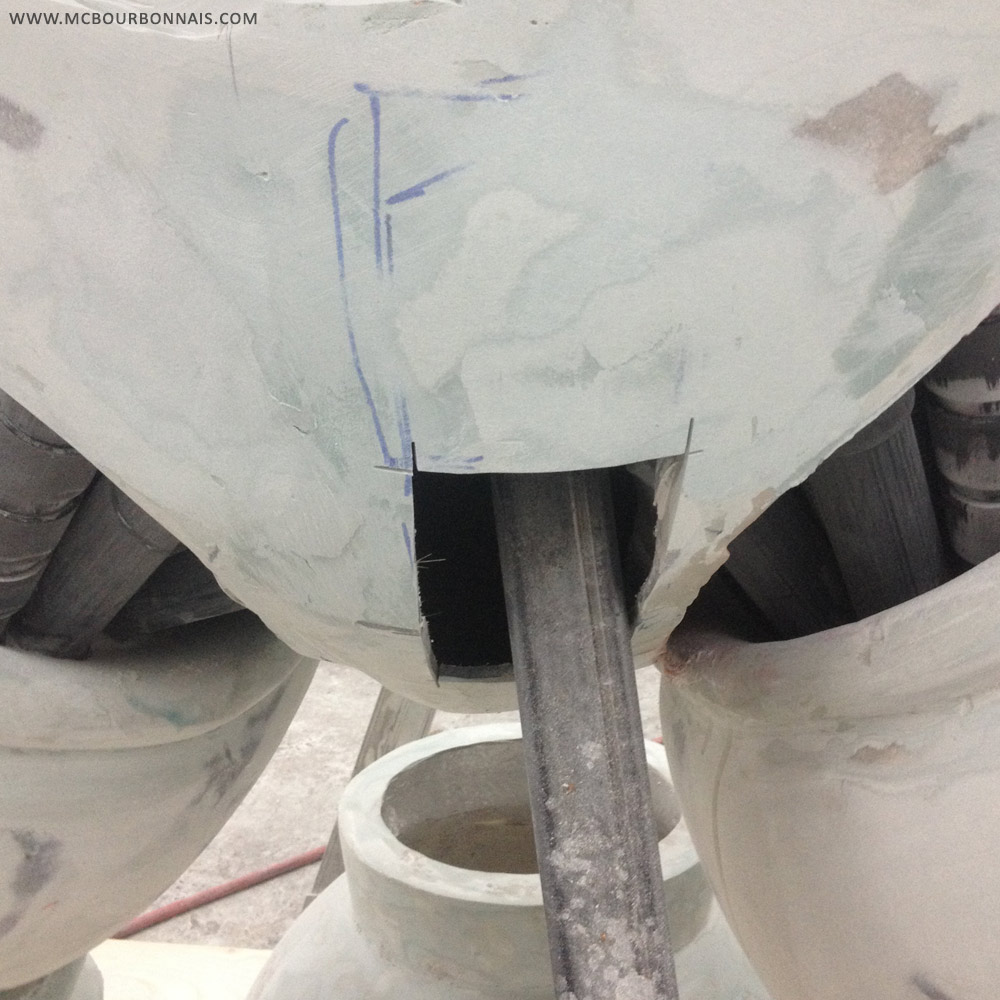
I mentioned in Part 1 how this robot had a design that was obviously not meant to be built in real. With a very large upper body holding on small legs, we were expecting to have some problems. We had already started at that point inserting inside the fiberglass pieces a metallic structure that would hold the pieces together and that would make the robot stable. But we were afraid that 2 metallic square tubings hidden inside the robot’s legs and welded to a metallic base might not be enough to make the robot stable. The robot would sure be very stable if you’d try to push on its side to make it move from left to right. Nothing could happen. But what if someone would push on the front or back of the robot? Could it kind of slightly ‘balance’ with all that weight from the upper body? It appeared to us that we had no other choice than adding a third metallic tubing coming out from the back of the robot to form a triangle with the 2 other tubings hidden in the legs. We pierced a whole with a buffer into the robot’s butt and my friend’s brother welded that extra third support. This is probably one of fiberglass only advantages, with the fact that it’s cheap. You can make holes in a fiberglass object and patch it and with some bodyfiler and proper sanding, the patch will never show off once painted. On the next pics, you can see the robot standing on the 3 metallic tubings that were welded to its ‘skeleton’ and welded to the rectangular base on the floor.
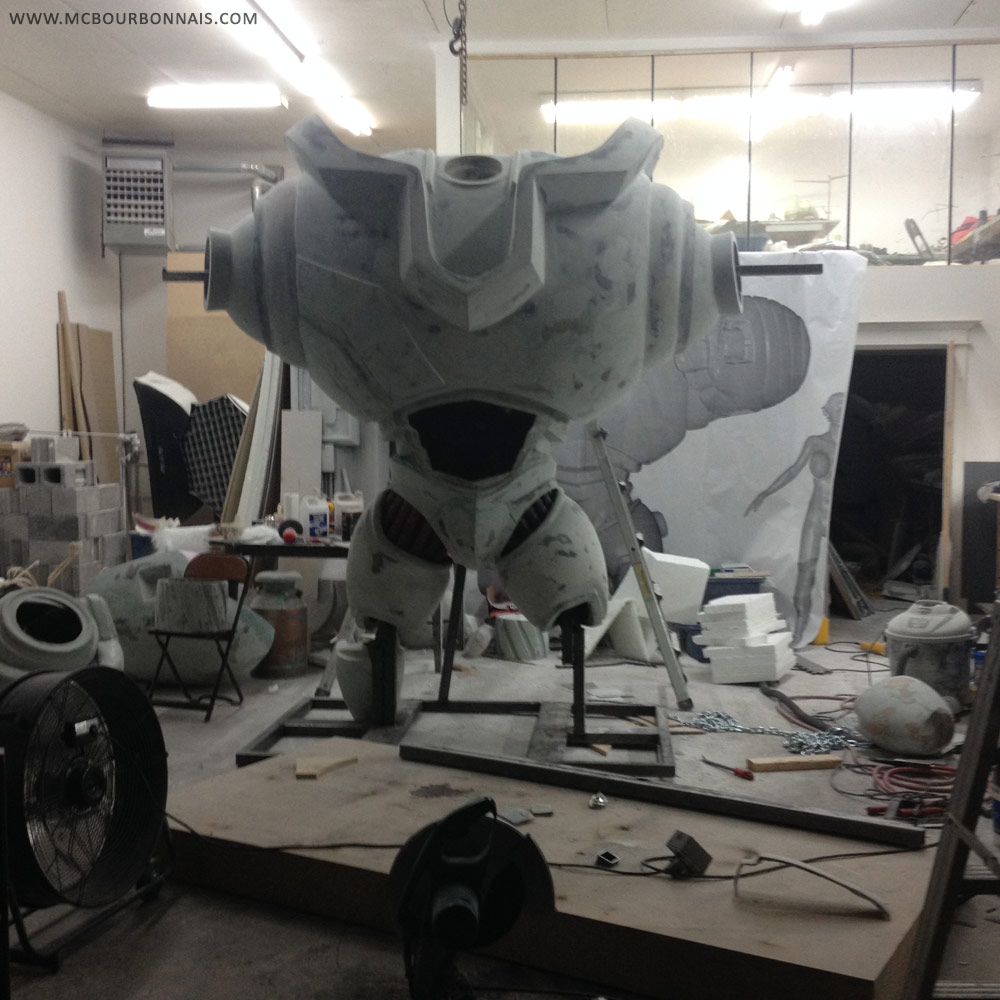
Then on the next pic, we had started fitting the robot’s knees and calves pieces around the metallic tubing.
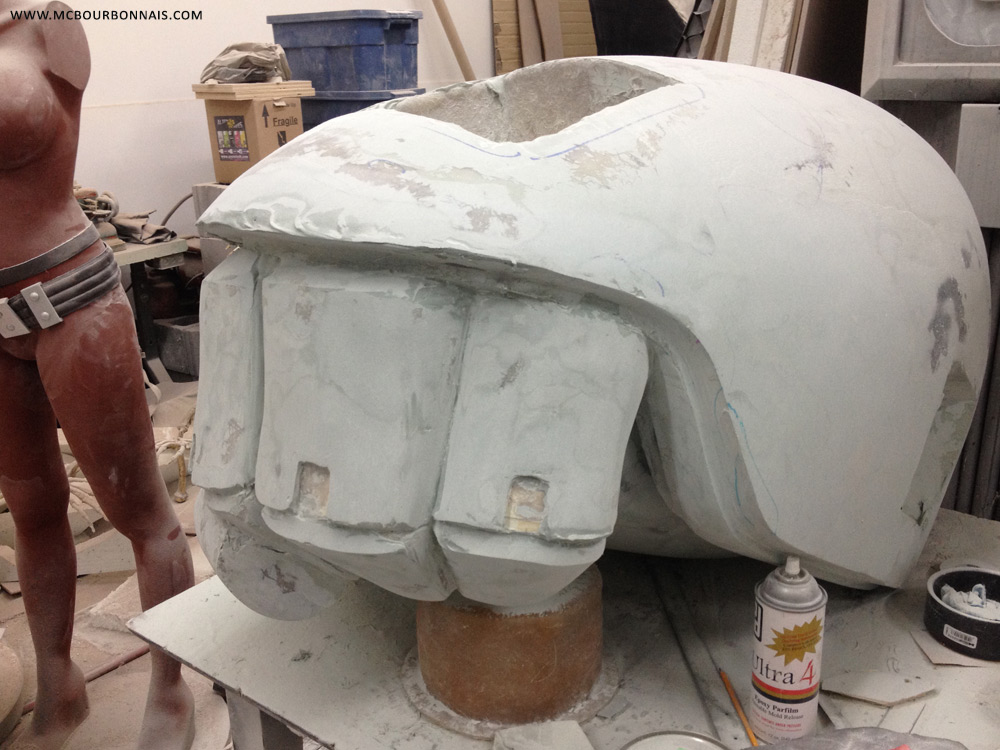
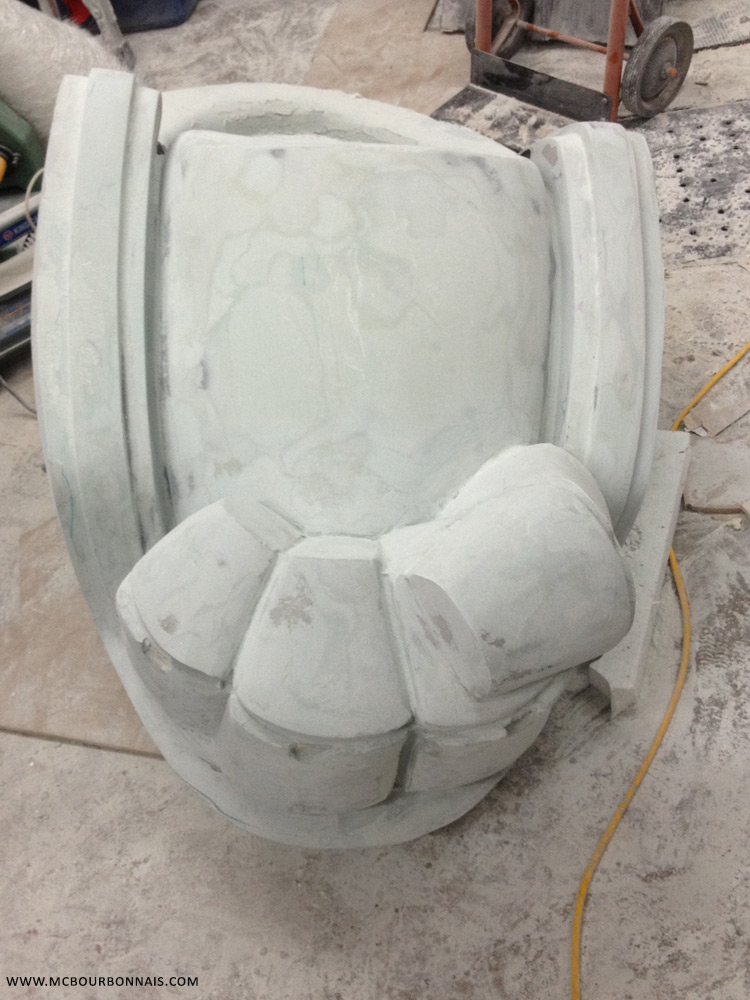
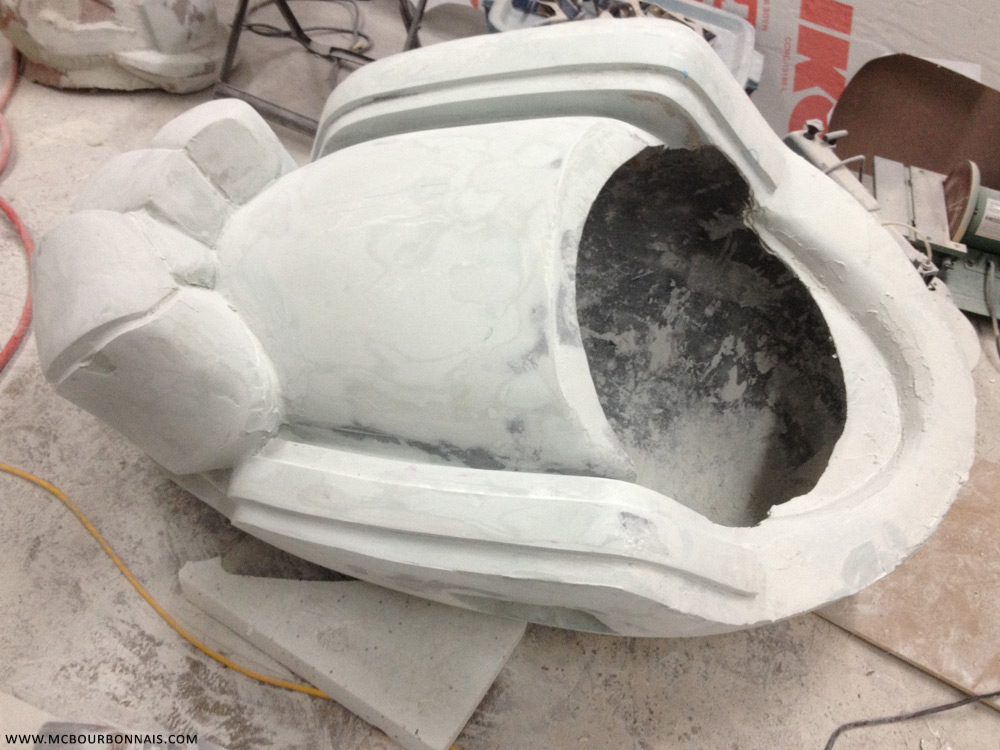
Now let’s talk about a small, but very important piece: the robot’s head. It was too small to be built using the same 2 inches thick styrene sheets that we had used for all the other body parts. So we used 1/8 inch thick masonite sheets. My friend sliced the 3D model of the robot’s head using that same software, 123D Make. Many, many shapes of slices that we printed on paper, glued on the masonite sheets and cut with a band saw. Then we stacked all the slices together to form a very heavy head that we sanded and molded. On the next pics, you can see the original head made with the masonite slices once it was sanded and painted with primer, ready to be molded. The second pic is the inside of the silicone mold.

And here’s the fiberglass casted head placed on top of a styrene neck that we would later also cover with fiberglass.
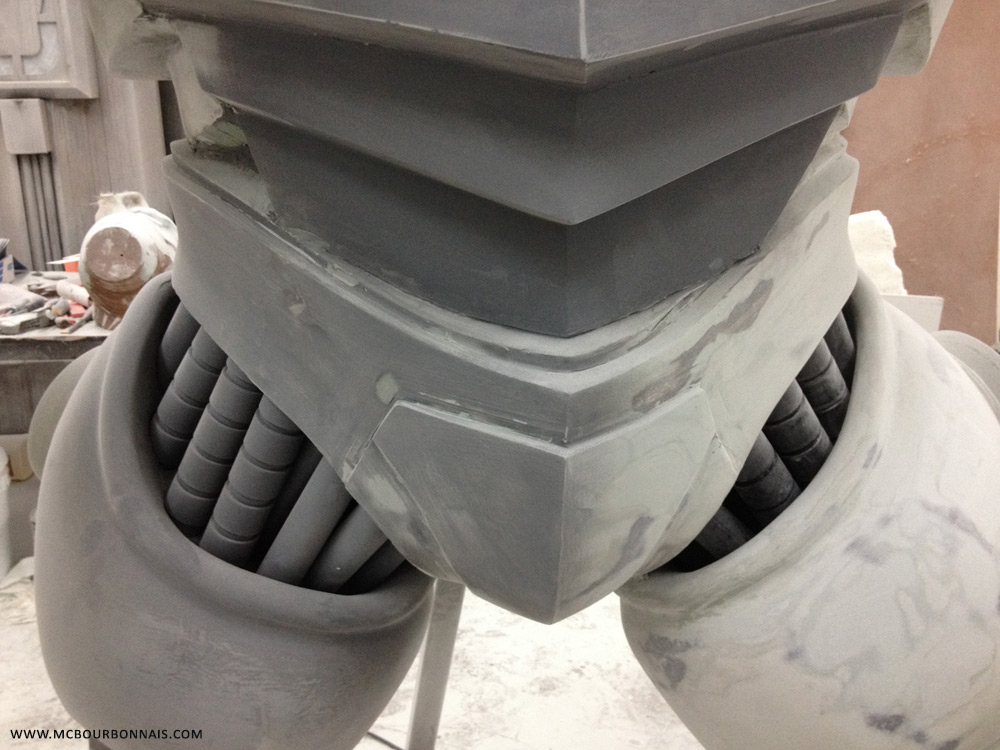
At that point, we had started doing finishing sanding on some of the robot’s pieces, while other pieces still needed a lot of work. Since we built the robot in separate pieces that needed to be assembled, it added a lot of work to the whole process. Everywhere you add fiberglass mat to hold 2 pieces together, you need more bodyfiller and more sanding.
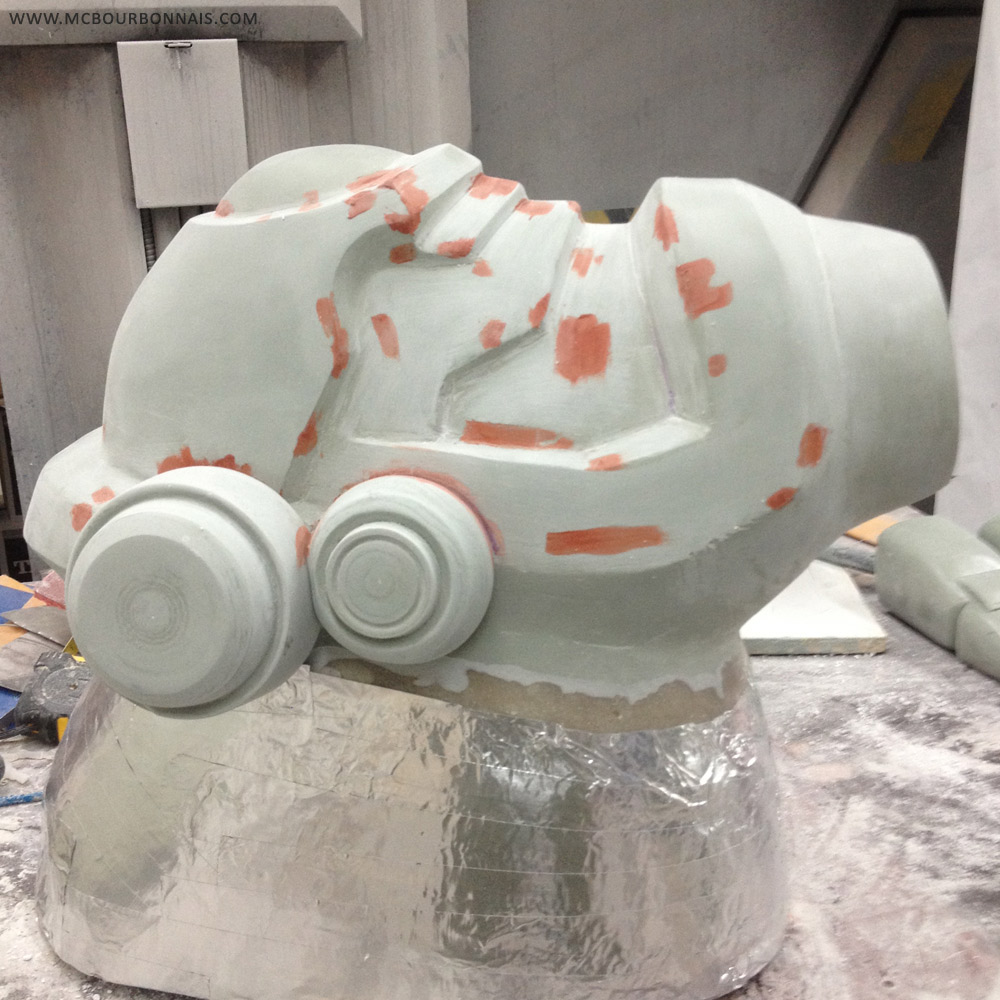
Here’s a closeup of the torso. The green bodyfiller was a finer one to do finishing sanding. By the way, there are many different colors of bodyfiller hardeners, so you could see different fiberglass projects around showing different colors of bodyfiller. It depends on the brands. By the end of this project, I was pretty tired of seeing shades of blue, because my bodyfiller’s hardener was blue. Seeing that spot of green was surprisingly exciting for me!
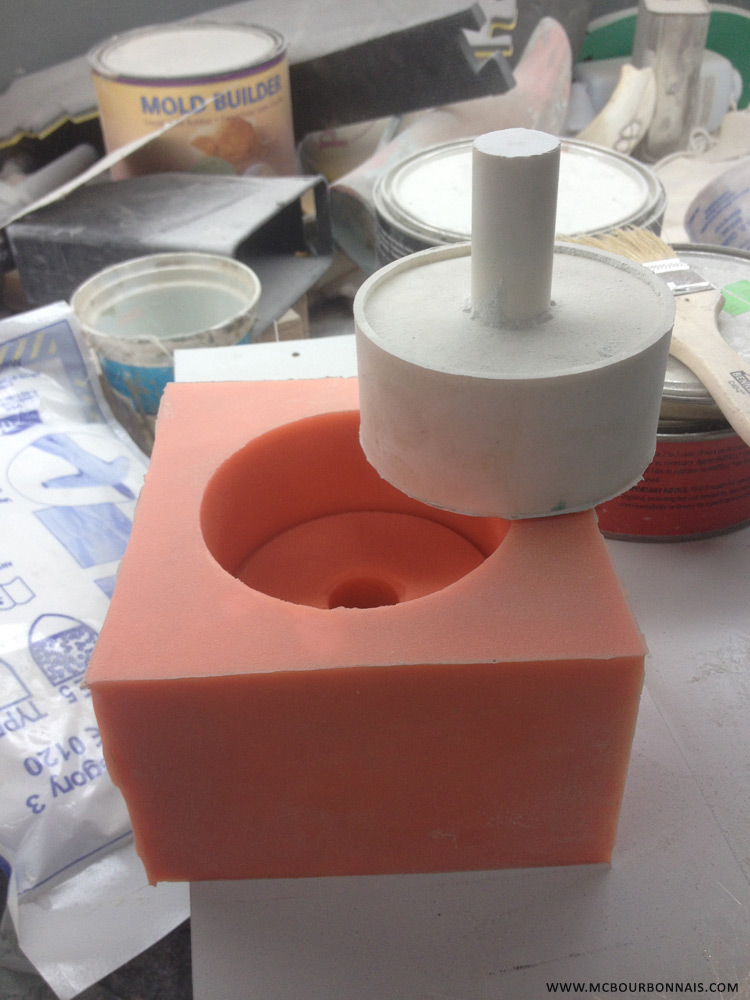
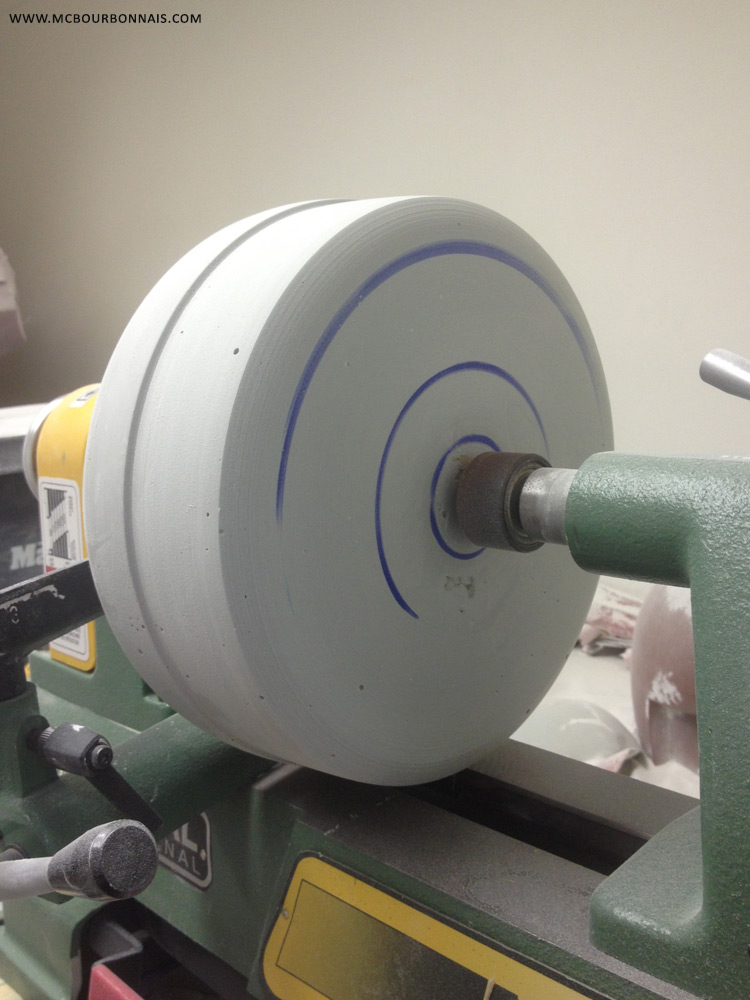
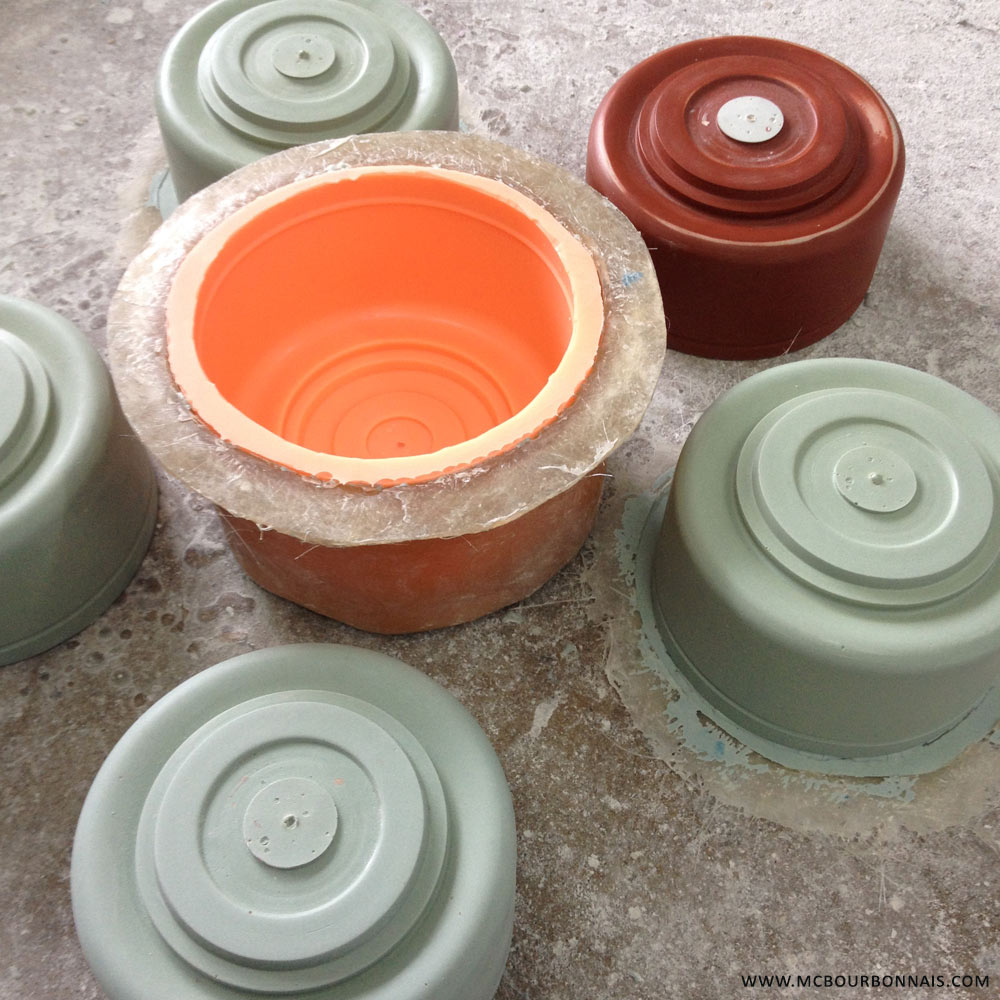
In the robot design, there was many cylinder shapes of various sizes. Instead of trying to sculpt them, we thought it would be easier to reach perfect shapes if these pieces were made on a lathe. This is when my friend had that genius idea that I would later use again in my costuming projects. He casted various Smooth-On Smooth-Cast cylinders and we realized that some of these products were very easy to sculpt on a wood lathe. Plus, they have a slick surface at the end, perfect to be molded! Here are some pics of the original casted Smooth-Cast block with a tip that can fit into my wood lathe, a block on the wood lathe ready for work, one of the silicone molds with its fiberglass shell and the final fiberglass casted pieces that we would add to the robot following the design.
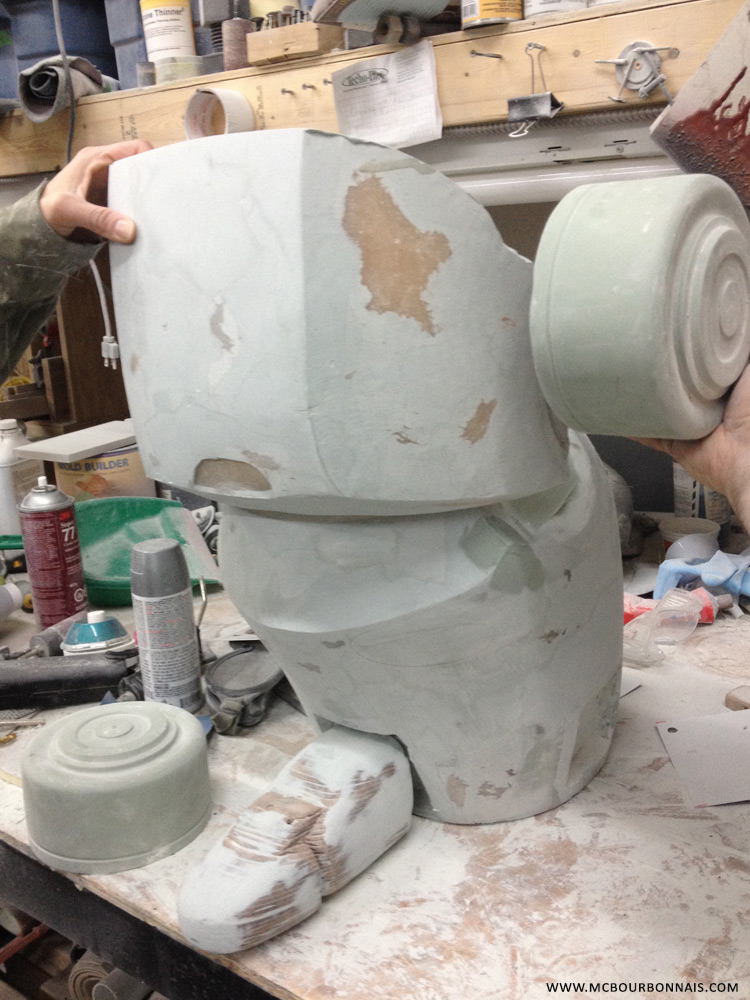
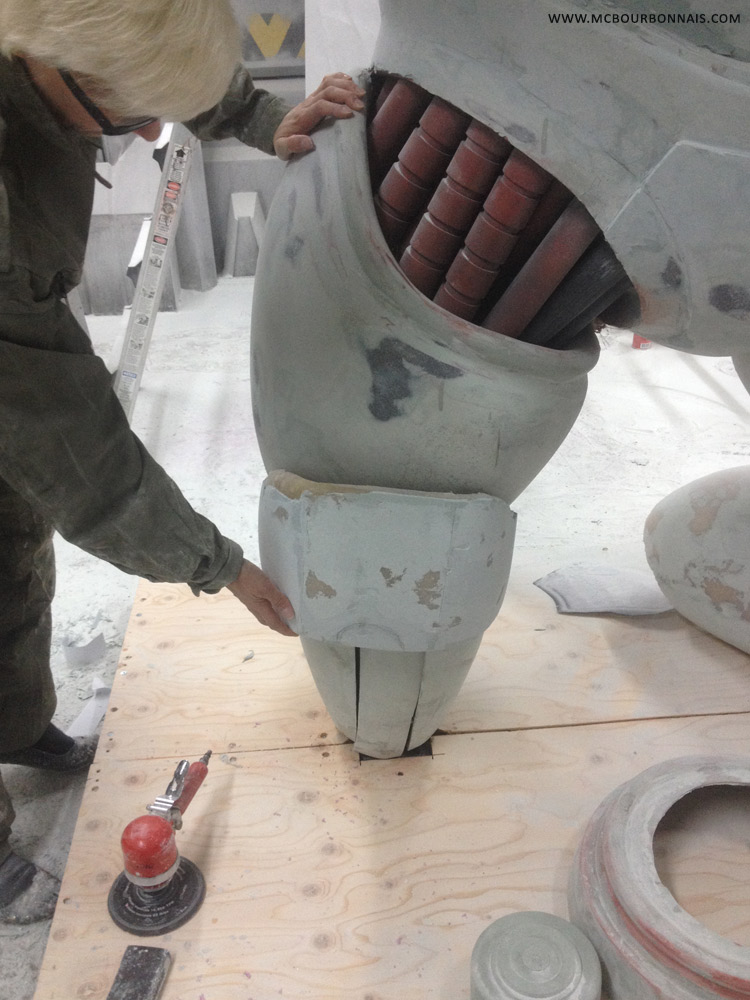
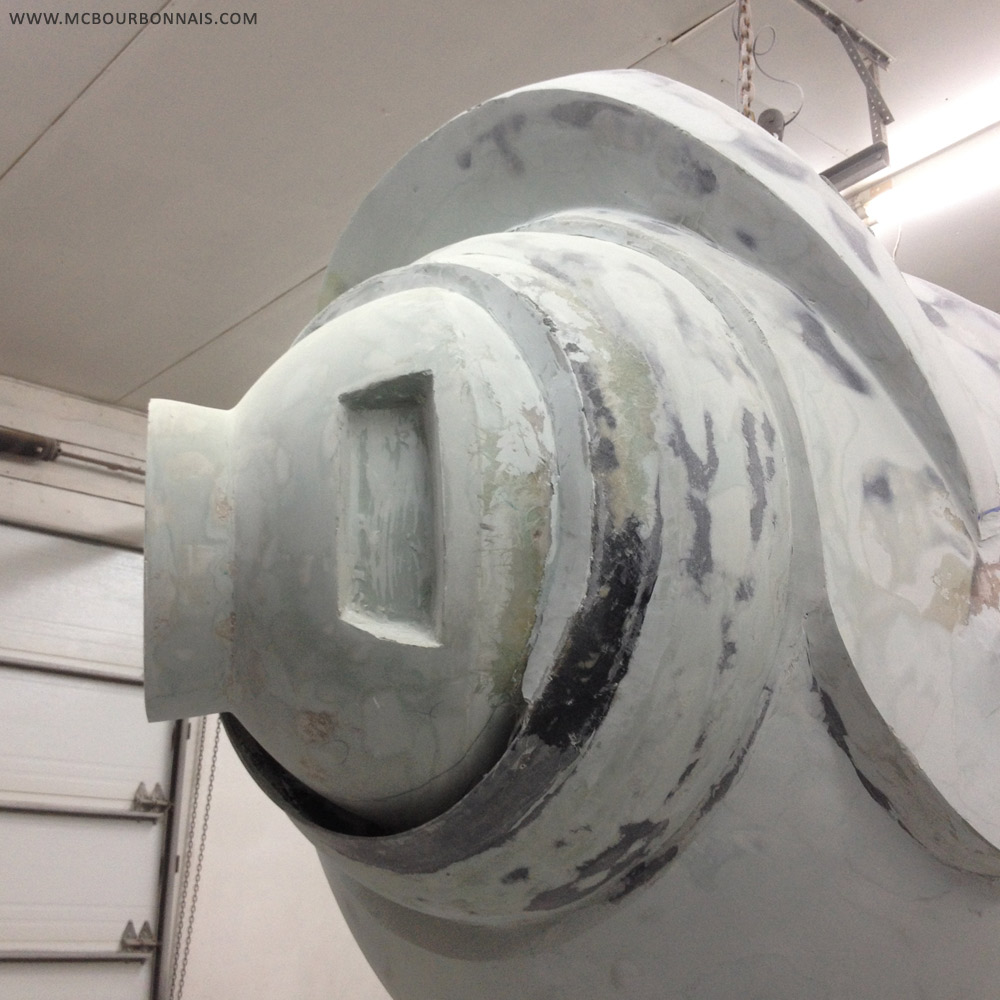
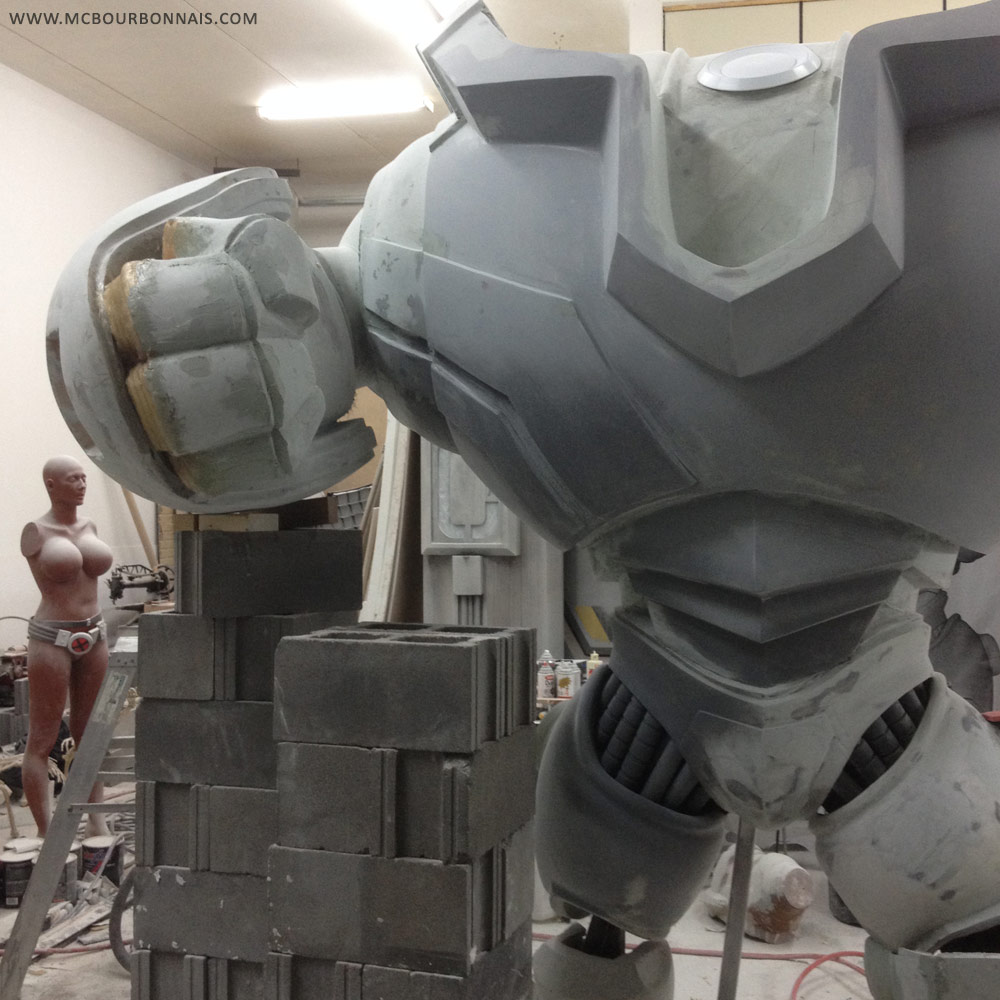
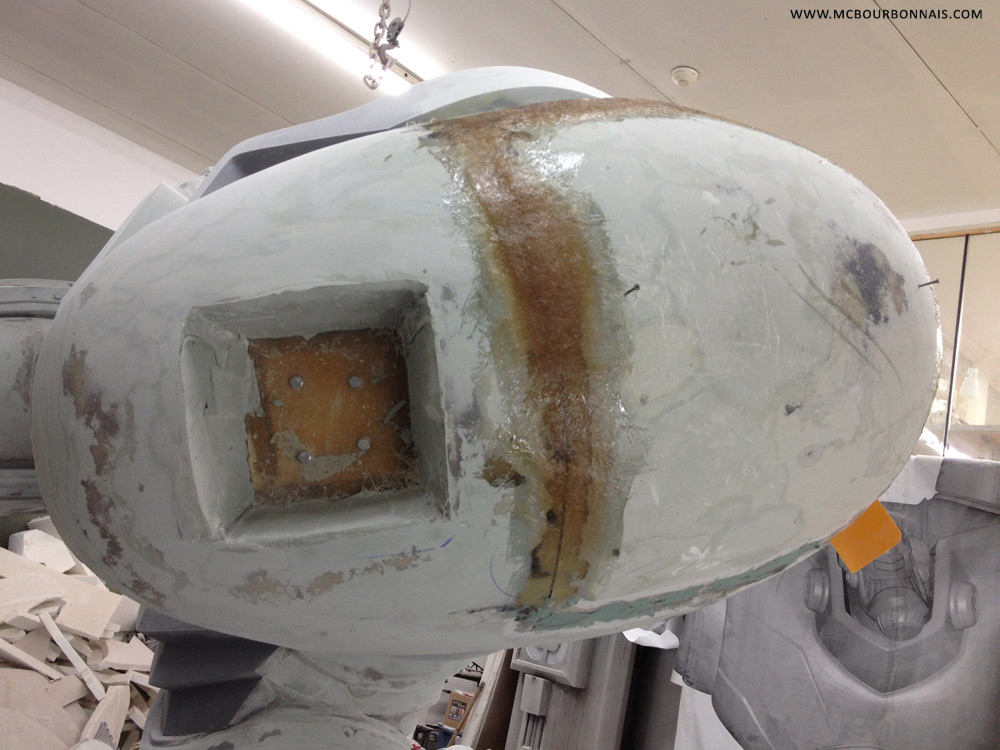
Lug’s huge forearms were a lot of work. A lot of sanding and a lot of thinking. These pieces were so heavy that they couldn’t obviously hold to the rest of the robot only with fiberglass. Polyester resin alone is weak. Cast a piece of polyester resine alone, drop it on the floor and it will break. That’s why we reinforce it with fiberglass mat or cloth. Fiberglass is strong, but it can still break. We knew that the weight of the forearms would certainly make the joins at the ‘shoulers’ break. Hey, we’re building a statue meant to decorate a booth in a convention, a statue so big that people will be able to walk under its arms. There’s no way I’m gonna be responsible of someone’s death because the arms of the robot I built broke and felt on someone’s head. So we had no choice but inserting more metallic support inside the forearms to weld them with the metallic core inside the robot’s torso.
Here are some closeups of the forearms and the way we held them in the air, using some interlocking blocks again. We placed the forearms in position to be able to insert and weld the metallic structure in them.
A view from the side. Again, we had to do a surgery to our robot, cutting a huge hole in its forearms to have enough room to insert and weld a metallic structure inside. By chance we had my friend’s brother. He’s a very good welder and he was able to figure out a way to make this unconventional project work. Many welders are only able to weld simple shapes on a flat table. For the robot, my friend’s brother had to find solutions to put together pieces in different angles, welding in different positions, definitely not an easy job. Anybody who knows welding will look at this and see how complicated it was. And yet, it worked. It’s certainly not the fanciest welding job you’ll get to see in your life, but it was properly made welding and it was strong. That’s all we needed.
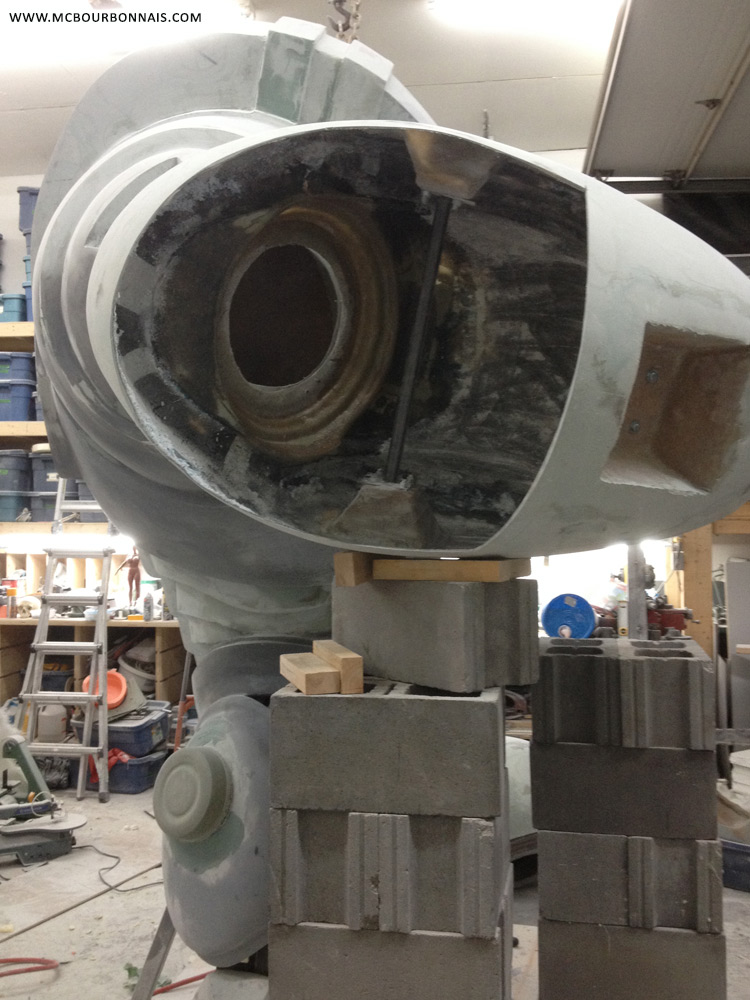


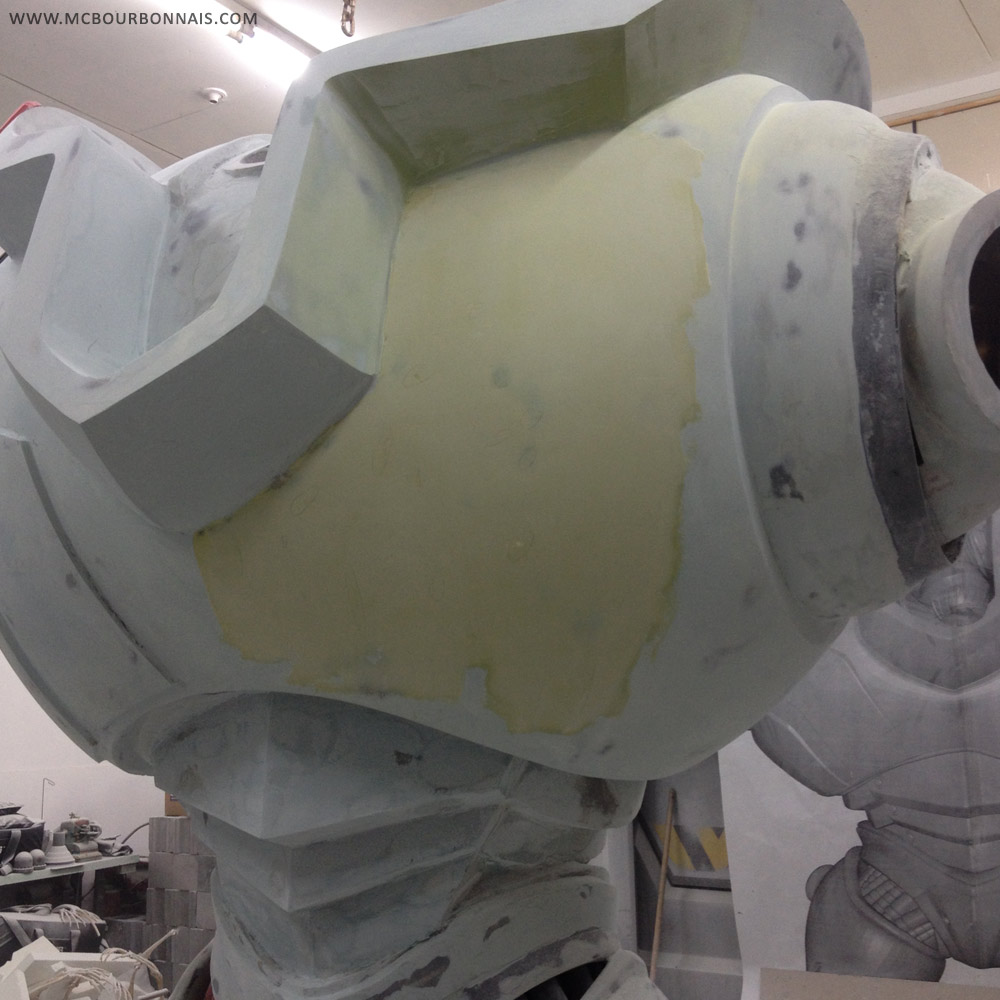
Now you can see how we patched the hole in the forearms using fiberglass mat. To avoid creating extra thickness around the piece, where the join is, we used a buffer to sand down around the hole and around the piece, creating some room to put the extra fiberglass mat. The join has to be even. At the end, you don’t want to see or feel it under the paint.
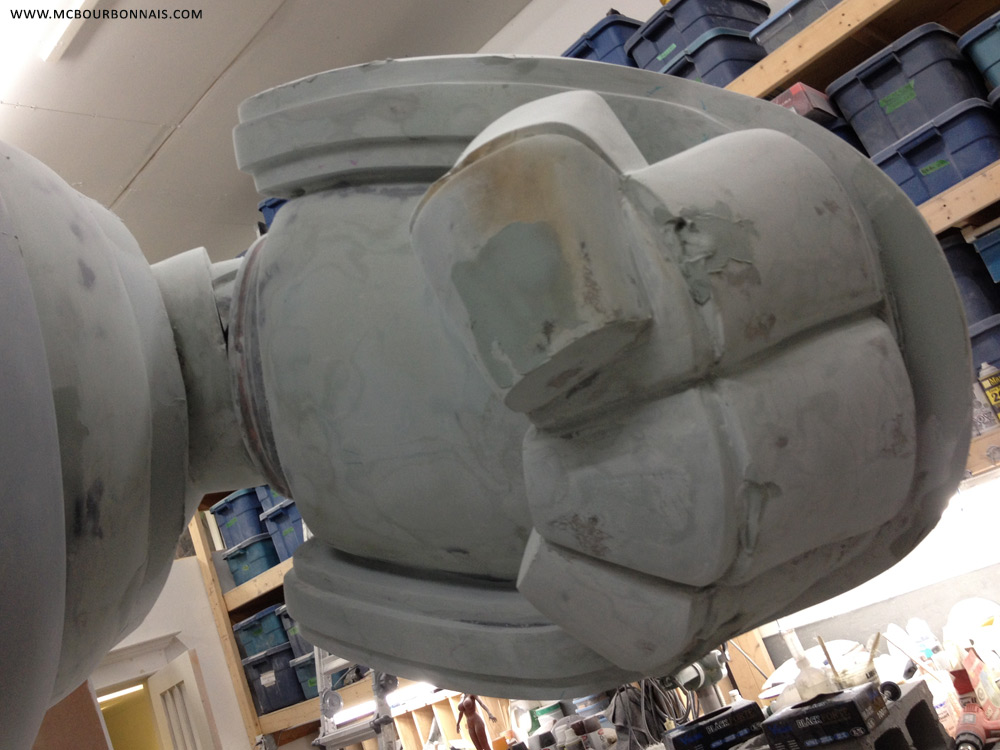
More closeups of the forearms once they were installed and a closeup of our robot’s belly, which was also a lot of work. We had to do the same type of ‘surgery’ on its abdomen, cutting a hole to weld the metallic structure inside and patching the whole thing. I remember that we sanded that part a lot. We sanded everything a lot.

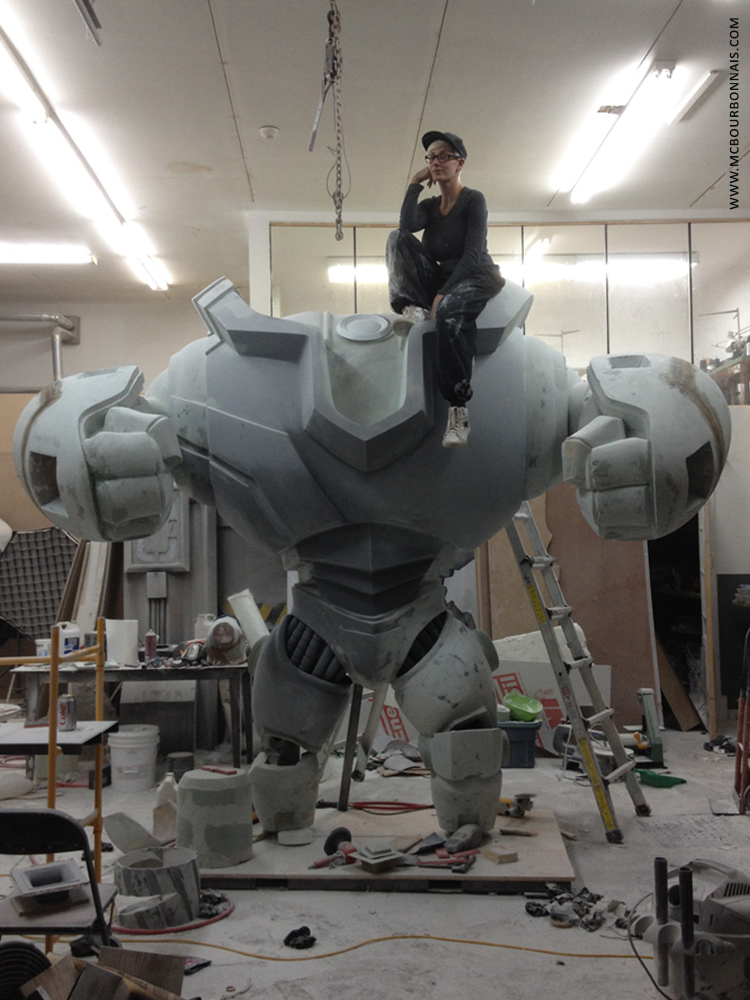
And all of a sudden, with its arms on, our huge robot became gigantic. It was so large! We had created a monster! It was during summer, since Gen Con in August was coming up, and we were working with the garage door of the workshop open. Everybody in the industrial park would stop by to see what was that giant thing standing in the middle of the workshop. Lug was a superstar, being taken in pictures even before he arrived in convention! lol
We were actually supposed to deliver Lug in May or June, I don’t remember anymore, for a first convention that Soda Pop Miniatures wanted to attend. Then they wanted to bring Lug to a second convention in July and finally bring it to Gen Con in August. We were never able to finish Lug on time for the 2 first conventions. We were very sorry to keep Soda Pop Miniatures from taking advantage of this statue for 2 conventions, but we were working day and night. We couldn’t go faster. Then I received a phone call from one of the people in charge at Soda Pop Miniatures saying that they really, really needed to have Lug for Gen Con, no matter what. And I totally understood the idea. I wanted more than anything to finish Lug on time for Gen Con. ‘Can you give me another budget so I could hire people to help us building Lug?’ I asked. They couldn’t. I couldn’t afford to hire people to work with me either. ‘I’ll try to find volunteers’ I said. And this is the first making of picture that I posted on my social medias in 2015, finally sharing with the world what I had been working on for months, asking if someone, somewhere, would be willing to come to the workshop and help me working on the robot for free so we would finish it on time for Gen Con.
You already know that we managed to deliver Lug on timfor Gen Con… but if you want to know how we did it, don’t miss Part 3 of my Making Of blog! :D
I can’t remember noticing the 3rd support beam in the picture so I’m glad it didn’t detract from the overall statue. It’s still amazing how massive the robot is and made only by two people (and some friends heh). All the pieces really came together, and the detail on them is great.