
Jujutsu Kaisen Nobara Kugisaki Cosplay
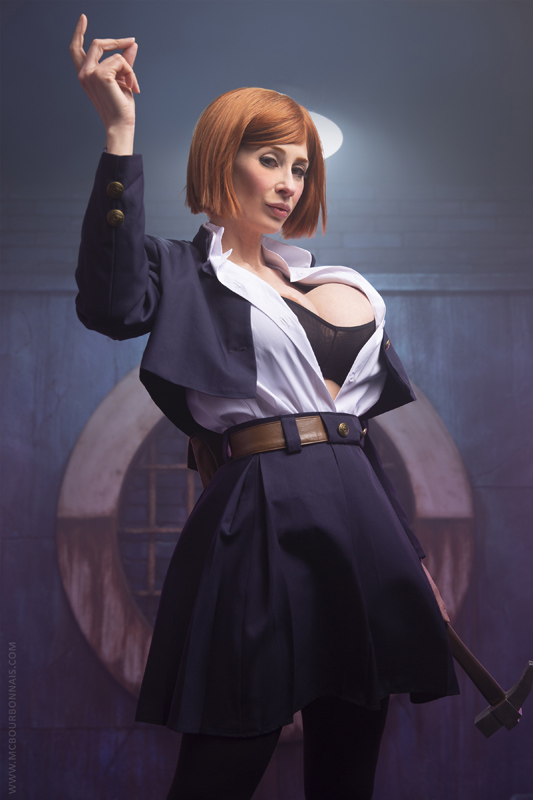
Here it is, the 2nd biggest cosplay photoset I built after my ‘Evil Boner’ photoset… a Jujutsu Kaisen photoset! Directly inspired by a scene from the anime, this set required months of work! :D


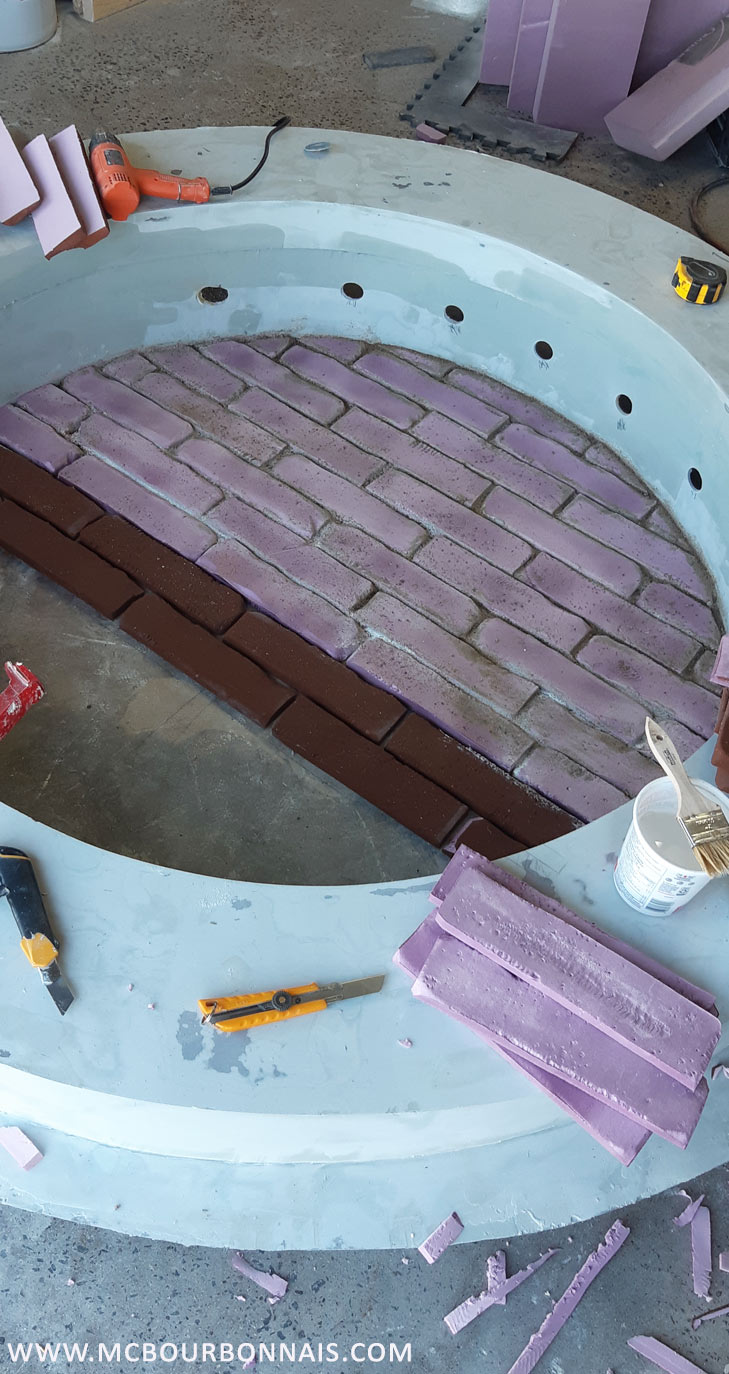
It all started with polystyrene bricks I had made for another project. I realized how easy it was to work with polystyrene insulating boards to make fake bricks or fake stones. And I decided to make a full wall (and even a floor) using those polystyrene insulating boards.
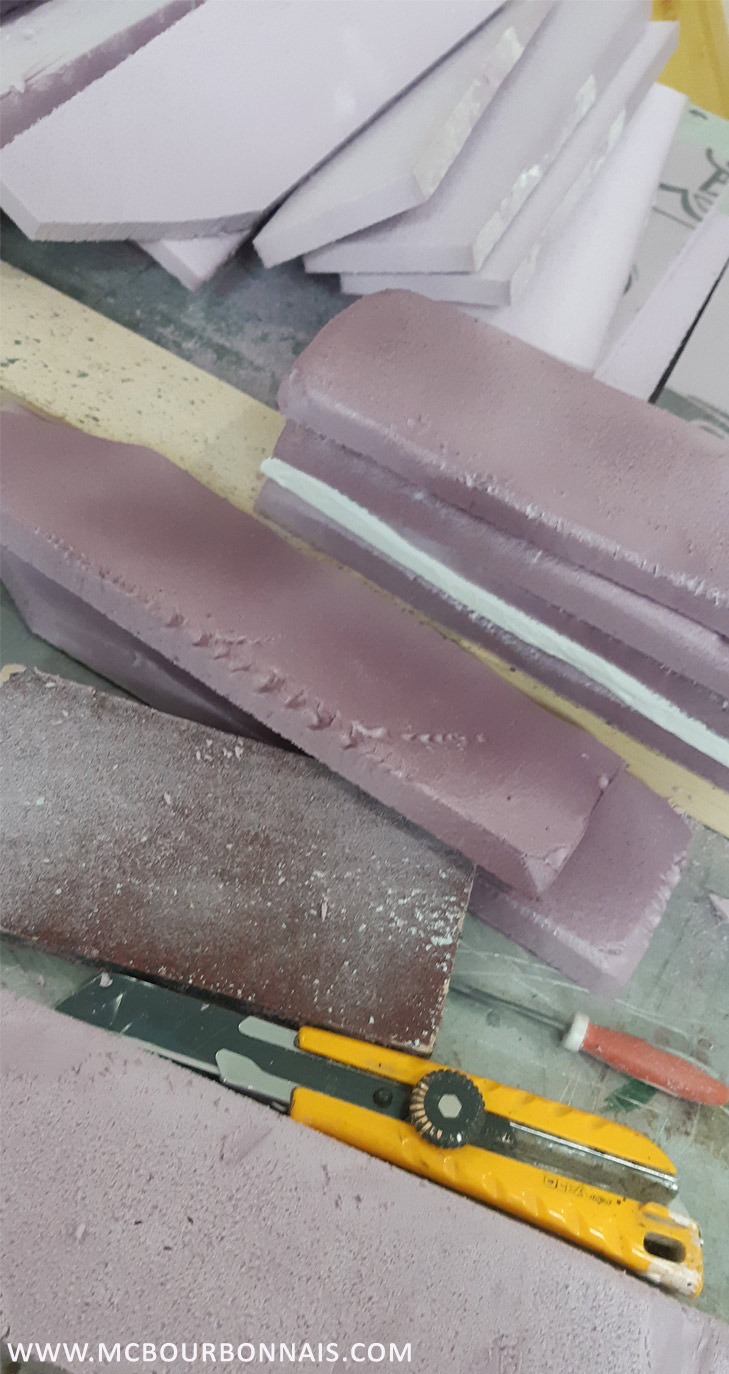
Each brick was cut one by one using a bandsaw. The brick texture was made using sanding paper, various cutting tools and a heat gun.

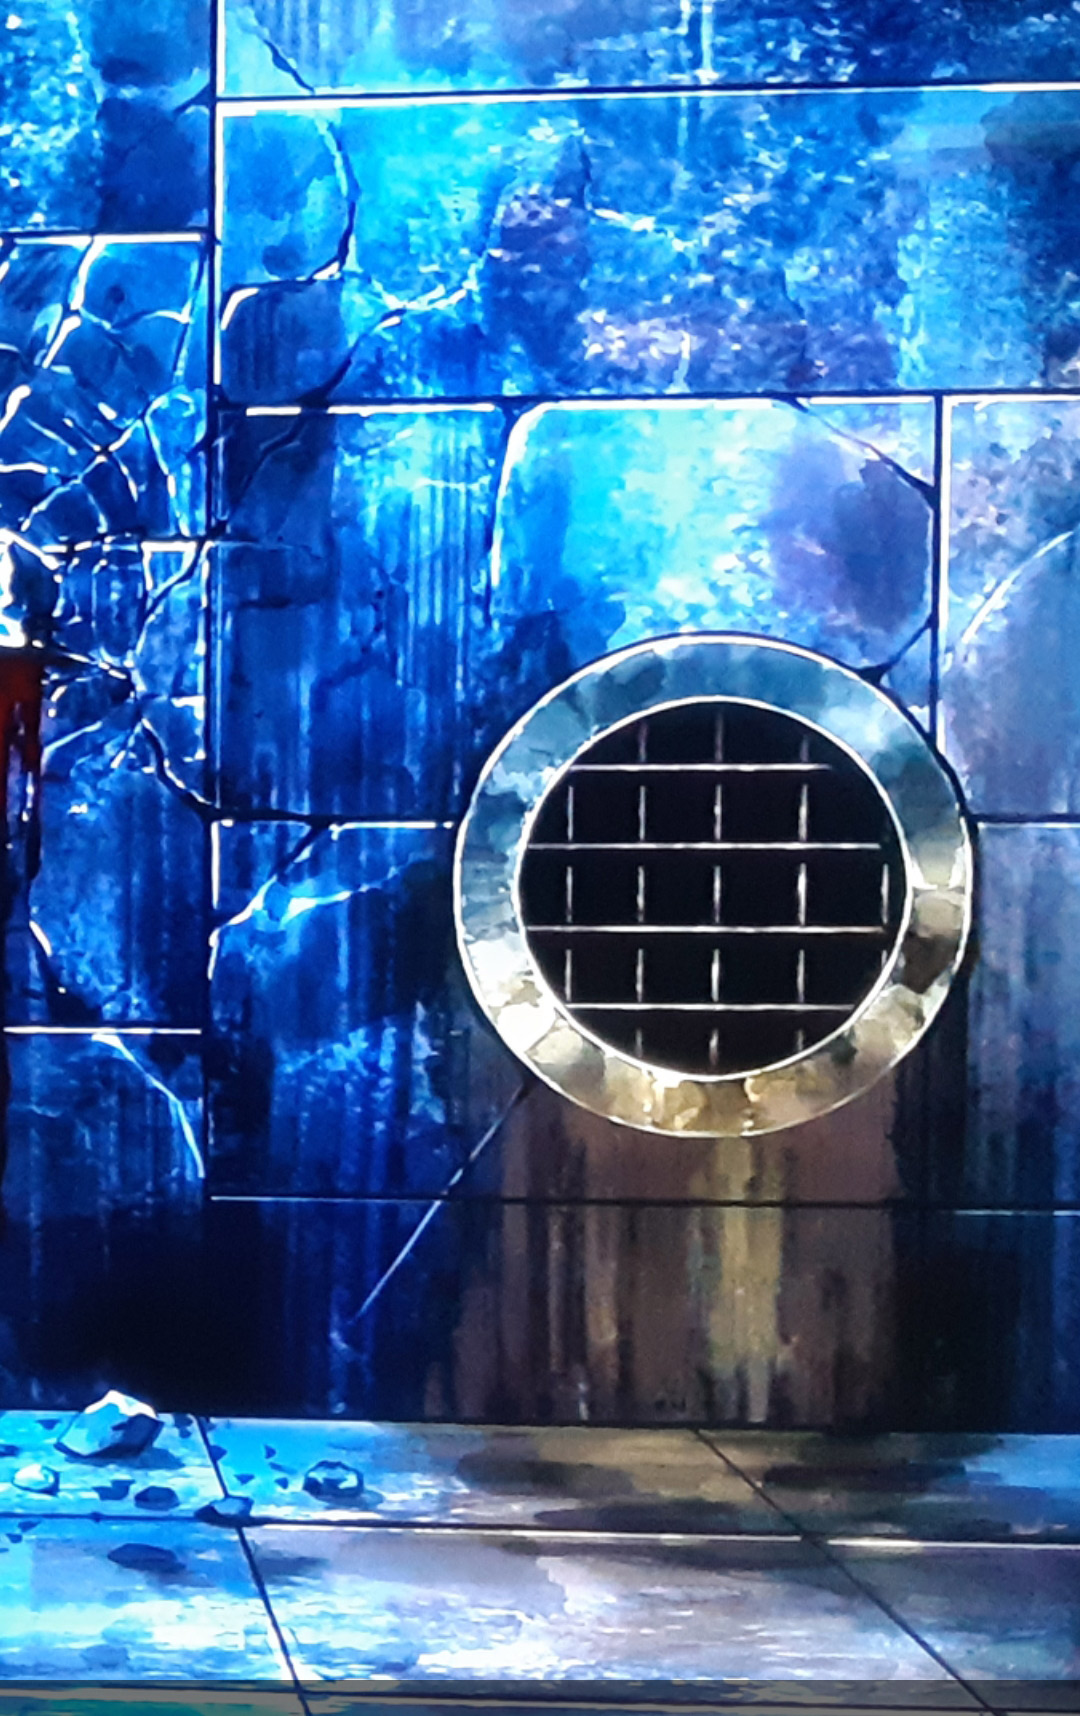
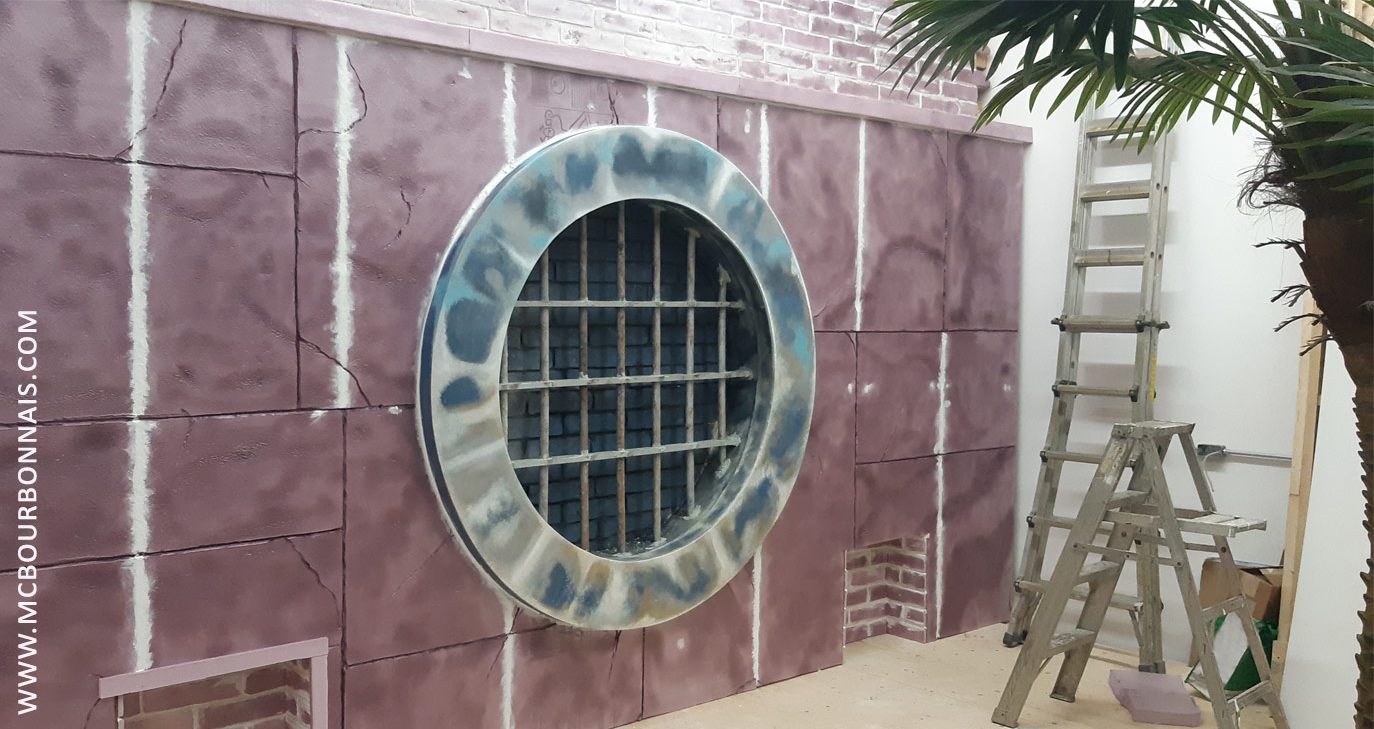
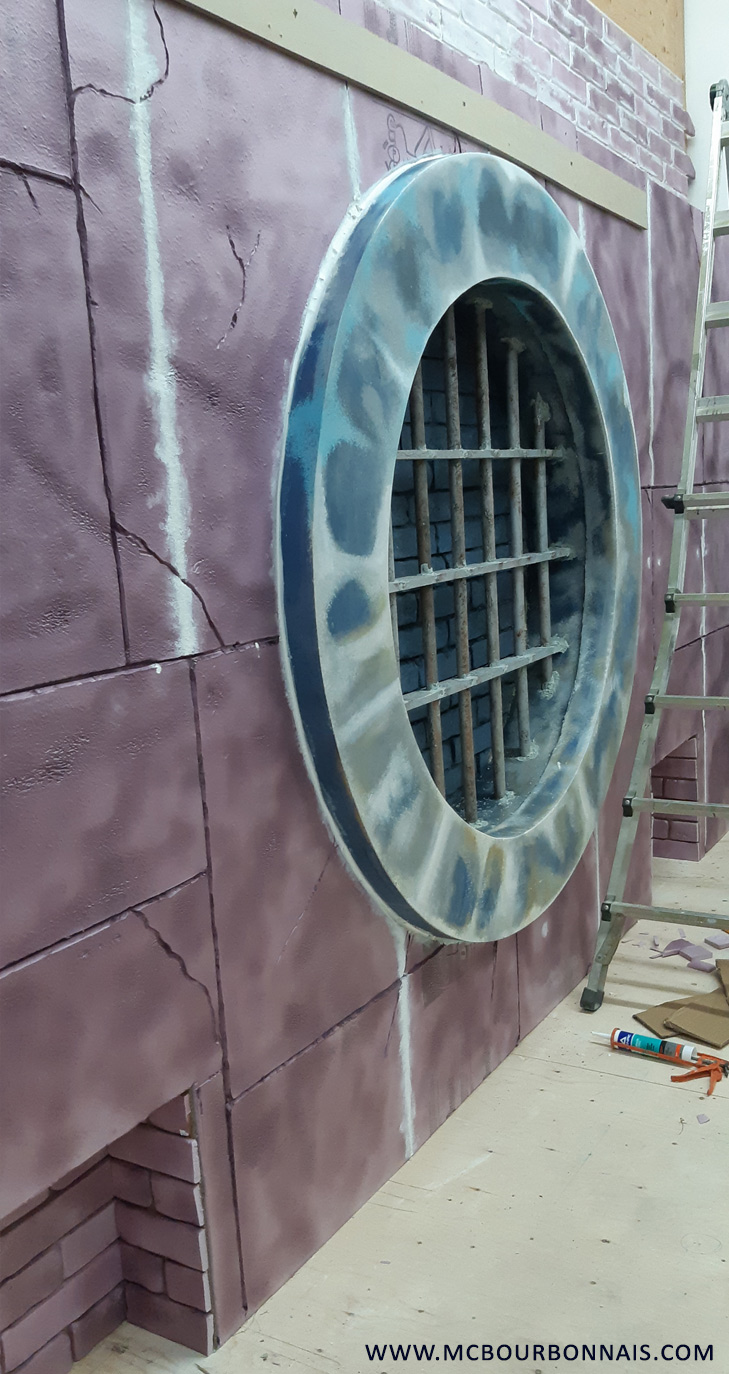
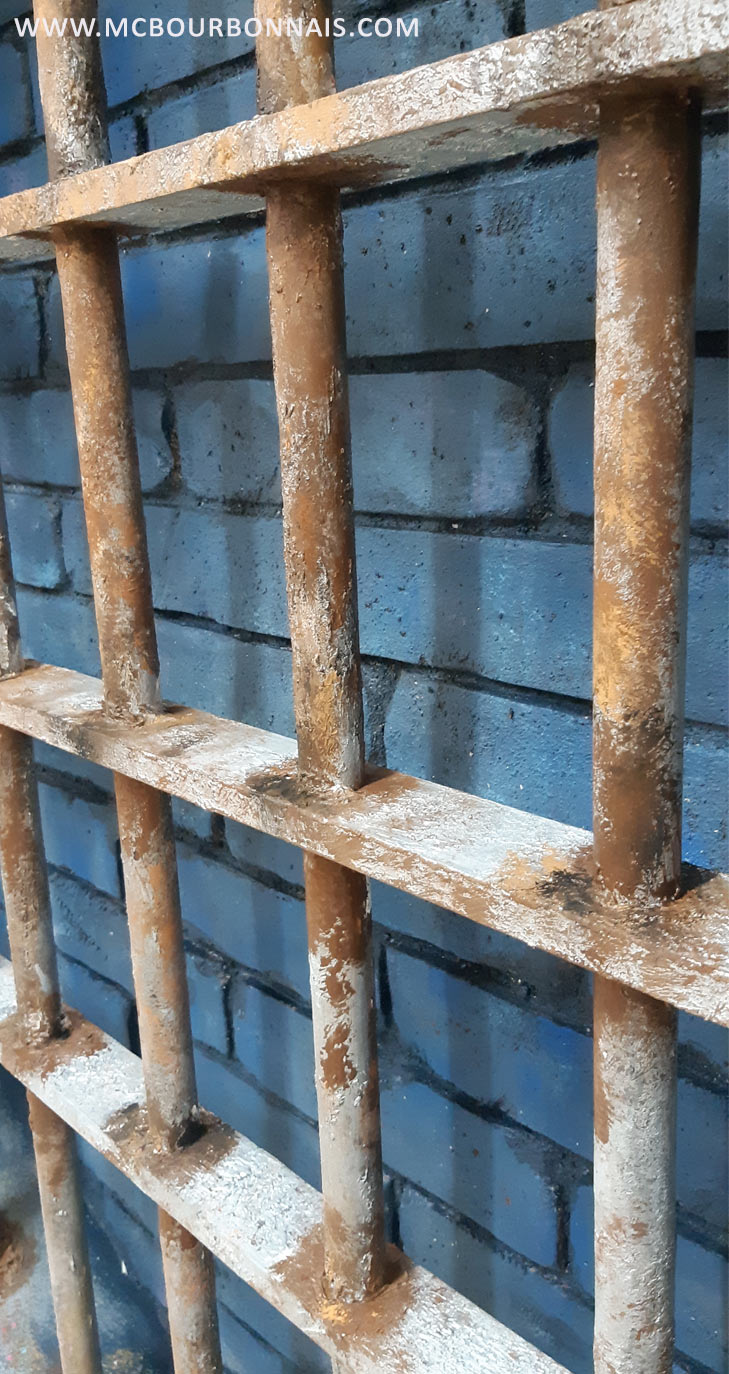
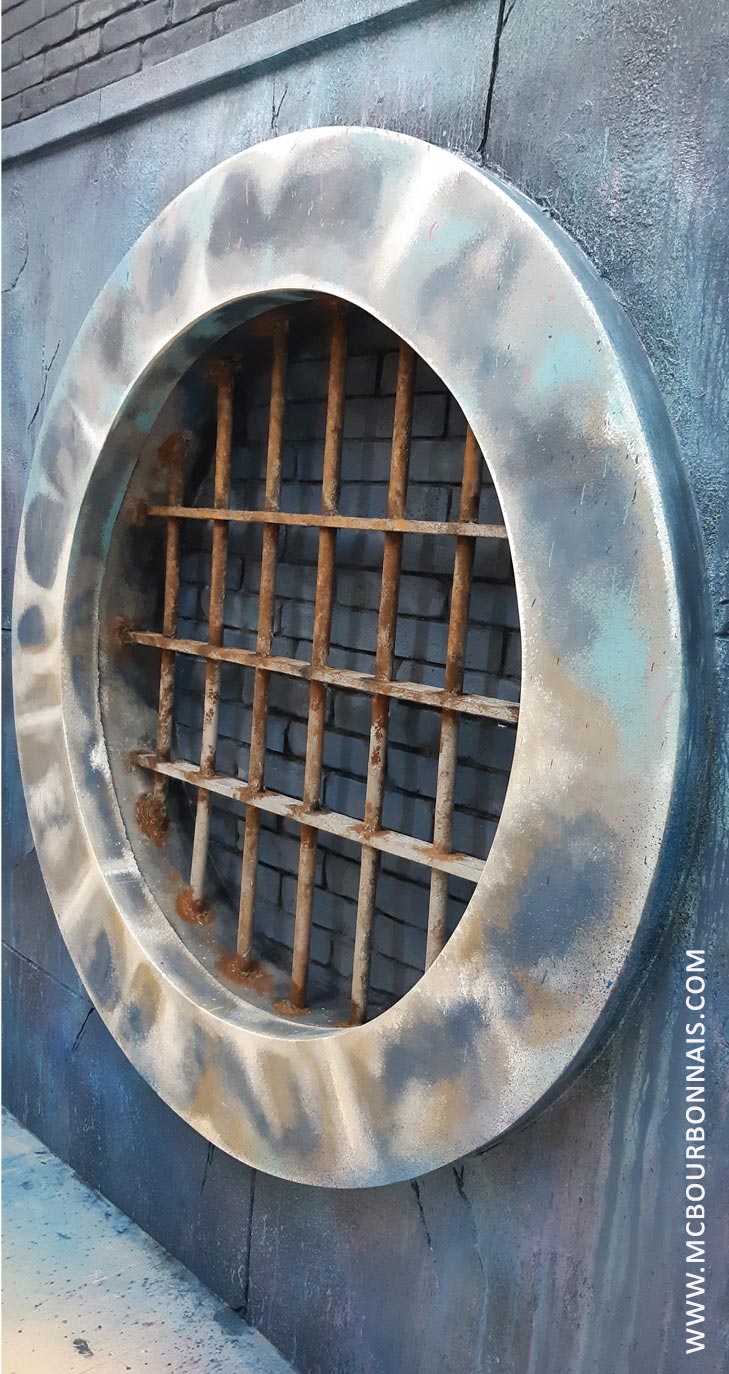
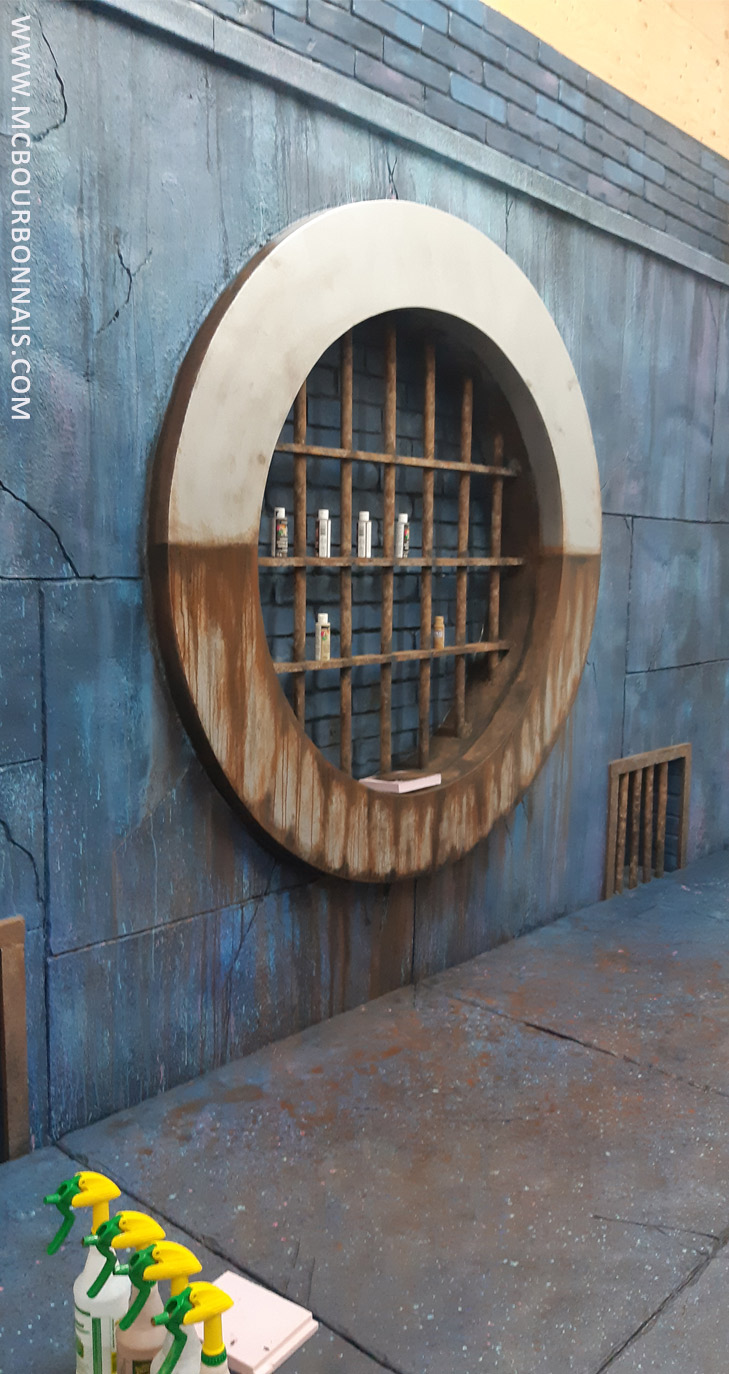
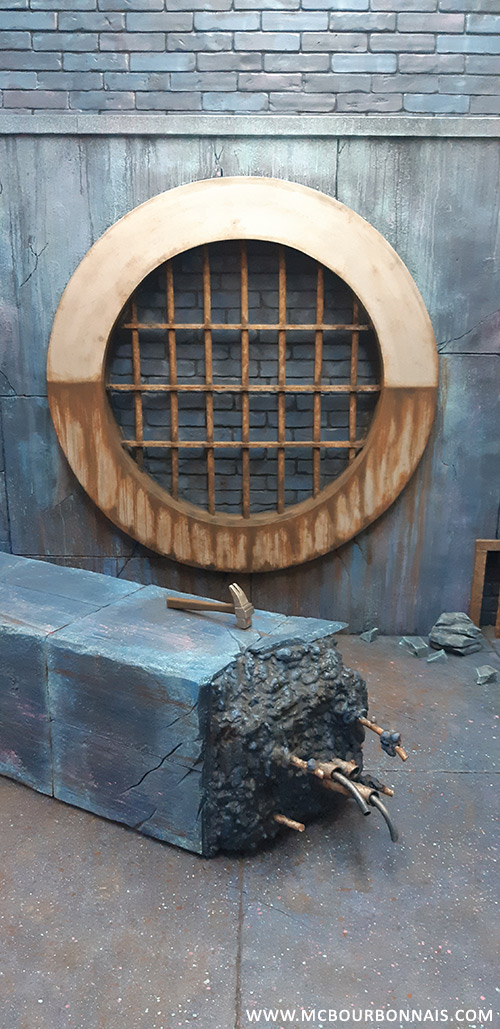
That sewer entrance or sewer gate was made using wooden dowels and fiberglass. The big ring is all made of fiberglass.
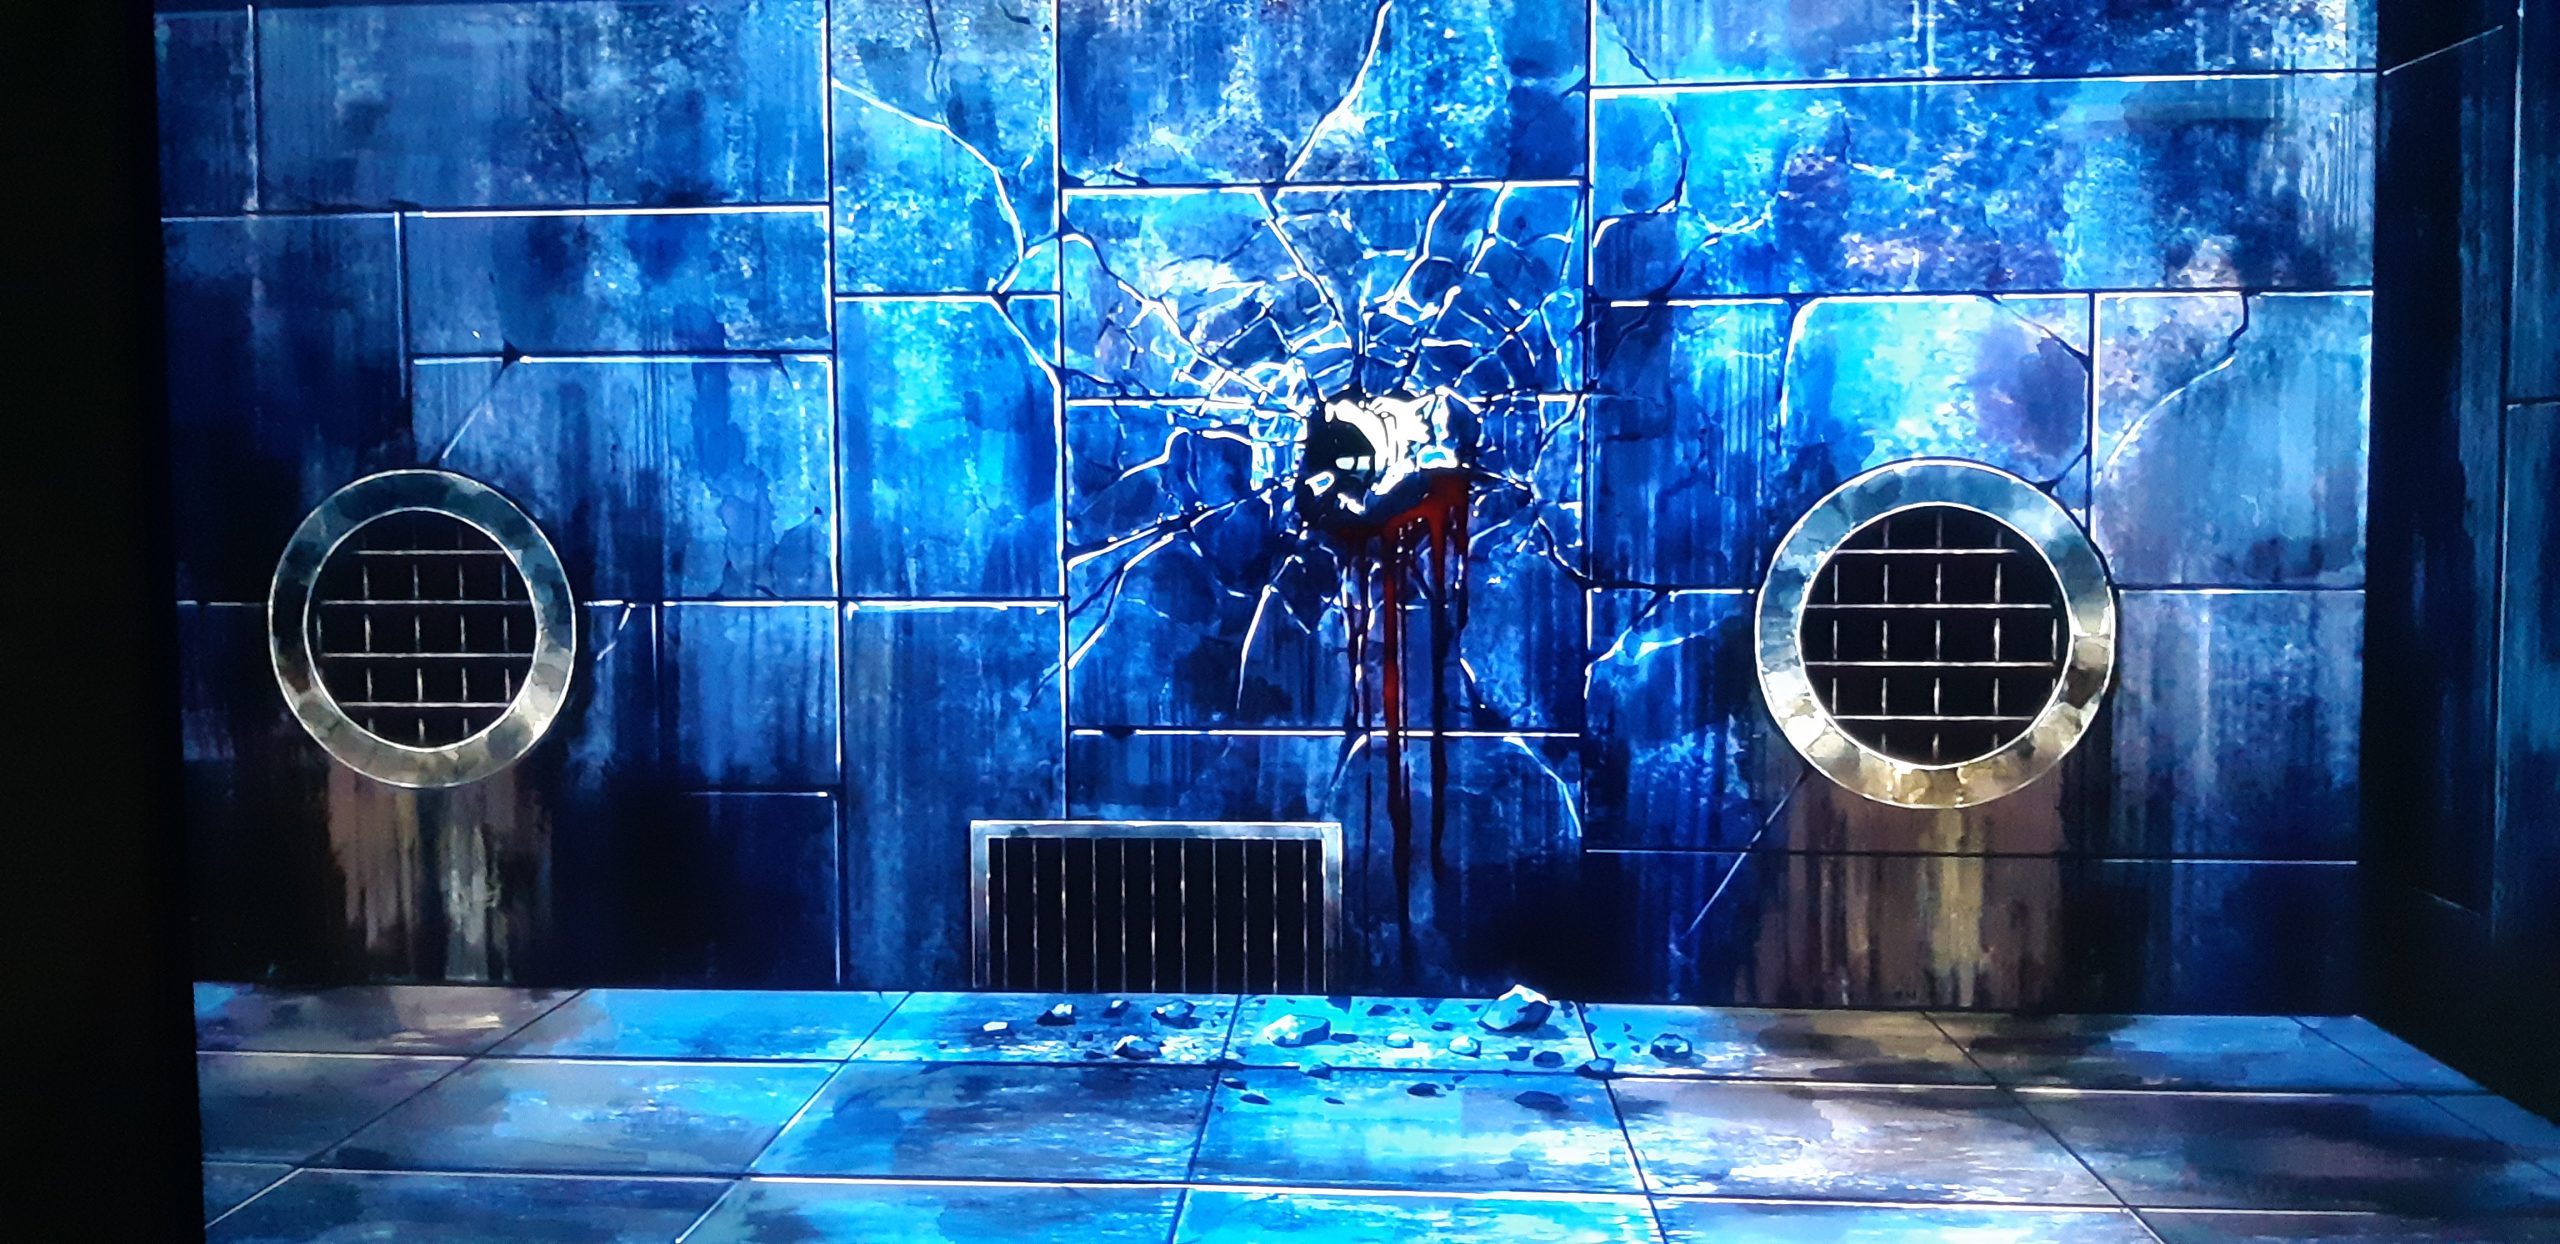
Then the sewer gate was installed in a support in the wall and the wall was covered with 4′ X 8′ polystyrene insulating boards.
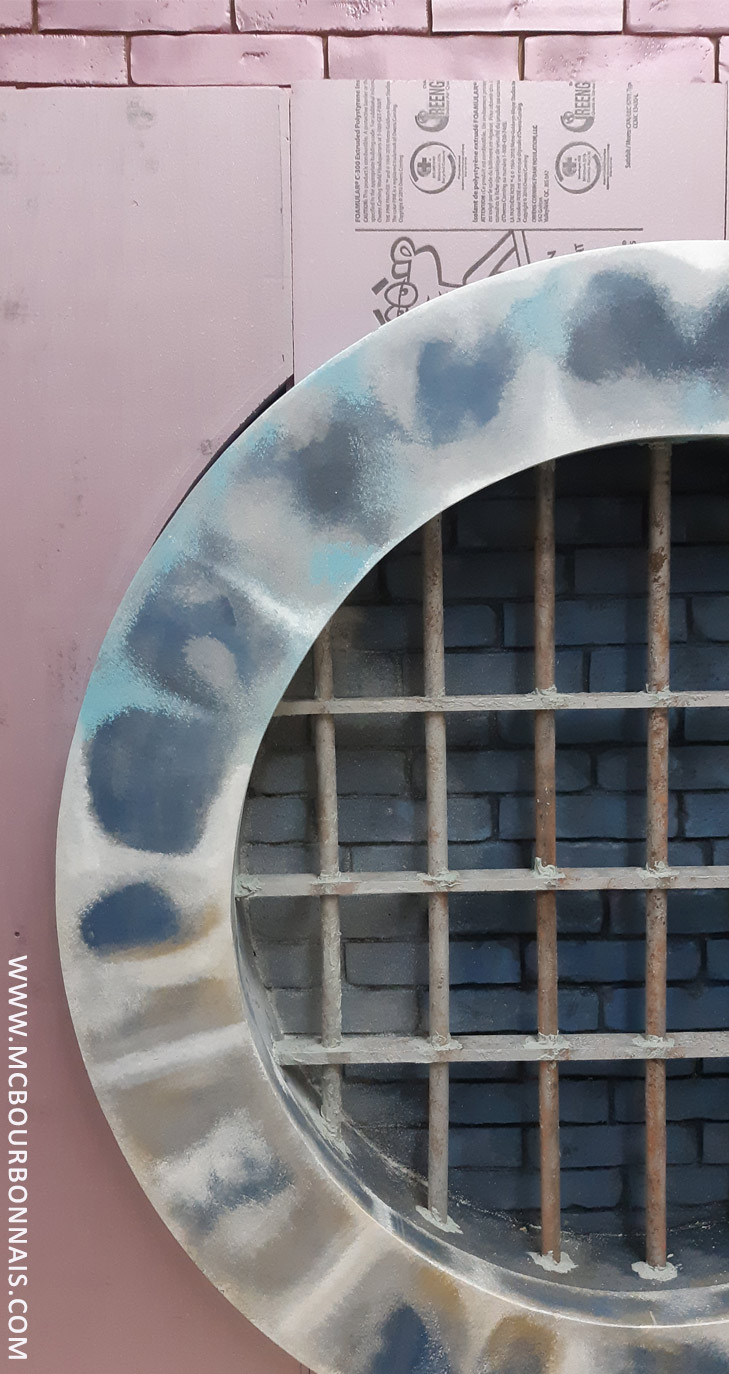
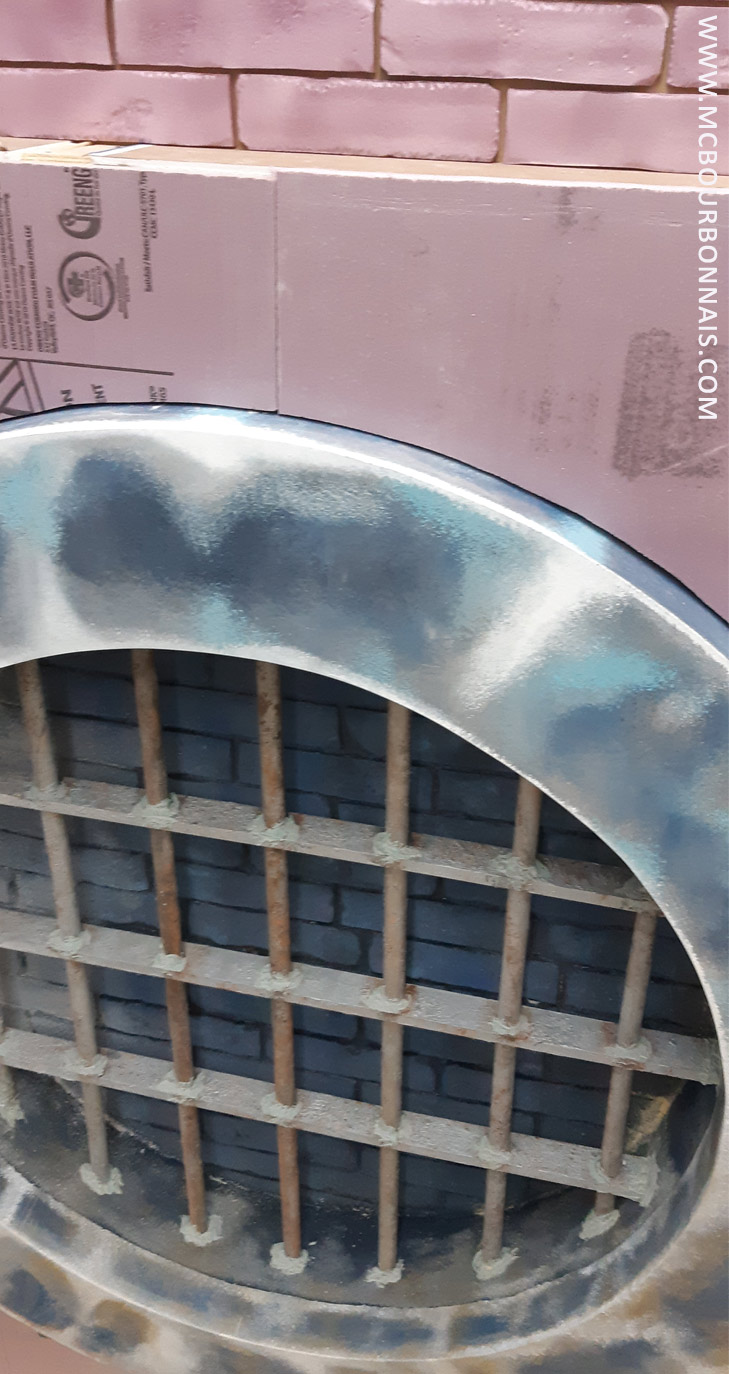
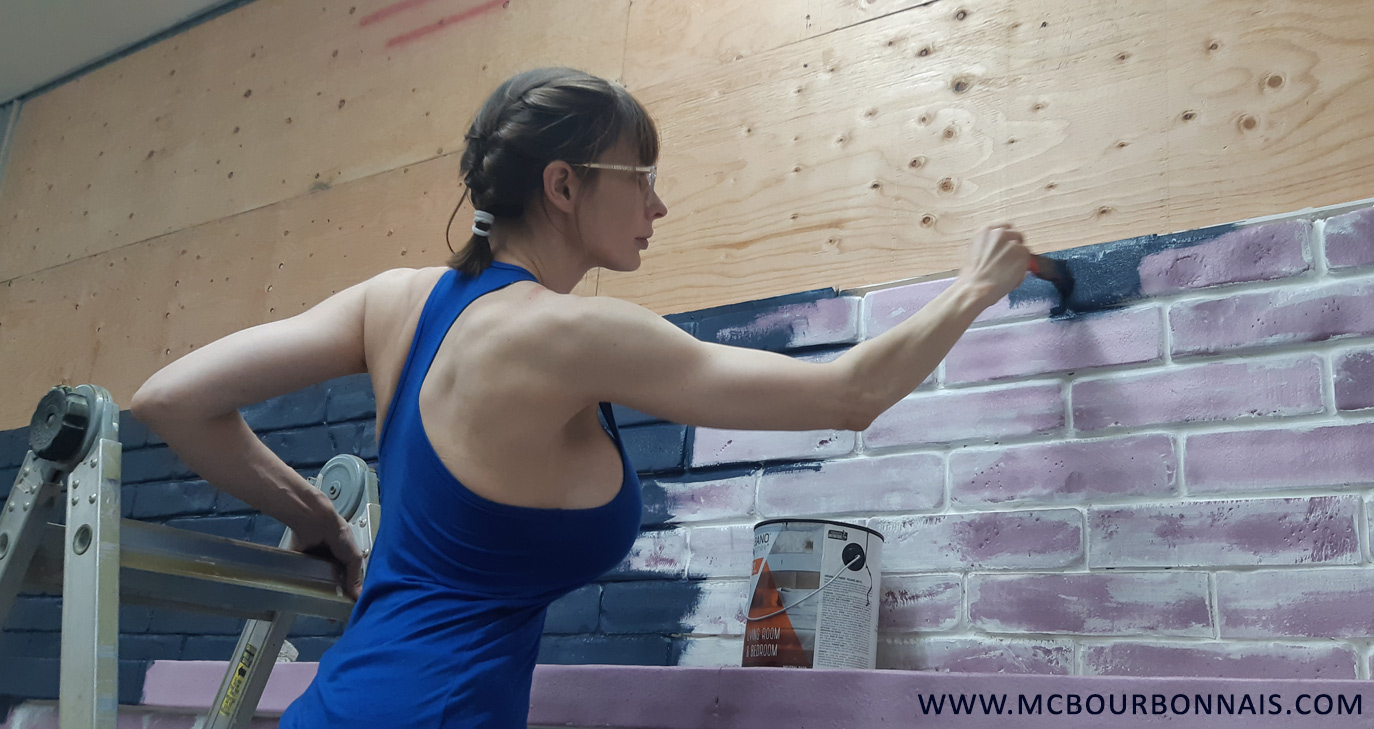
Over that stone wall, there’s part of a brick wall. Each brick was easily glued with hot glue.
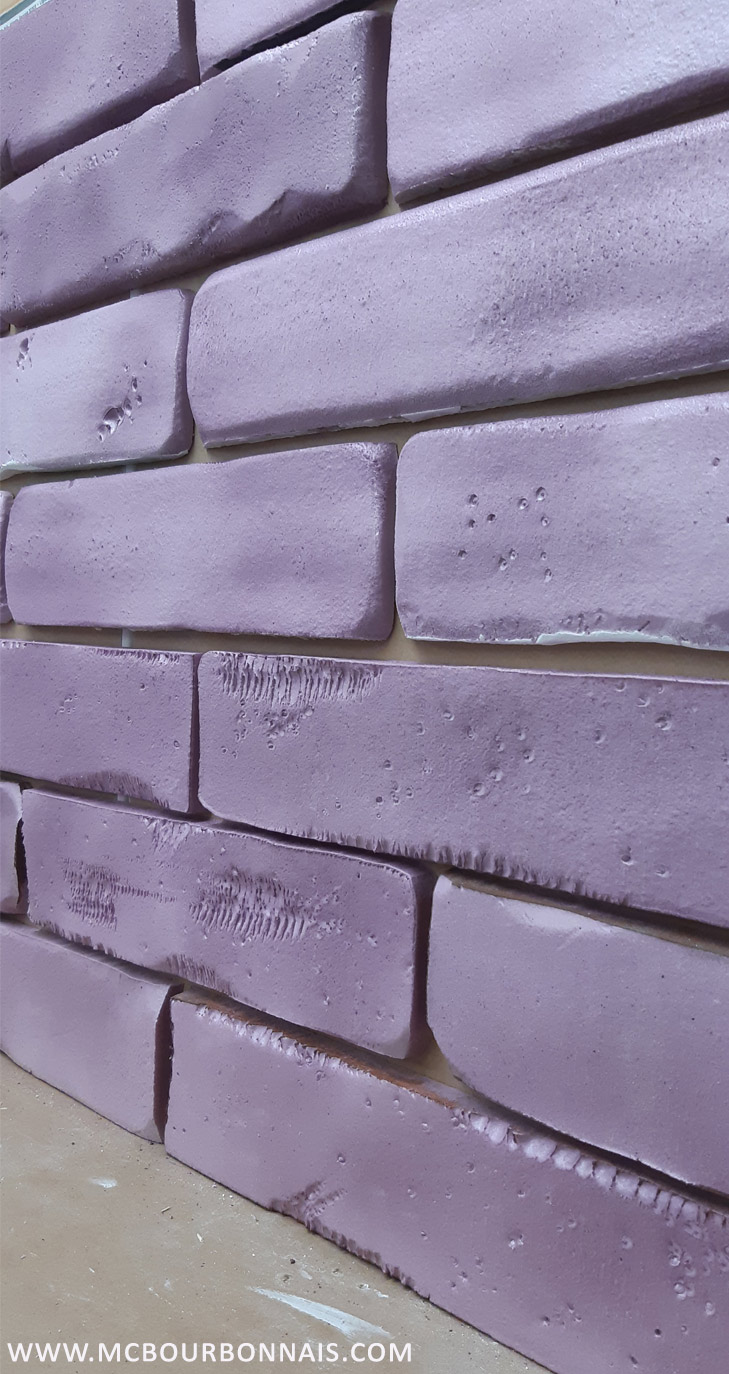
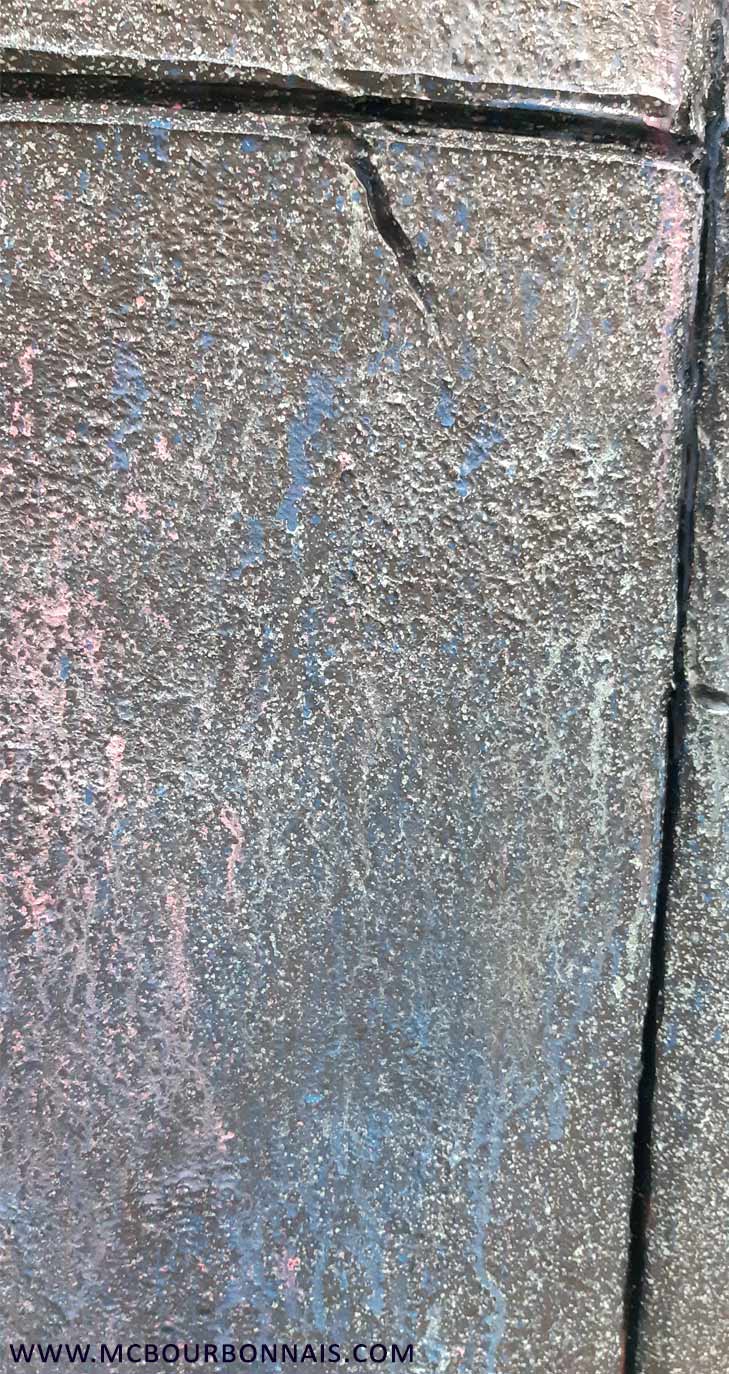
The polystyrene insulating boards on the wall were sculpted with a heating tool to create a stone effect. The junctions between the 4′ X 8′ polystyrene boards were covered with latex sealant. The latex sealant was then covered with baby powder to give it a mate effect. Otherway, the latex sealant, once painted, would have been glossy while the polystyrene is mate.
I used ordinary plaster as a fake mortar for the polystyrene bricks. Everything was very easy to paint.
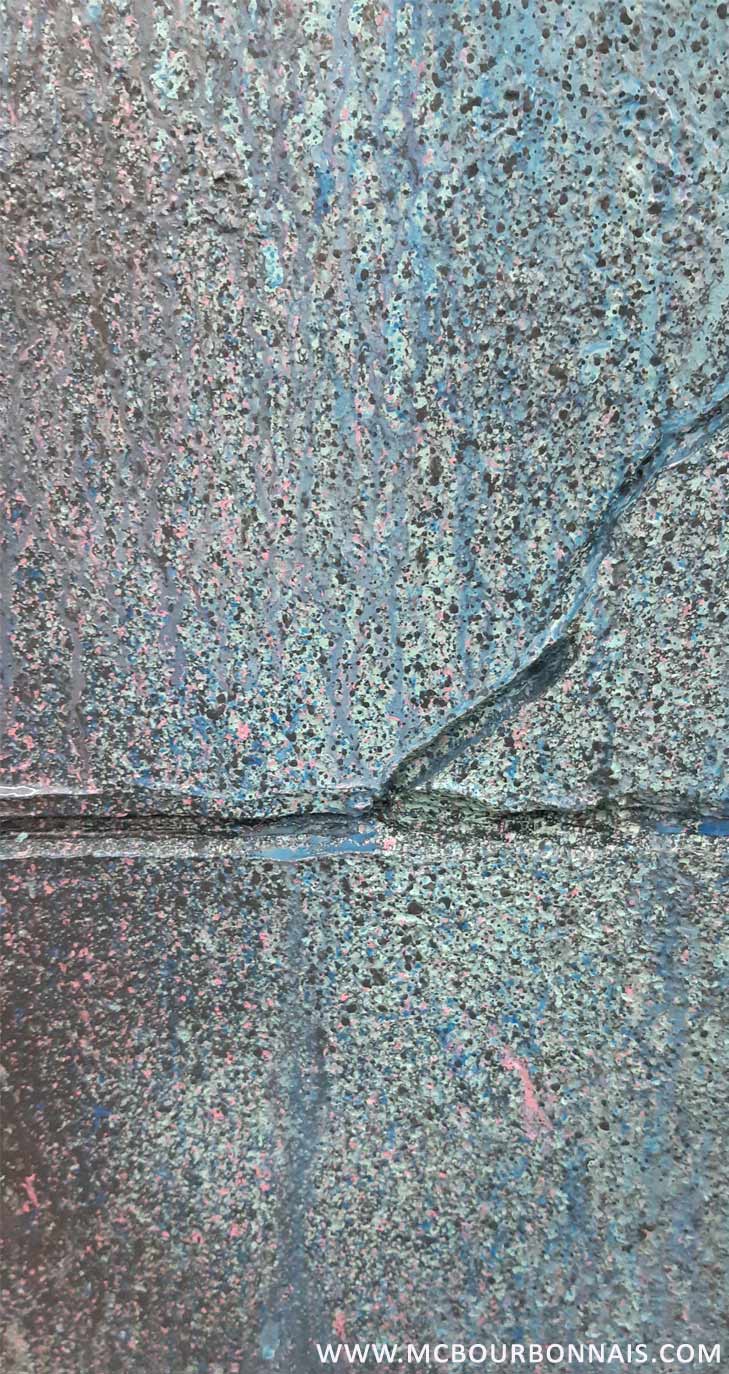
Polystyrene is easy to melt with a heat gun. It creates the perfect stone texture.
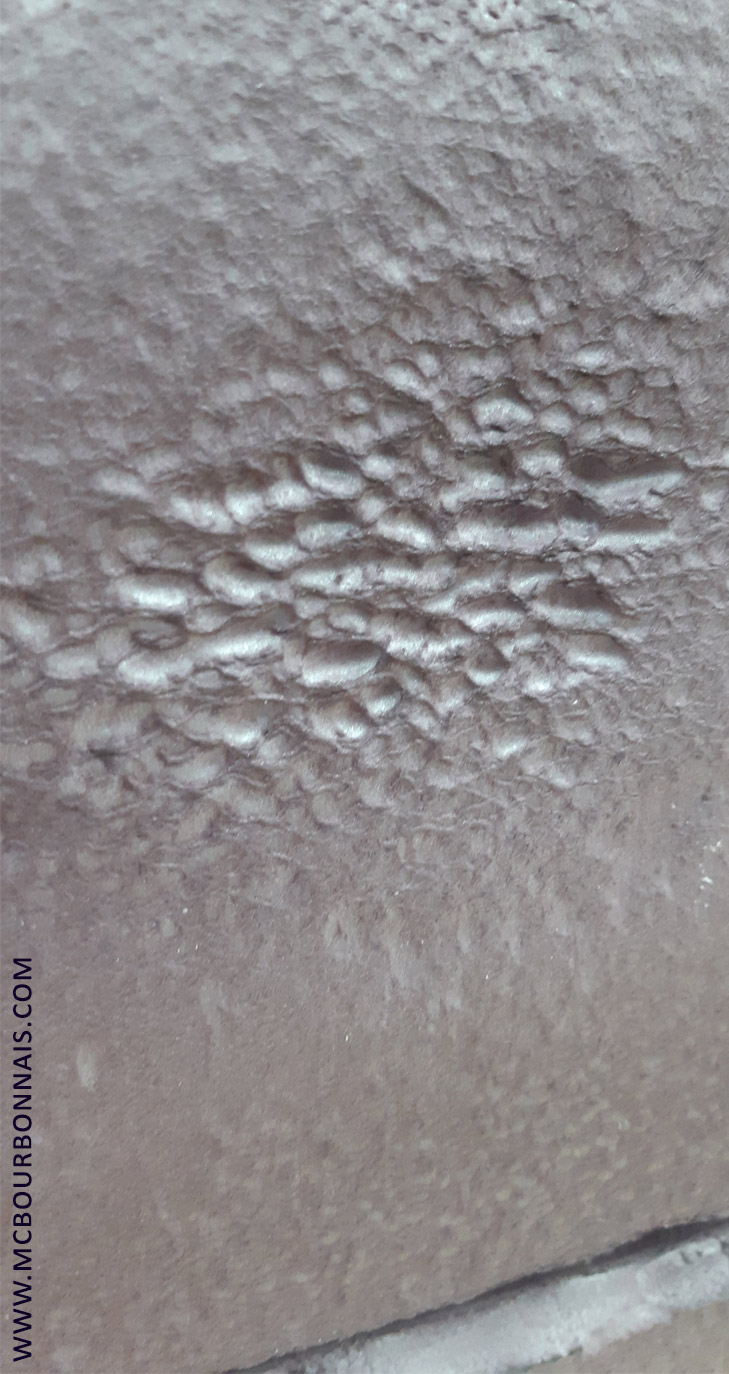
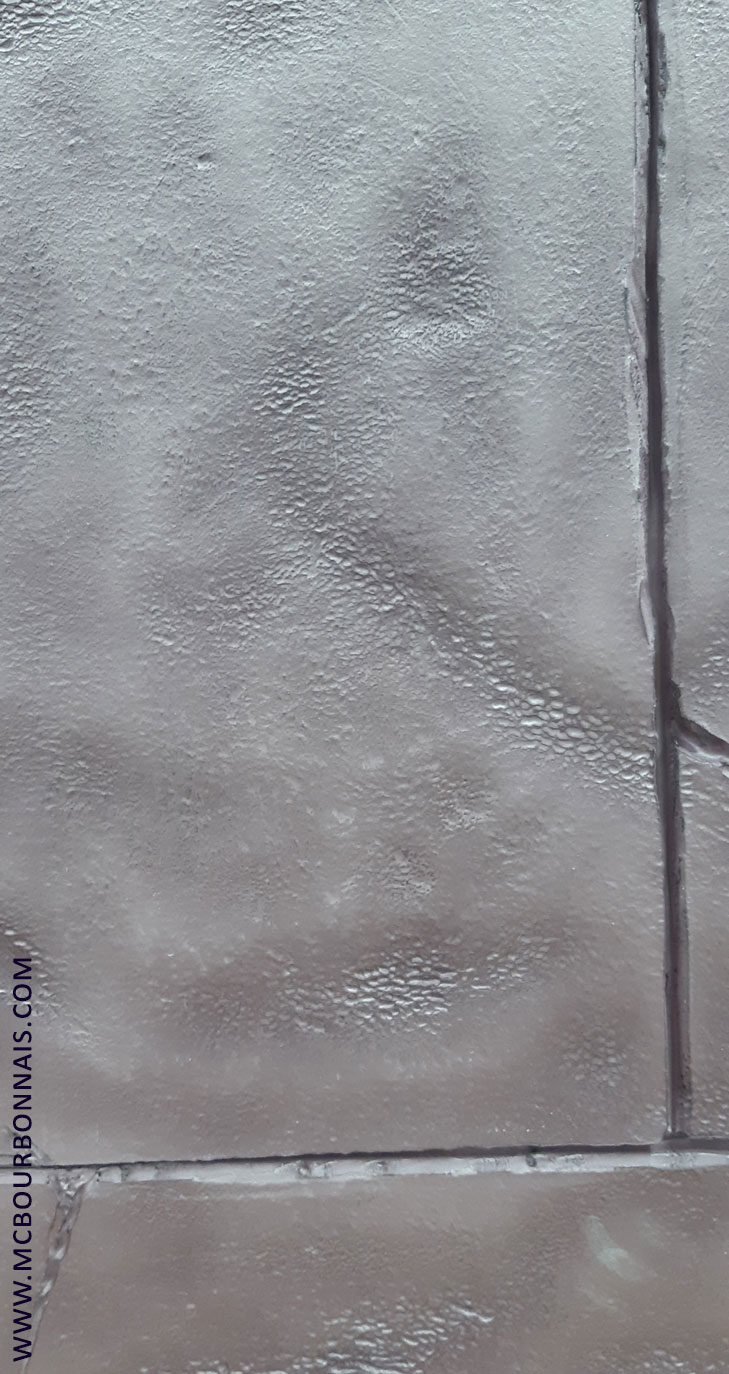
Extra stone texture was added to the wall using plaster here and there.
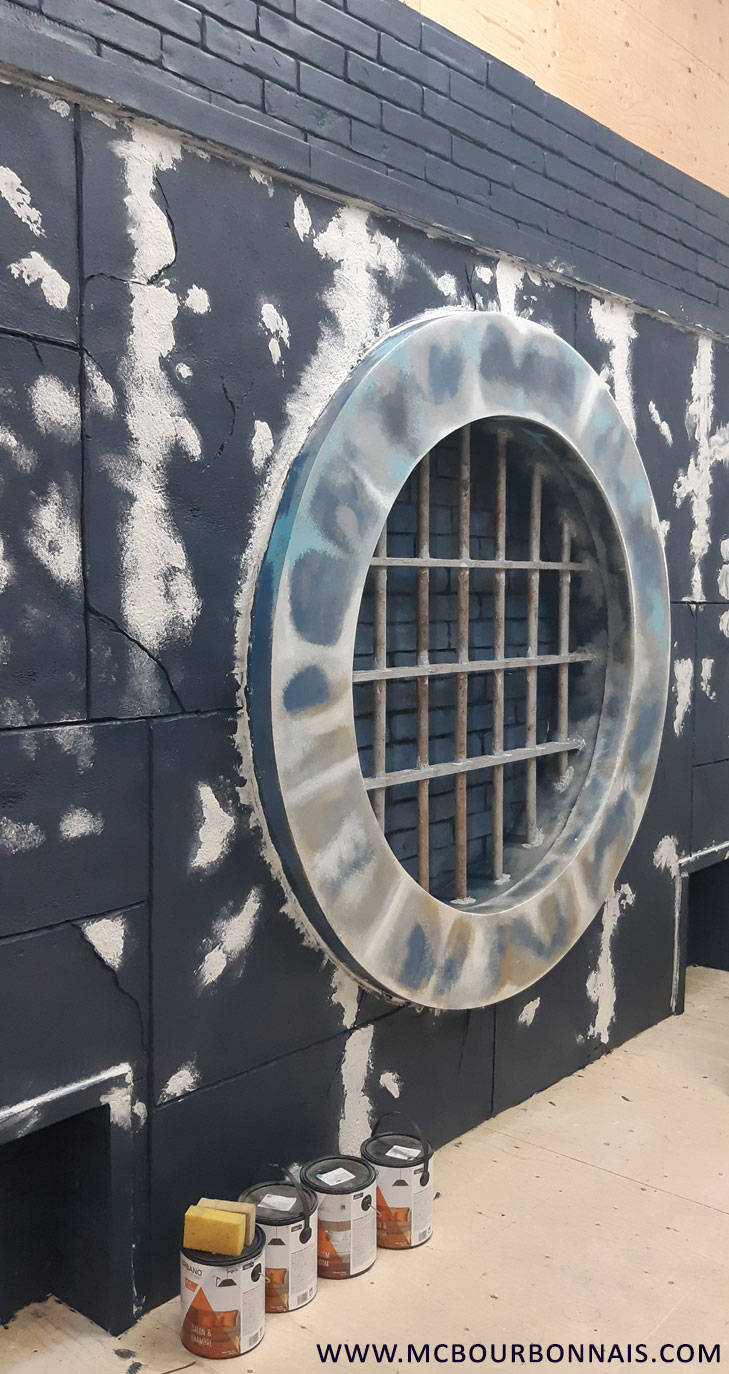
A whole color palette was used to create a more realistic effect.

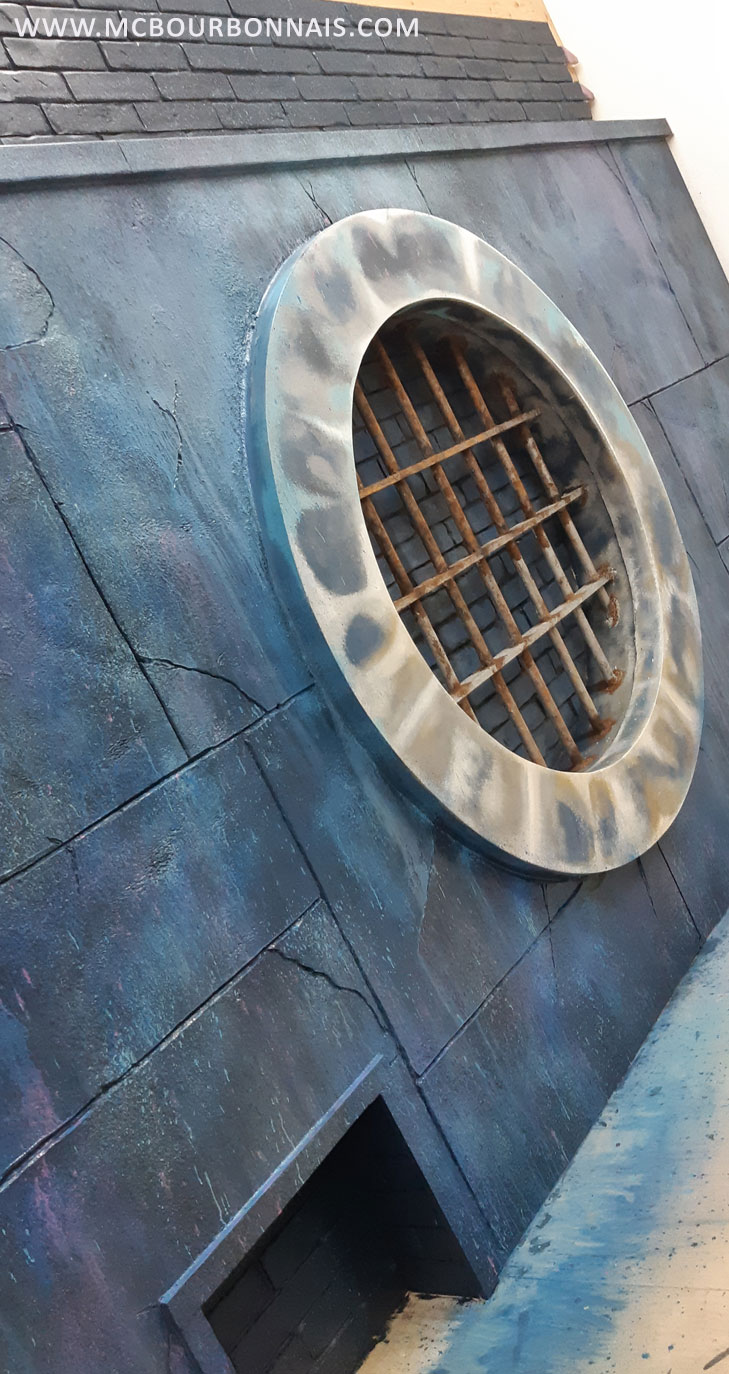
Body filler was applied on the wooden dowels to create a rust texture. The final effect is obtained after various paint coats.
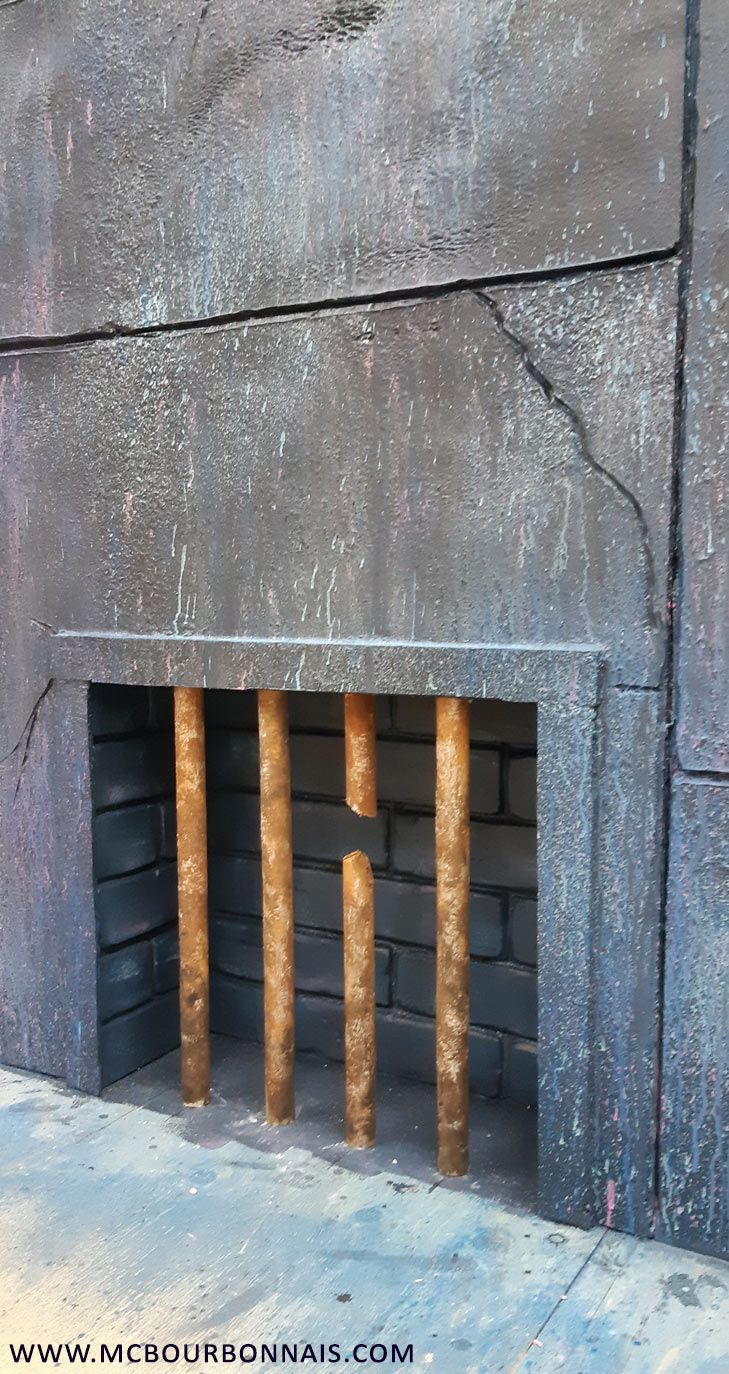
The floor was also covered with polystyrene insulating boards.
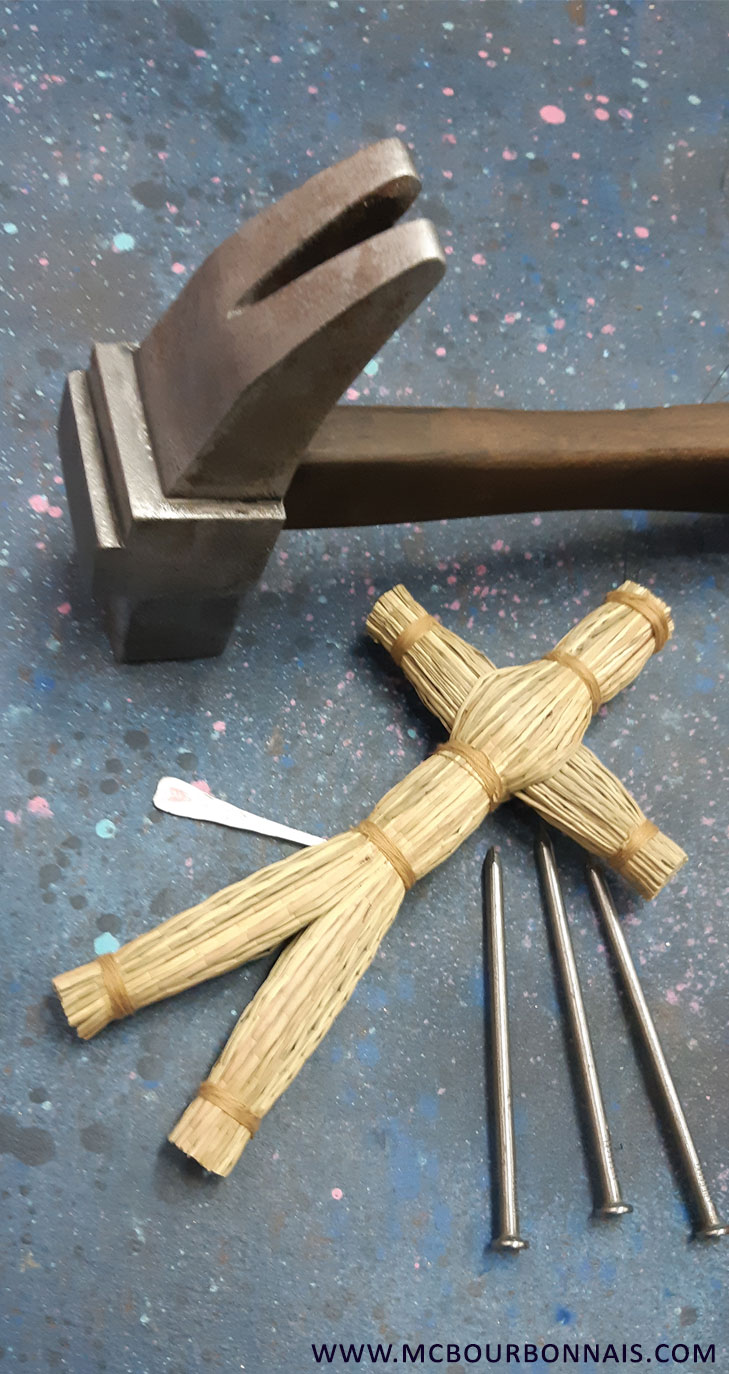
Since it’s so easy to find Japanese anime cosplay costumes online nowadays, I didn’t sew this costume. I invested a lot of time and money in the photoset itself and I have to make efficient business choices for my company’s profitability. So the costume is store-bought, but I still had to change the buttons, adjust the costume to my measurements and I did some tiny improvements to the fake leather belt and pouch. However, the hammer and little straw doll are custom made. :)
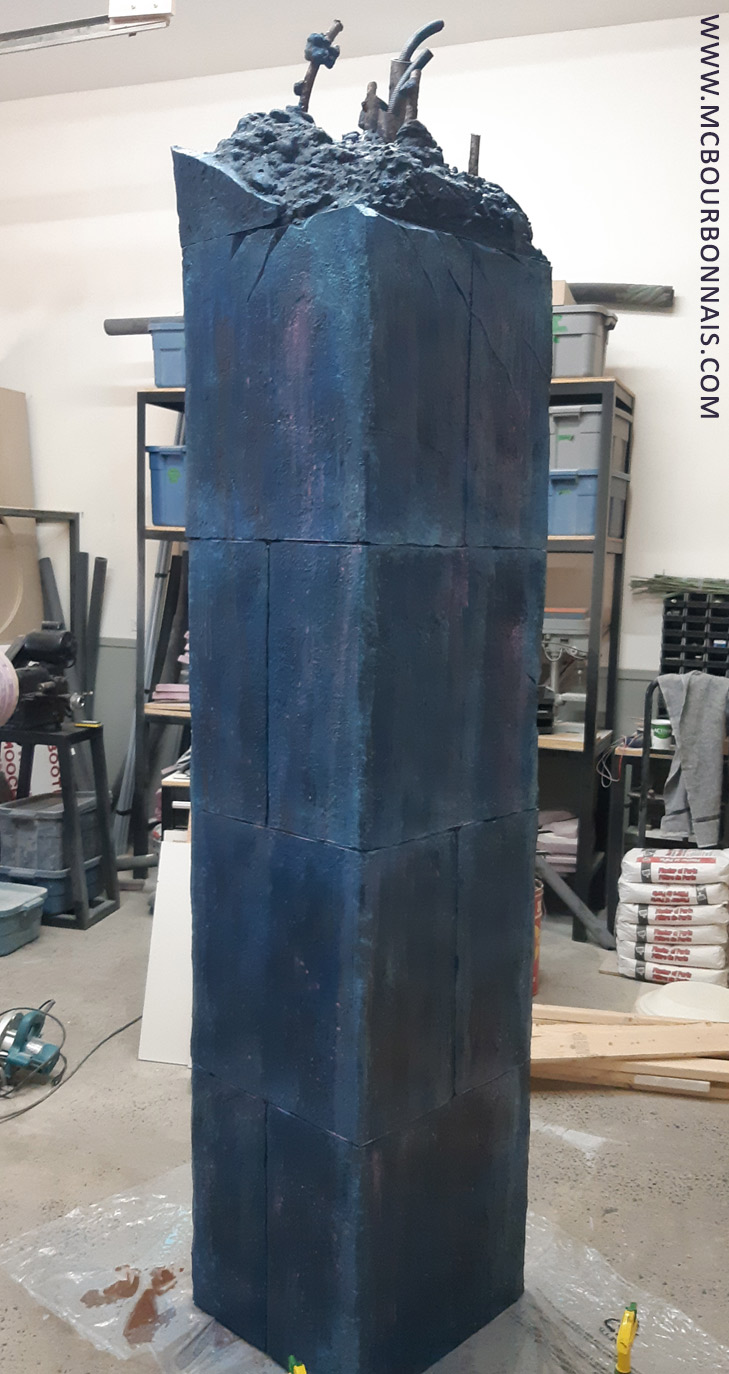
I had first planned to sit on the sewer gate and do a lot of poses there during the photoshoot. However, lighting didn’t work out as planned and I ended up building a separate giant prop to sit on and take poses on it, a few feet in front of the wall. I built what could have been a stone column that would have fallen during the fight. It was made of a wooden structure covered with the same polystyrene insulating boards. No, all the pics of that photoset were not taken on the same day. I had to do 3 separate photoshoot days. Here’s my giant column. For the photoshoot, it was put on its side, on the photoset’s floor, like a fallen, broken column.
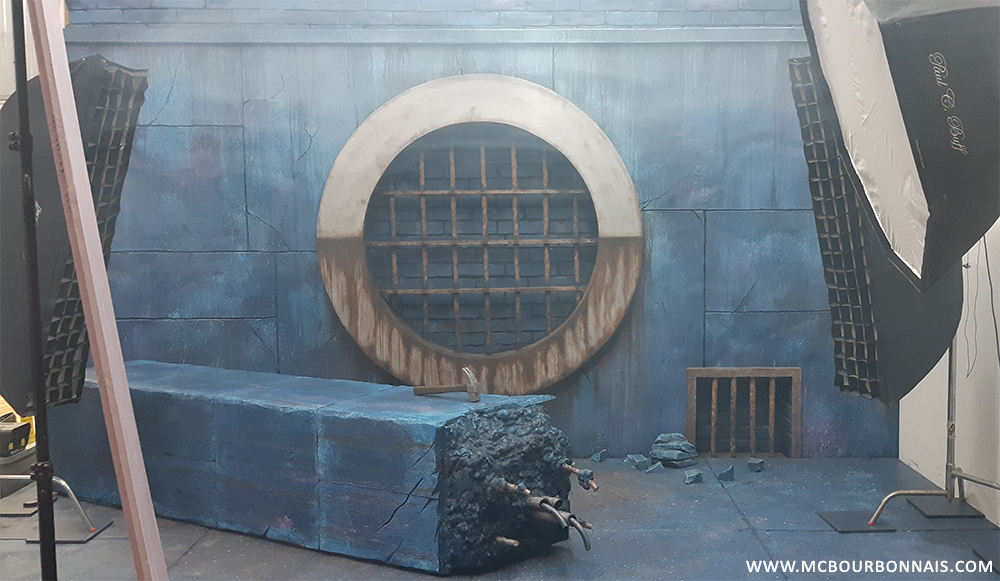
The final photography setup. :) Hope you enjoy my Jujutsu Kaisen photoset!
This set is so amazing, it could easily be a Hollywood movie set, you did an amazing job MC. You could always do set design in the future as an option. The only thing more amazing is you MC.
Hi Patrick,
Thanks for your comment! :) I think this set is the most realistic looking I’ve built since my Evil Dead cabin reproduction. I have to admit I’m really proud of it! :D It was looking so good even without the photography lighting effects. I wonder if I’ll ever be able to build someting that impressive again! lol I’ve learned a lot of things while I was working with polystyrene insulating boards for this set. I might use these techniques again for other photosets in the future. :)
I thought your work on this was incredible, a great set that I could see you using later. Thanks for giving a look at the build, it is great to see. – David in NJ
Thanks for your kind words, David! :) I’m glad that you took the time to read my Making of blog. I put a lot of work in that photoset, it’s one the biggest I’ve made since my Evil Dead cabin reproduction. These might be my 2 favorite photosets. :D
how about you cosplay yor forger from spy x family🤔🤔😎😎🧐🧐 By the way, it must be a good investment and dedication to do the cosplay and the scenarios, you’re great and I like what you do.
Hi Trinity,
I really like Spy x Family, I’d love to do a Yor cosplay! :D I already have many cosplay projects in the works. Maybe I’ll add this one to my list eventually! :) I’m glad that you appreciate the work I put in my photosets. :)