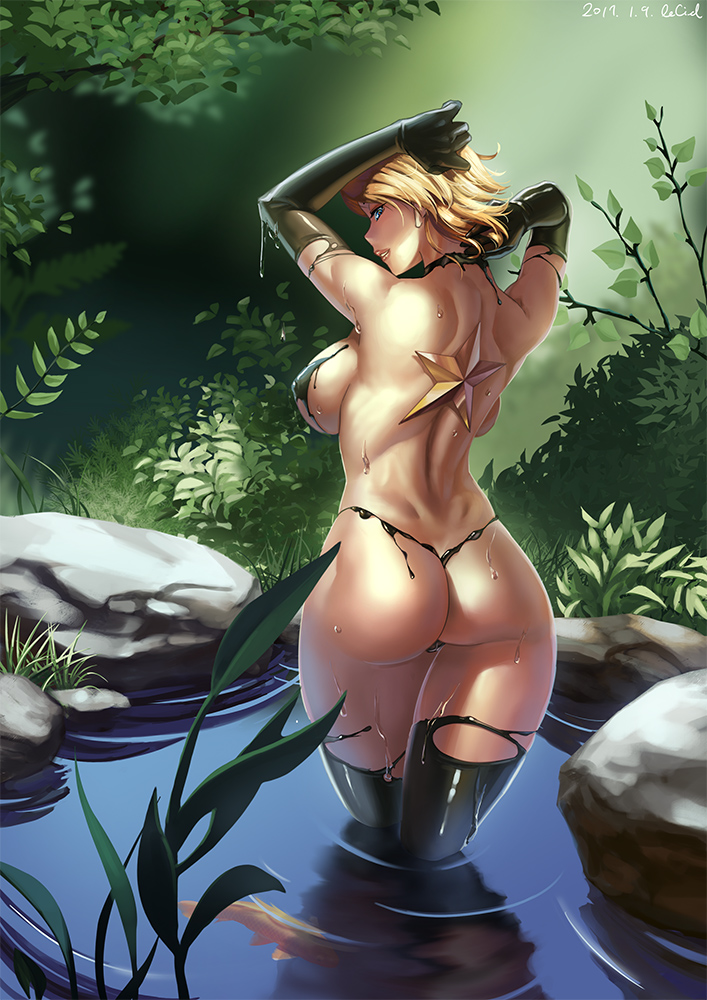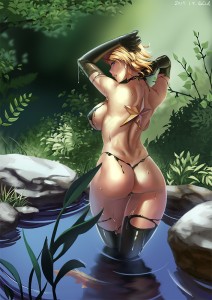
It’s the first time we can see Aimsee naked without her octopus yokai, showing on her back the star ‘gate’ where the yokai usually connects itself when it appears . This ‘lid’ allows Aimsee to have some control over the yokai that inabits her. But as it’s obviously demonstrated in this pic, it’s not a perfect solution and some of the octopus yokai’s connection’s effects, like Aimsee’s ink clothes, can still be observed.
I specifically requested this piece to the artist as I like the way he depicts muscles and adds definition to them. Shapes in his drawings seem to have some weight and you can feel that the body has some strenght without being totally muscular. The lower back part is pretty sexy! Also, from what I understood, it was the first time that EuD was requested to do foliage in a pic. It looks pretty nice for a first try!
EuD Links (NSFW, ya know)
Tumblr : http://theeud.tumblr.com/archive
Hentai Foundry : http://www.hentai-foundry.com/user/euD/profile
 Une convention tout près de chez moi! Cette année, je serai à Nadeshicon!
Je suis très heureuse d’être reçue comme invitée cosplay pour Nadeshicon 2017 qui aura lieu du 31 mars au 2 avril dans les Pavillons Alphonse-Desjardins et Maurice-Pollack de l’Université Laval! Notez par contre que je ne serai présente que le samedi et le dimanche (1er et 2 avril). Je serai disponible pour prendre des photos à ma table et je tiendrai aussi un panel sur la fabrication de Rachnera de Monster Musume pendant le weekend. Consultez le site web de l’événement pour les détails de la programmation. À bientôt!
http://www.nadeshicon.ca/
It’s a pleasure for me to be received as a cosplay guest for Nadeshicon, an anime convention in Québec City, from March 30th to April 2nd. Not far from where I live… It’s good to celebrate cosplay at home! :)
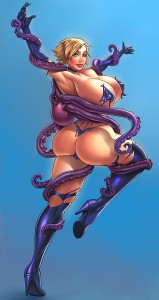
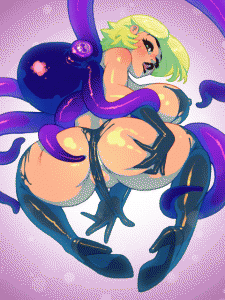
Mikiron can draw girls with curves and I asked for it. This is probably the most extreme version of Aimsee that was drawn so far. I like the work, but damn, it yells sex and this is not what my project is all about. I mean, it’s a really scientific mix of sexiness, fun and action. Sometimes I just need to visualize things to set my mind. I’m really satisfied about this style exercise and also pleased with how the work was done.
Mikiron links! (Mostly NSFW)
Twitch : https://www.twitch.tv/mikiron
Deviantart http://mikiron.deviantart.com/
Patreon : https://www.patreon.com/mikiron
Tumblr : http://mikironis.tumblr.com/
Commission email : mikironart@gmail.com
 J’ai déjà annoncé que je commencerais l’année 2017 en participant à une convention canadienne, Tri-Con 2017, en janvier, à Kitchener, ON. Je suis très heureuse d’annoncer que je serai aussi reçue comme invitée cosplay à une convention québécoise, Shawicon 2017, les 11-12 février! Je serai d’ailleurs à la conférence de presse le 11 janvier prochain! On se voit à Shawicon!
http://www.shawicon.ca/
I have announced already that I would start the new year with a Canadian convention, Tri-Con 2017 in Kitchener, ON. I’m happy to announce that I will also be received as a cosplay guest for a French Canadian convention, Shawicon, in Shawinigan, QC, on February 11-12! I will also be there for the press conference on January 11th. Looking forward to meeting my cosplayer friends from Québec!
Photographer: Rayfon – https://www.facebook.com/rayfonresearch/
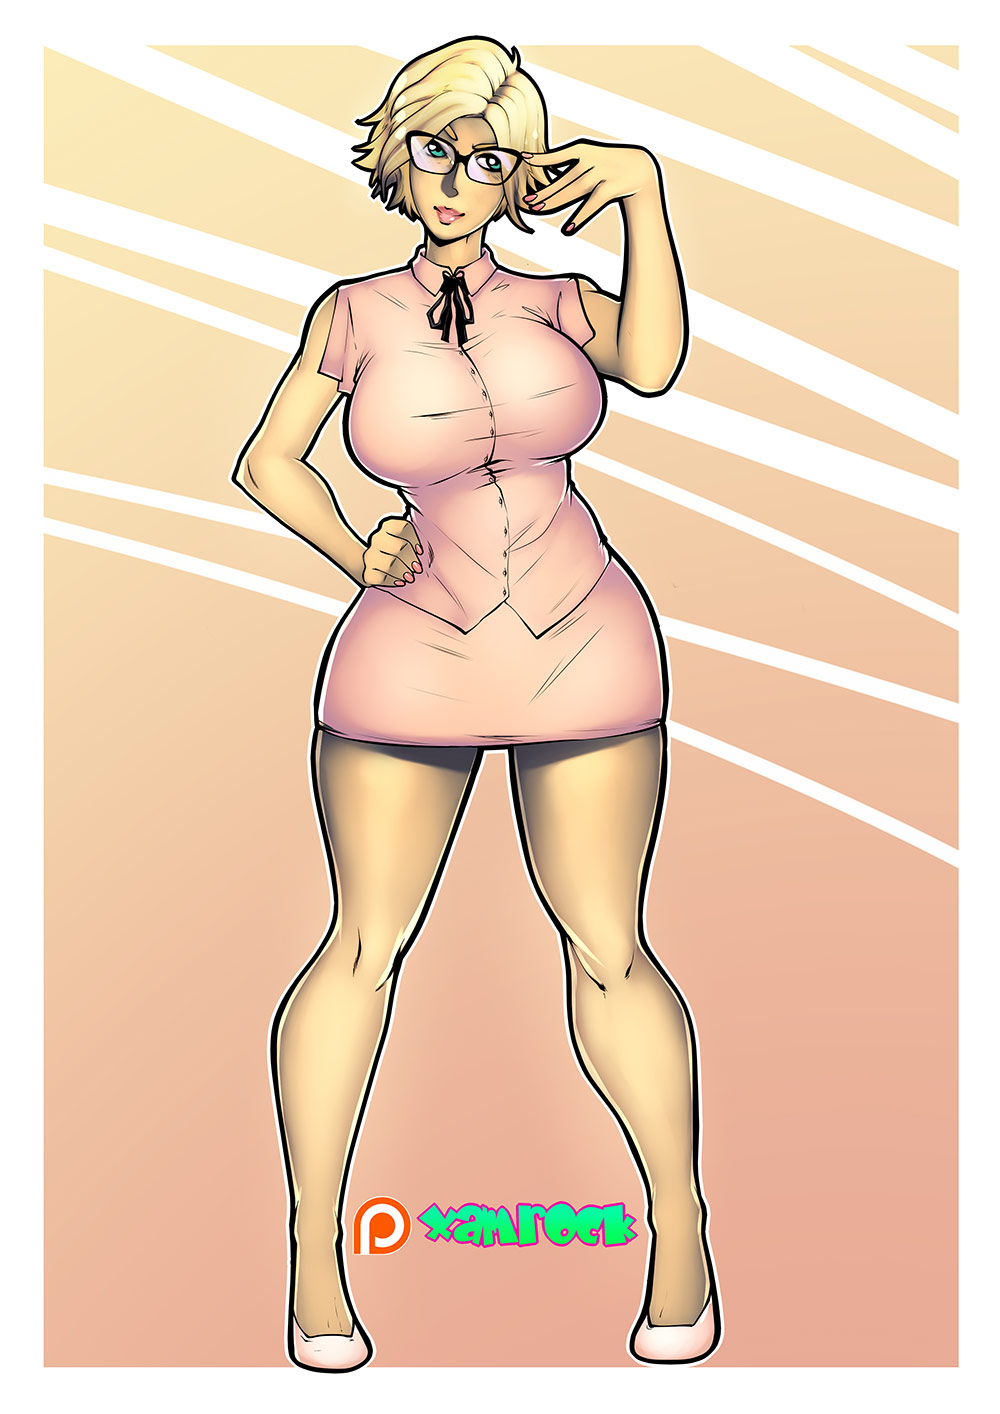
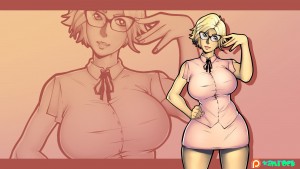
Following the previous illustration by Xamrock, here’s a version of Aimsee wearing casual clothes. Again, I’m looking to establish a definitive look for my original character. All I can say right now is that I’m not sure of anything when it comes to Aimsee’s look outside her ‘realease’ form, when she’s not connected to her octopus yokai. Xamrock perfectly executed my request, but I didn’t pinpoint the final look and I’m still doing researches.
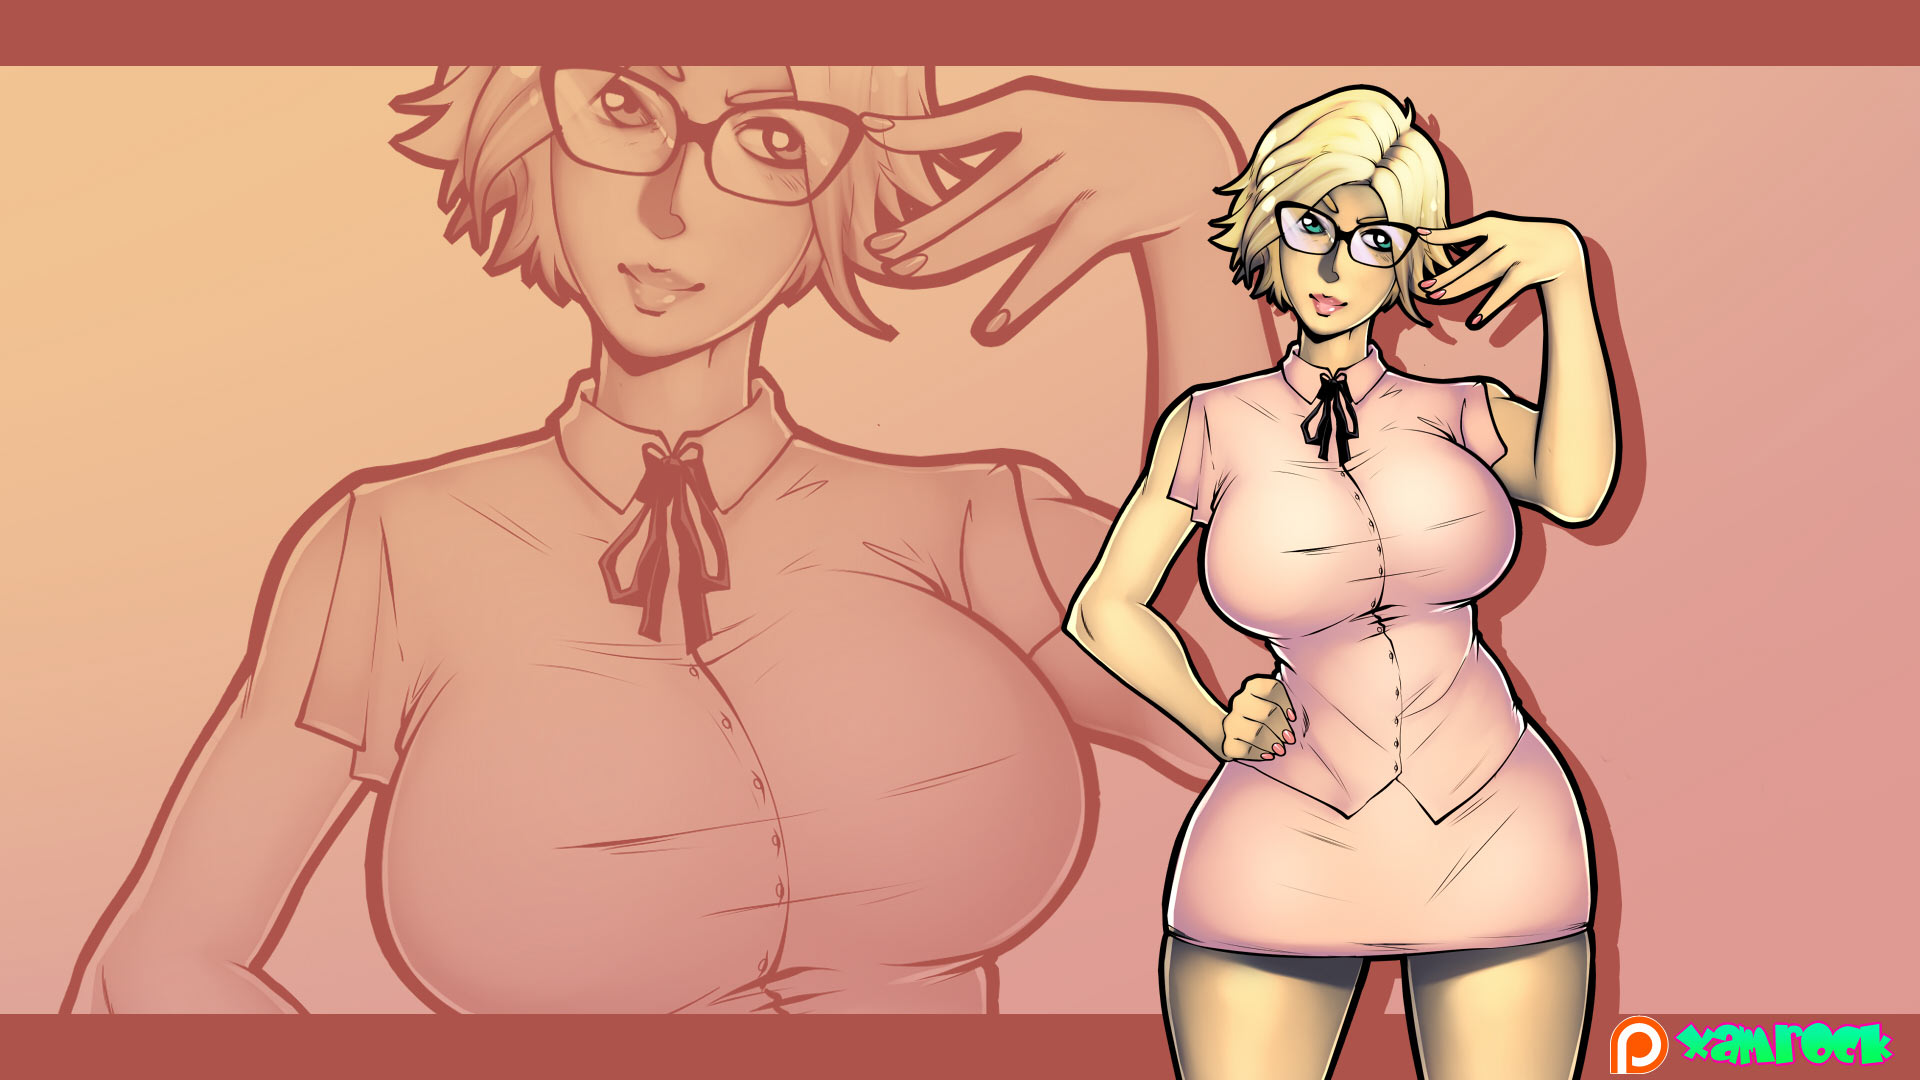
And another generous bonus by Xamrock, an Aimsee wallpaper:
Want to see more of Xamrock’s art or commission some illustration from him? Here’s the links!
Patreon: https://www.patreon.com/xamrock
Hentai foundry: http://www.hentai-foundry.com/user/Xamrock/profile
Facebook: https://www.facebook.com/xamrockart
Deviantart: http://xamrock-art.deviantart.com/
Pixiv: http://www.pixiv.net/member.php?id=13546024
xamrockart@gmail.com
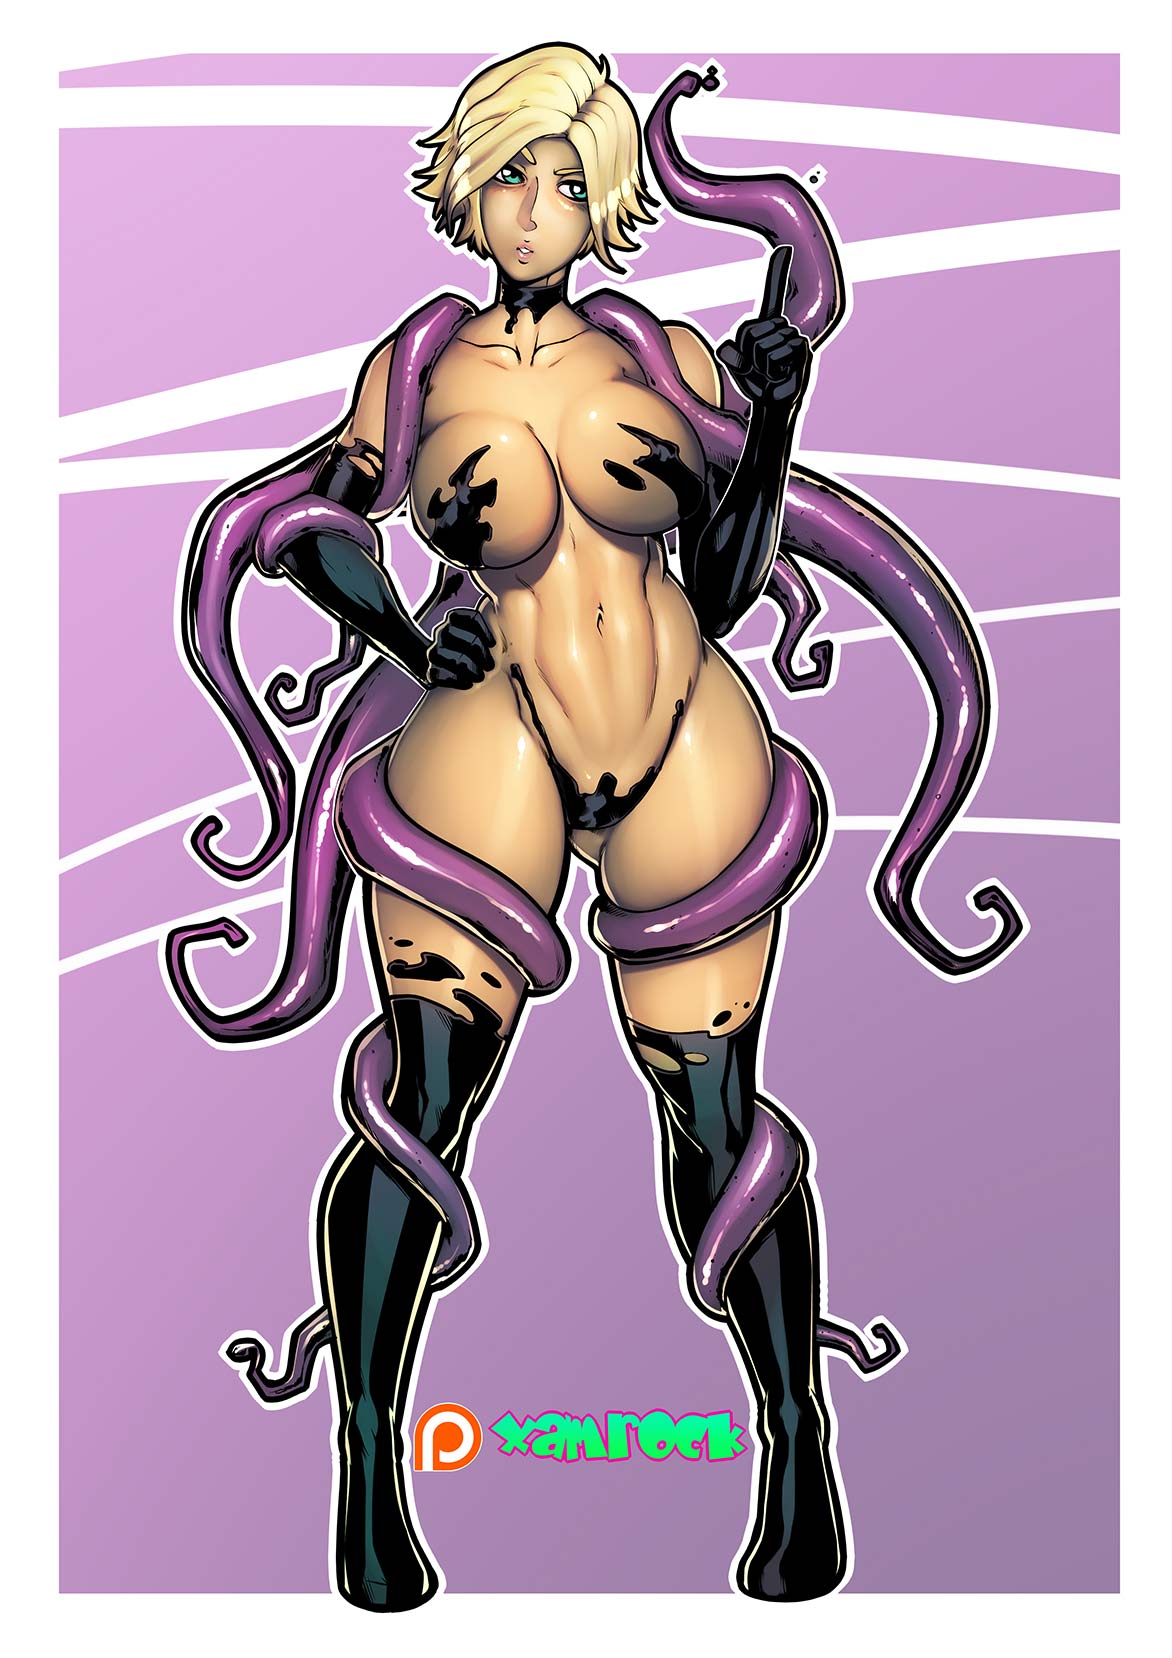
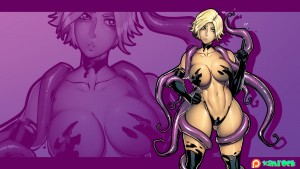
 Here’s another pics of my OC Aimsee, but this time by Xamrock. I’m still exploring different styles with various artists and gauging the audience’s reactions. Sometimes ‘simpler’ illustrations are stronger. I like the tentacles a lot on this one. They look creepier and the ink on Aimsee’s skin is just a tad more mystical. Don’t you think?
And here’s a generous bonus by Xamrock, an extra Aimsee wallpaper!
Want to see more of Xamrock’s art or commission some illustrations from him? Here’s the links!
Patreon https://www.patreon.com/xamrock
Hentai foundry: http://www.hentai-foundry.com/user/Xamrock/profile
Facebook: https://www.facebook.com/xamrockart
Deviantart: http://xamrock-art.deviantart.com/
Pixiv: http://www.pixiv.net/member.php?id=13546024
xamrockart@gmail.com
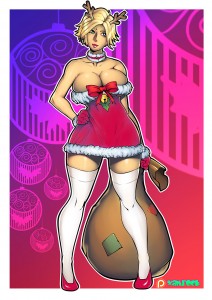
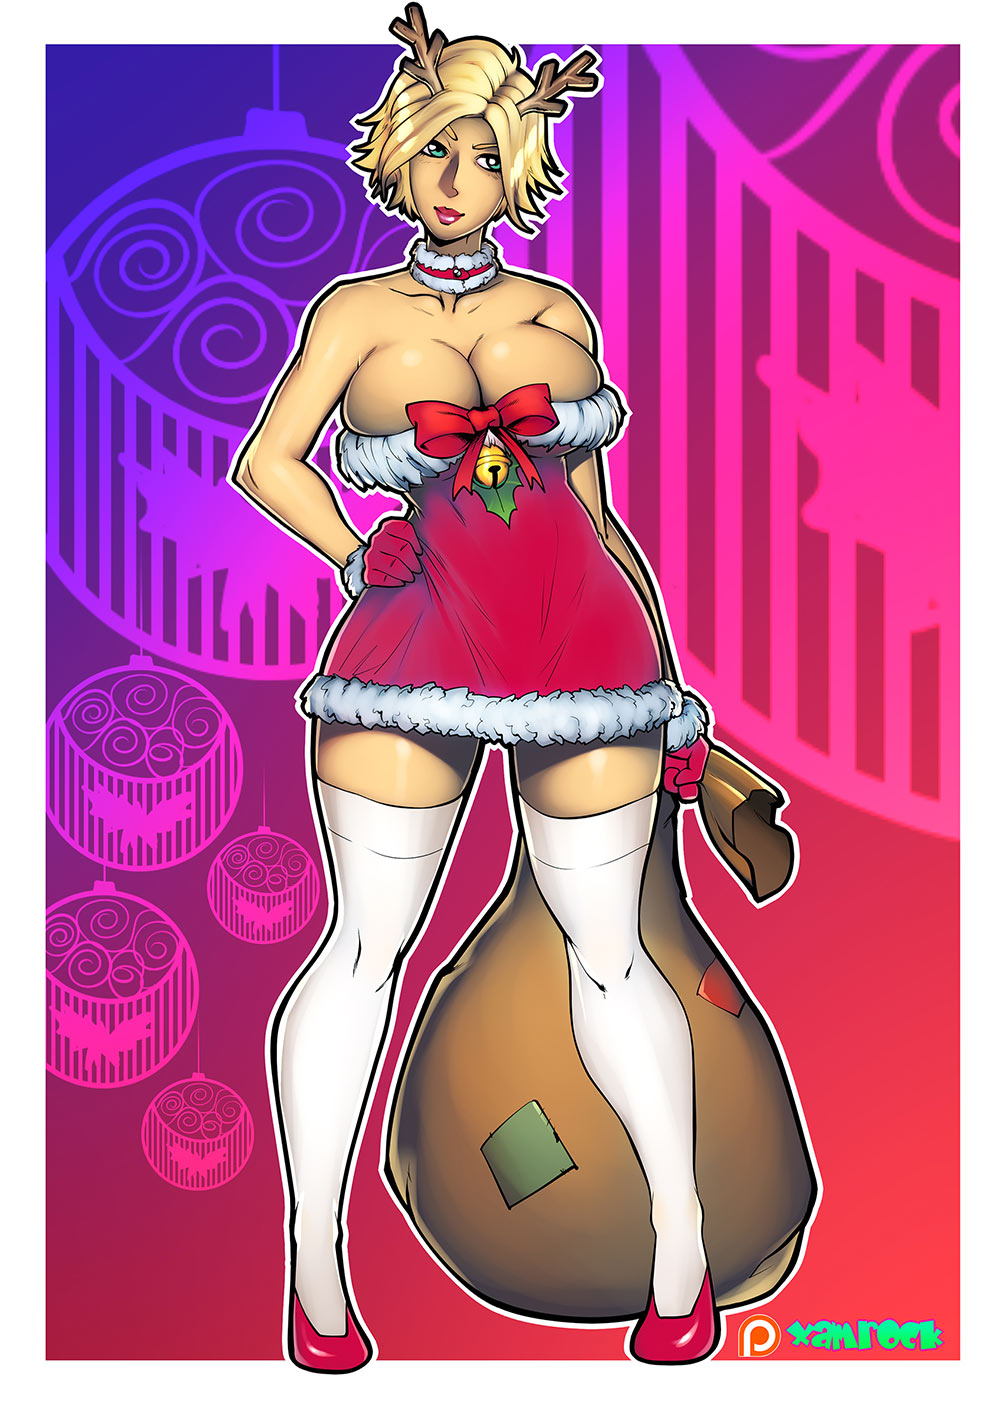
This one cracks me up and was a really nice idea from Xamrock. Sometimes I’m so lost in my thoughts that I forget what is going on in the ‘real’ world! This pic came to me as a reminder that Christmas was at our door. People, here’s Aimsee as Santa Girl in her sexy Christmas attire. Thanks, Xamrock! :)
And a generous bonus by Xamrock, a Santa Girl Special Aimsee wallpaper!

Want to see more of Xamrock’s art or commission some illustrations from him? Here’s the links!
Patreon https://www.patreon.com/xamrock
Hentai foundry: http://www.hentai-foundry.com/user/Xamrock/profile
Facebook: https://www.facebook.com/xamrockart
Deviantart: http://xamrock-art.deviantart.com/
Pixiv: http://www.pixiv.net/member.php?id=13546024
xamrockart@gmail.com
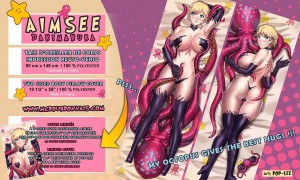
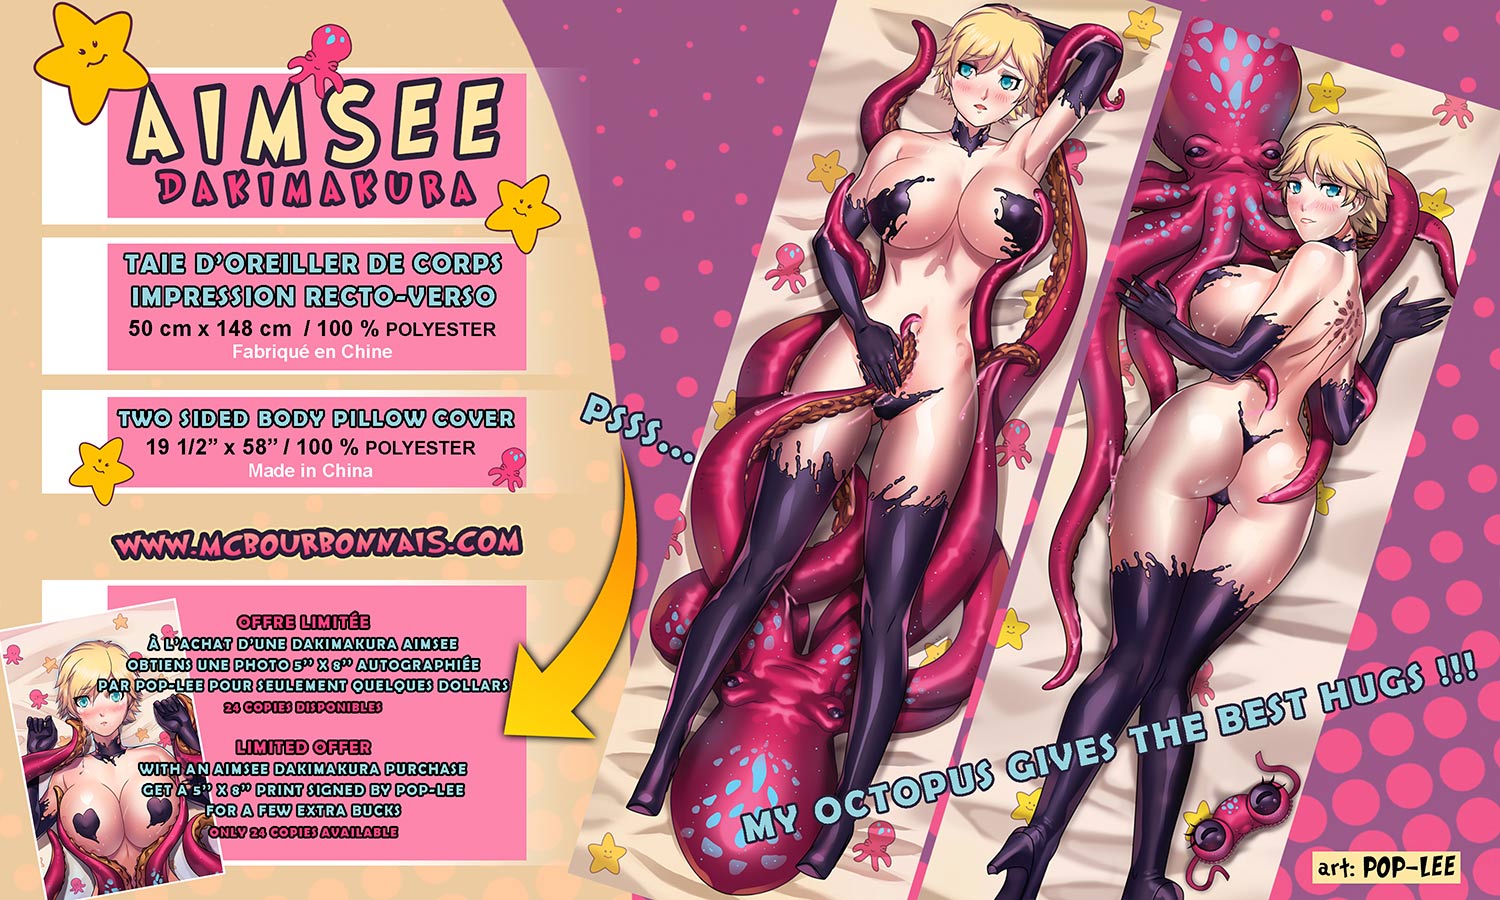
Right on time for Christmas, I have the perfect gift for you! You’ve been dreaming of cuddling Aimsee, my cute character? Well, your wish was granted! Make this 5 feet tall body pillow case yours and try to choose your favorite side. Will you cuddle your Aimsee dakimakura from the front or from the back? ;)
For a few extra bucks, you can get the Special Package that includes a 5” X 8” glossy print of Aimsee drawn by Pop-Lee, the artist who made the art for both the mousepads and the dakimakura, signed to your name by both Pop-Lee and I! Only 24 Special Packages available! Don’t miss your chance!
Make someone (or yourself) happy and order your sexy Aimsee dakimakura here.
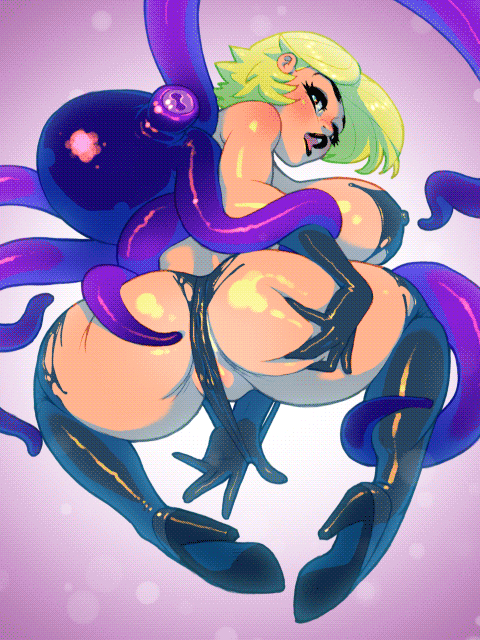
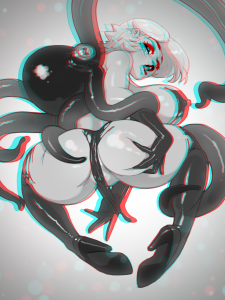
The king of the wiggle! You might remember this frontal view of Aimsee by Boobella. (Check out the pics galleries.) Folks, here’s a new POV of Aimsee in motion! Love this fun, cute and sexy style.
And as a bonus, here’s the analglyph version.
I’ve always been served really well and in a timely manner by this artist, please visit :
(NSFW) http://boobella.deviantart.com/
(NSFW) http://melona-boobella.tumblr.com/
Great news for my Canadian fans! I will start the new year by visiting Ontario! I’m received as a cosplay guest for Tri-Con KW 2017 in Kitchener, ON, on January 14th 2017. Visit their website for more details.
http://www.themuseum.ca/exhibition/tri-con-2017
Photographer: Rayfon – https://www.facebook.com/rayfonresearch/